Getting Started with DataOps and Knowledge Modeling (Docker)
Use Connect, Atlas and Bridge together on Docker: bring outside data in, model your plant as a knowledge graph, and publish the result to the systems that consume it.
This article picks up where Start Here for Docker: How to Deploy and Secure Timebase 2.0 left off. Your containers are running, Pulse is configured, and every component holds its client secret. What follows is the other half of the job: making three of those components work together as a data pipeline.
What you are building#
Atlas models and serves a knowledge graph. It does not collect data and it does not store history. Two components move data across its boundary, and this article uses all three together:
| Component | Direction | What it does here |
|---|---|---|
| Connect | In | Reads an outside source - a Historian, SQL database, OPC UA server, HTTP API - and advertises each data point as a binding path |
| Atlas | Model | Describes what exists, binds properties to those paths, and compiles the result into a queryable World |
| Bridge | Out | Subscribes to compiled property values and streams them to SQL Server, Kafka, MQTT, Snowflake and others |
The order matters. A binding path has to exist before you can bind a property to it, and a property has to be compiled before Bridge can subscribe to it. So the work runs left to right: Connect, then Atlas, then Bridge.
Prerequisites#
Everything in this list comes from the previous article. If any of it is not true, go back and finish it first.
- The Compose stack is running, including the
connect,atlasandbridgeservices. - Pulse's token issuer is set, and its root CA is trusted on the machine you browse from.
Atlas,ConnectandBridgeeach hold their own client secret and can exchange it for a token.- You can sign in to Atlas at
https://localhost:4552.
You will also need one data source you can reach - a Timebase Historian, a SQL database, an OPC UA server. If you have none yet, Step 3 shows you how to use the built-in synthetic source instead, which is enough to prove the whole pipeline works.
Step 1: Check that Connect and Bridge carry the Atlas audience#
Do this before anything else. The previous article gave each component a secret, which lets it authenticate to Pulse. It does not by itself let it reach Atlas. Atlas gates the hubs that Connect and Bridge connect to, and it checks whether its own client id appears in the caller's token.
Without this, both components get a valid token, Atlas refuses them with 401 Unauthorized, and each retries forever. The retry log is indistinguishable from an unreachable host, which is what makes this worth eliminating first rather than diagnosing later.
A Pulse first started on 2.0-gc1 or later seeds the audiences already: Connect with Pulse, Atlas and Historian, and Bridge with Pulse and Atlas. On such an installation this step is a check, and you move on. A Pulse that was first started on an earlier Beta, or a client you deleted and recreated, may be missing them.
In Pulse, open Clients and for each of the two:
- Select the
Connectclient. ConfirmAtlasis in its Allowed Audiences, alongsidePulse; add it if not. Save. - Select the
Bridgeclient. ConfirmAtlasis in its Allowed Audiences, alongsidePulse; add it if not. Save.
If you changed either, restart it so it requests a fresh token:
docker compose restart connect bridge
the rule is to let X call Y, add Y to X's audiences. A client's own id is always included automatically, so you never list it. This is the single most common cause of a 401 between two Timebase components that both have correct credentials.
For the whole audience model, how a token's aud claim is built, and how to rotate a secret, see Registering Timebase apps as OAuth clients in Pulse.
Step 2: Point Connect at Atlas#
Connect initiates the connection, so it needs Atlas's address. In Docker that is the service name.
Open the Connect interface at https://localhost:4562 and select Targets, or edit the file directly:
docker compose cp connect:/connect/config/atlas.config ./atlas.config
Set the address to your Atlas service. It is a host, a port and a TLS flag, not a URL:
{
  "atlases": {
    "atl_7c3e18": {
      "name": "Primary",
      "alias": "primary",
      "config": {
        "host": "atlas",
        "port": 4552,
        "useTls": true,
        "reconnectDelaySeconds": 5
      }
    }
  }
}
The key is not the name. atl_7c3e18 is a surrogate the host mints and never changes. name is a label you can edit freely, and alias is what a source uses to name this target. Editing the name breaks nothing.
Use the
atlasservice name rather thanlocalhost. Inside the Connect container,localhostis Connect. The Docker image composes this file withatlas,4552and TLS on its first start, so on a fresh volume there is nothing to change; leaving the address out entirely gives youlocalhost, which is right only when Atlas runs on the same machine outside Docker.
For what the hub connection actually is, how a connector registers itself and what its retry loop is doing, see Connector Overview and Lifecycle.
Verify: Connect's log should report a successful connection rather than a retry.
docker compose logs connect | tail -20
Step 3: Add a data source to Connect#
Before you pick a plugin, check how your system is reached: Which Data Sources Timebase Supports, and How Each One Reaches Atlas covers every source, which component connects to it, and the ones that arrive through a Collector instead.
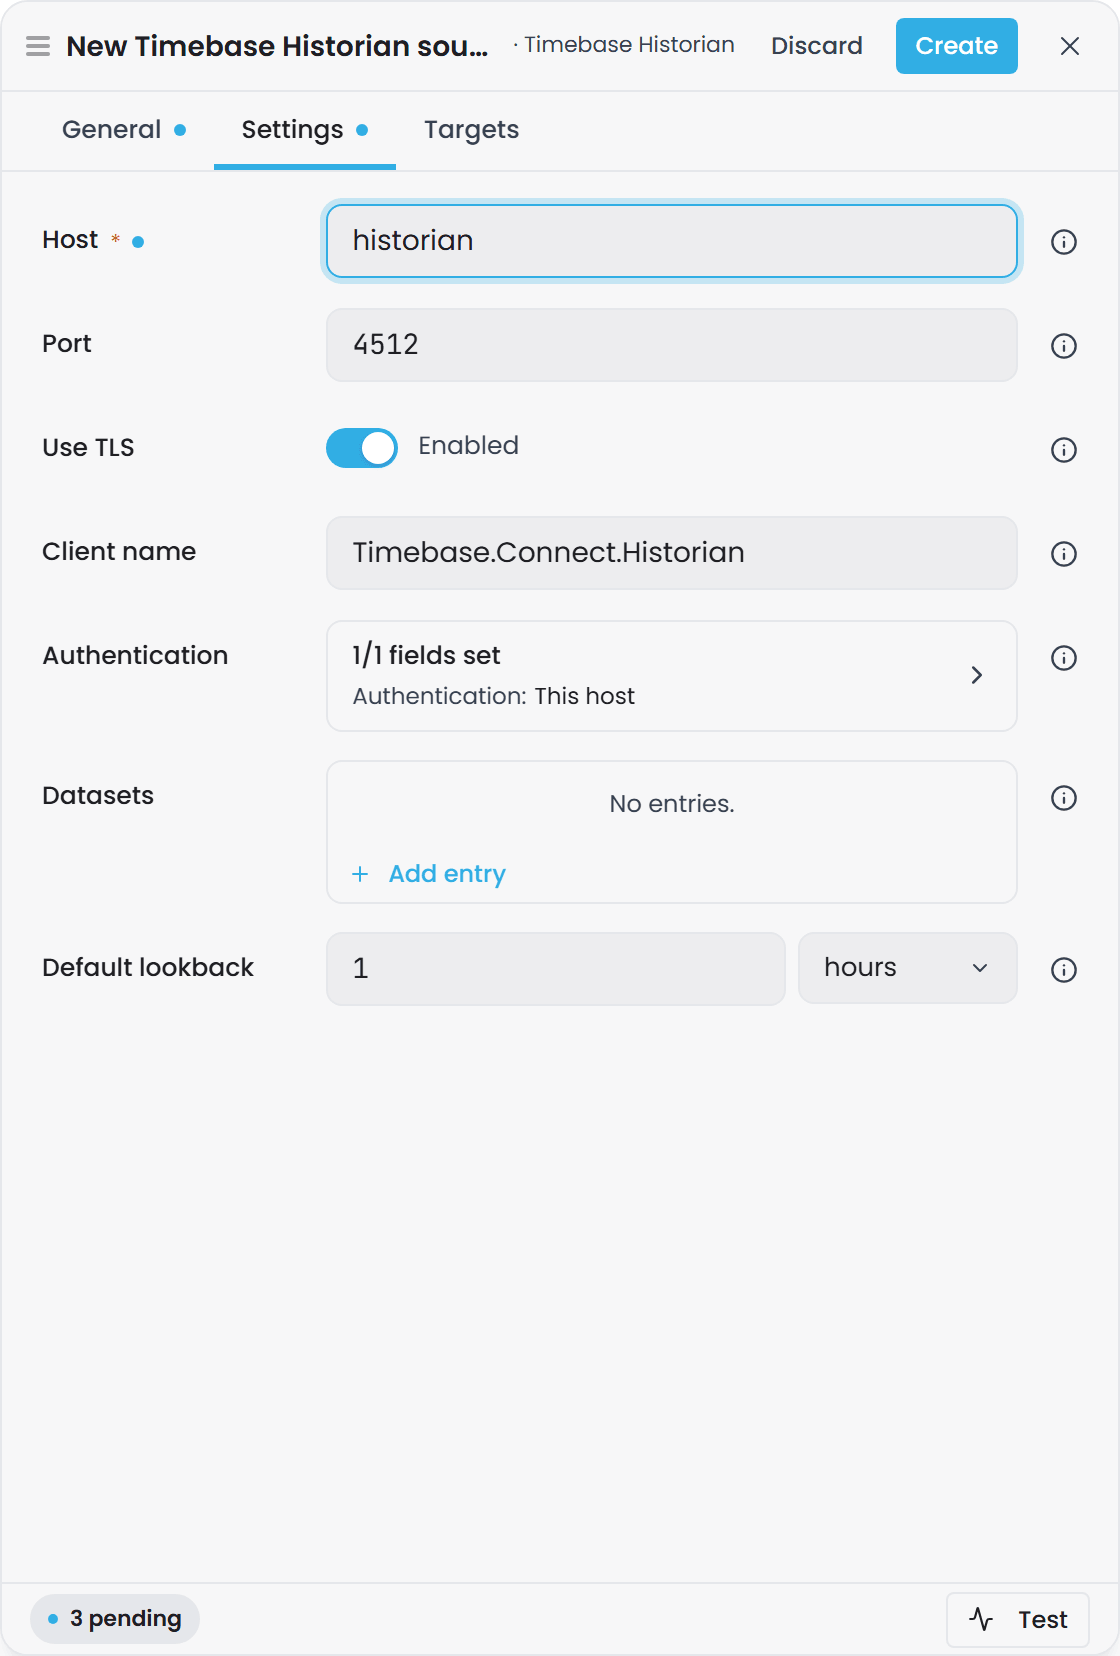
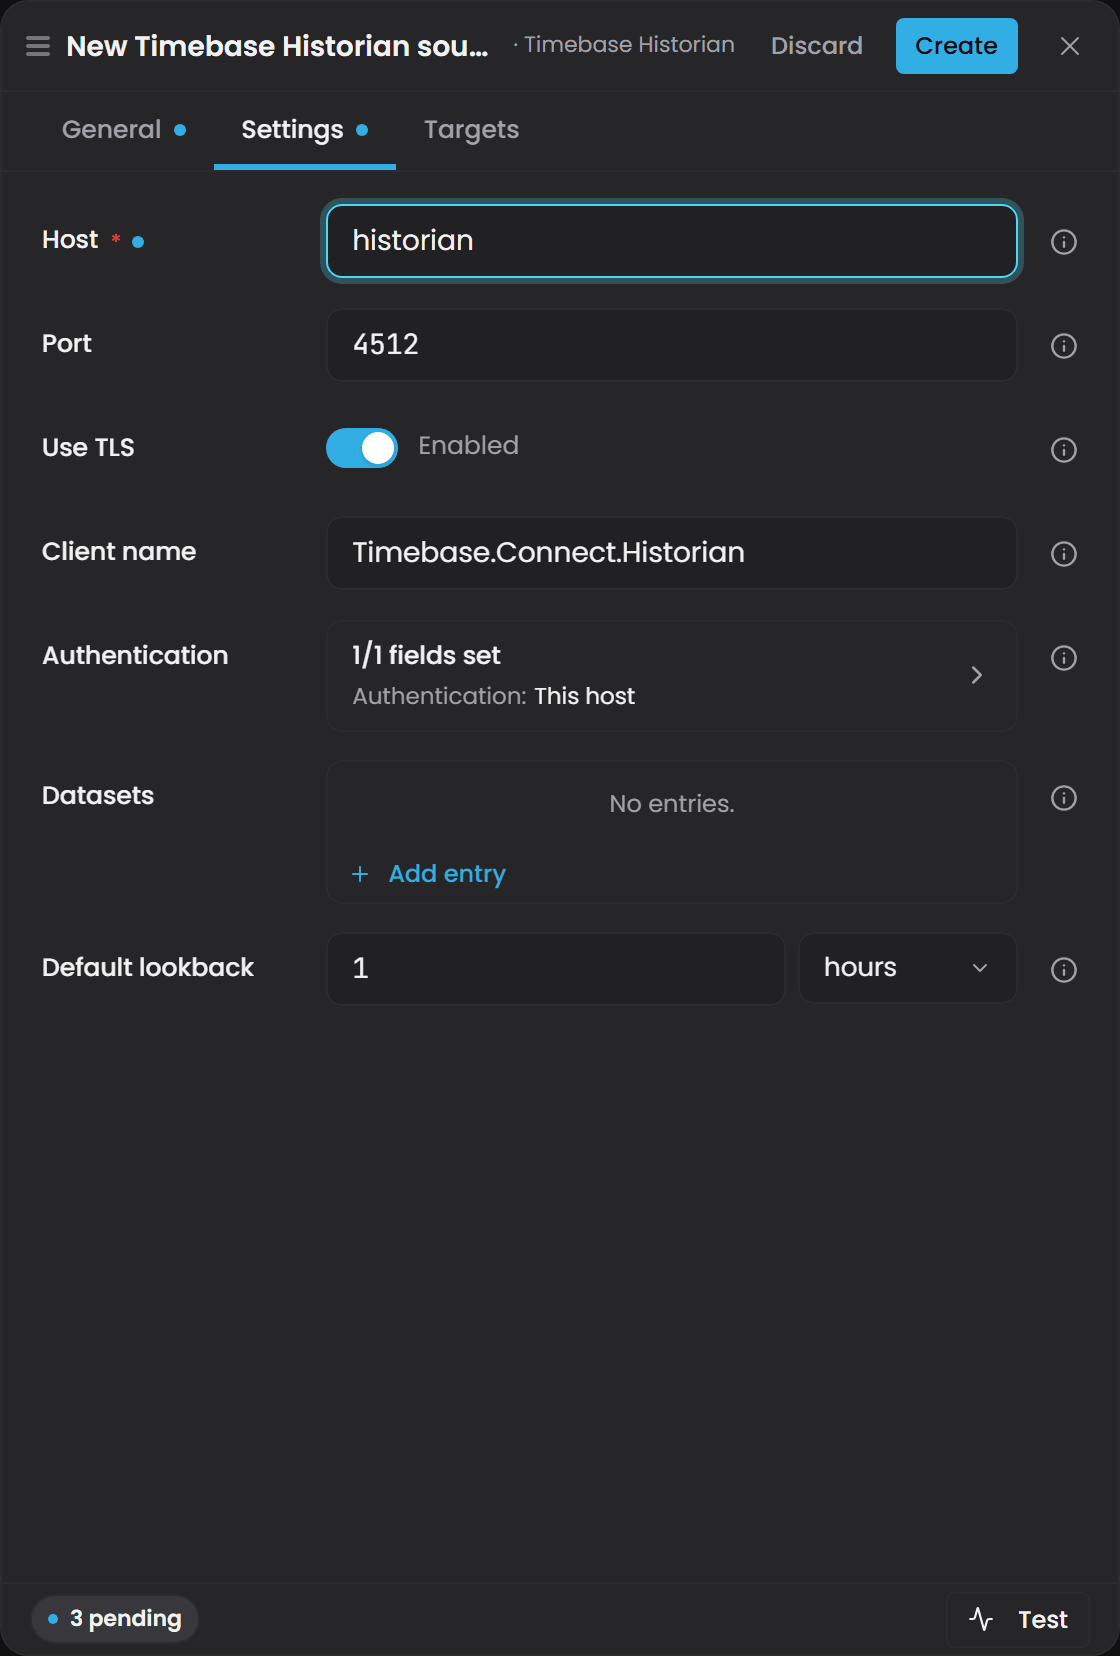
Connect has its own schema-driven editor with a connection test. Use it rather than hand-editing JSON.
- Open
https://localhost:4562and select Sources. - Select Add Source and choose the plugin for your source from the menu. Twelve ship, including Timebase Historian, SQL Server, OPC UA, HTTP / REST and AVEVA PI System.
- On the General tab, give the source a Name. Connect derives the source's alias from it, and the alias is what you write as the first segment of every binding path into this source, so pick something short and stable -
historian-main,erp,plant-opc. - On the Settings tab, fill in the connection fields.
- Select Test at the bottom of the tab. This opens a real connection and reports either success or the exact error.
- Add the datasets, topics or queries the source should publish, in the same tab.
- Select Create. A new source is created switched off: select Start on its row, or on its page, and it begins advertising - no restart.
for MQTT, Sparkplug B or Telegraf, Connect is not the route. Use a Collector to historize those protocols into a Timebase Historian, then point the Timebase.Historian plugin at that Historian. See Connecting Data Sources for the full plugin roster, and follow it to the dedicated article for the plugin you chose - each of the twelve documents its own connection fields, binding-path shape and failure modes.
No data source yet?#
Use the examples the stack ships with. The Collector has example-simulator, which writes a packaging line of ten juice fillers into the Historian's The Juice Factory dataset, and Connect has example-historian-juice-factory, a Timebase Historian source already pointed at that Historian and that dataset. Both ship switched off.
- In the Collector at
https://localhost:4522, select Start on theexample-simulatorrow. Values arrive in the Historian within a minute. - In Connect, select Start on the
example-historian-juice-factoryrow. Its page then lists the paths it advertises, under its aliashistorian-juice-factory.
That is enough to prove Connect starts, advertises paths, Atlas matches your binding against them, the domain compiles, and live values arrive. The paths look like historian-juice-factory/The Juice Factory/FillerTemps, and the Simulator example domains include a juice-factory domain already bound to them, if you would rather read a finished model than build one.
Step 4: Create a domain in Atlas#
A domain is one model. Everything you author lives on a Git branch that Atlas manages for you.
- Open
https://localhost:4552and sign in. - In the sidebar, select Domains.
- In the Branch select beside the filter box, choose your branch. On a new installation this is
main. - Select Create Domain at the top right of the page.
- Enter a Name - lowercase letters, numbers and single hyphens, for example
pump-station-north. - Under Libraries, add
atlas-common. It supplies theTVQtimestamp-value-quality shape that nearly every measurement needs, and theTagentity types. Addisa95-equipmenttoo if you are modelling an ISA-95 equipment hierarchy. Atlas Libraries explains what a library is, which ones ship, and how to build your own. - Write a one-line Description, then select Save domain.
a domain created on a branch you are not browsing is invisible until you switch to it. If something you just created has vanished, check the branch picker before anything else. See Branch Management for creating, comparing and merging branches, and How Atlas Uses Git for where the model physically lives.
Step 5: Define your types#
This is the ontology: the kinds of things that exist. Select Types under your new domain version, then Create.
This step is a summary. Defining Types and Schemas is the authoring reference, and Atlas Key Concepts defines every term used here with precision.
| Kind | What it is | Example |
|---|---|---|
| Entity Type | A kind of thing | PumpStation, Pump |
| Property Type | A value a thing carries | Speed, FlowRate, MotorTemperature |
| Relationship Type | How things connect | contains, feeds |
| Data Type | A value shape | TVQ |
| Function | Reusable calculation logic |
Two things differ from ordinary object modelling:
- Properties are authored standalone, then attached. Create the property, then select the entity type, open its Properties tab, and add it there. The same property can attach to any number of unrelated types, and attaching to a parent shares it down the whole subtree.
- Relationship participation is unconstrained. There is no one-to-one or one-to-many setting, so enforce a rule of that kind in how you build your instance maps.
Check atlas-common before defining anything - it already gives you TVQ, Tag, Folder, contains, connectsTo and the standard Timestamp / Value / Quality / UOM / Description properties. Importing beats defining a near-duplicate. Modeling Best Practices makes the case for reusing standard vocabulary before specialising, and Naming Conventions for Atlas Models matters more than usual here, because Atlas validates almost none of it and a name is locked once created.
Name is locked after creation on every kind of type. Label and description stay editable; the name does not.
for anything coming from a historian or an OPC UA server, set the property's value type to the compound TVQ from atlas-common, not a plain xsd:double. A plain number property bound to a multi-column result reads the first column by position, which lands the timestamp in your value and reads as a very large number.
Step 6: Copy the exact binding paths#
A binding path is the text Atlas uses to route a request to one data point. Atlas matches it against Connect's advertised paths at start-up, not when you save it - so a typo compiles cleanly and then silently produces no value.
Get the exact strings: on Connect's Sources page, select your source, and under Advertised routes on its page open the datasource row. It lists every binding path and every template the source currently advertises.
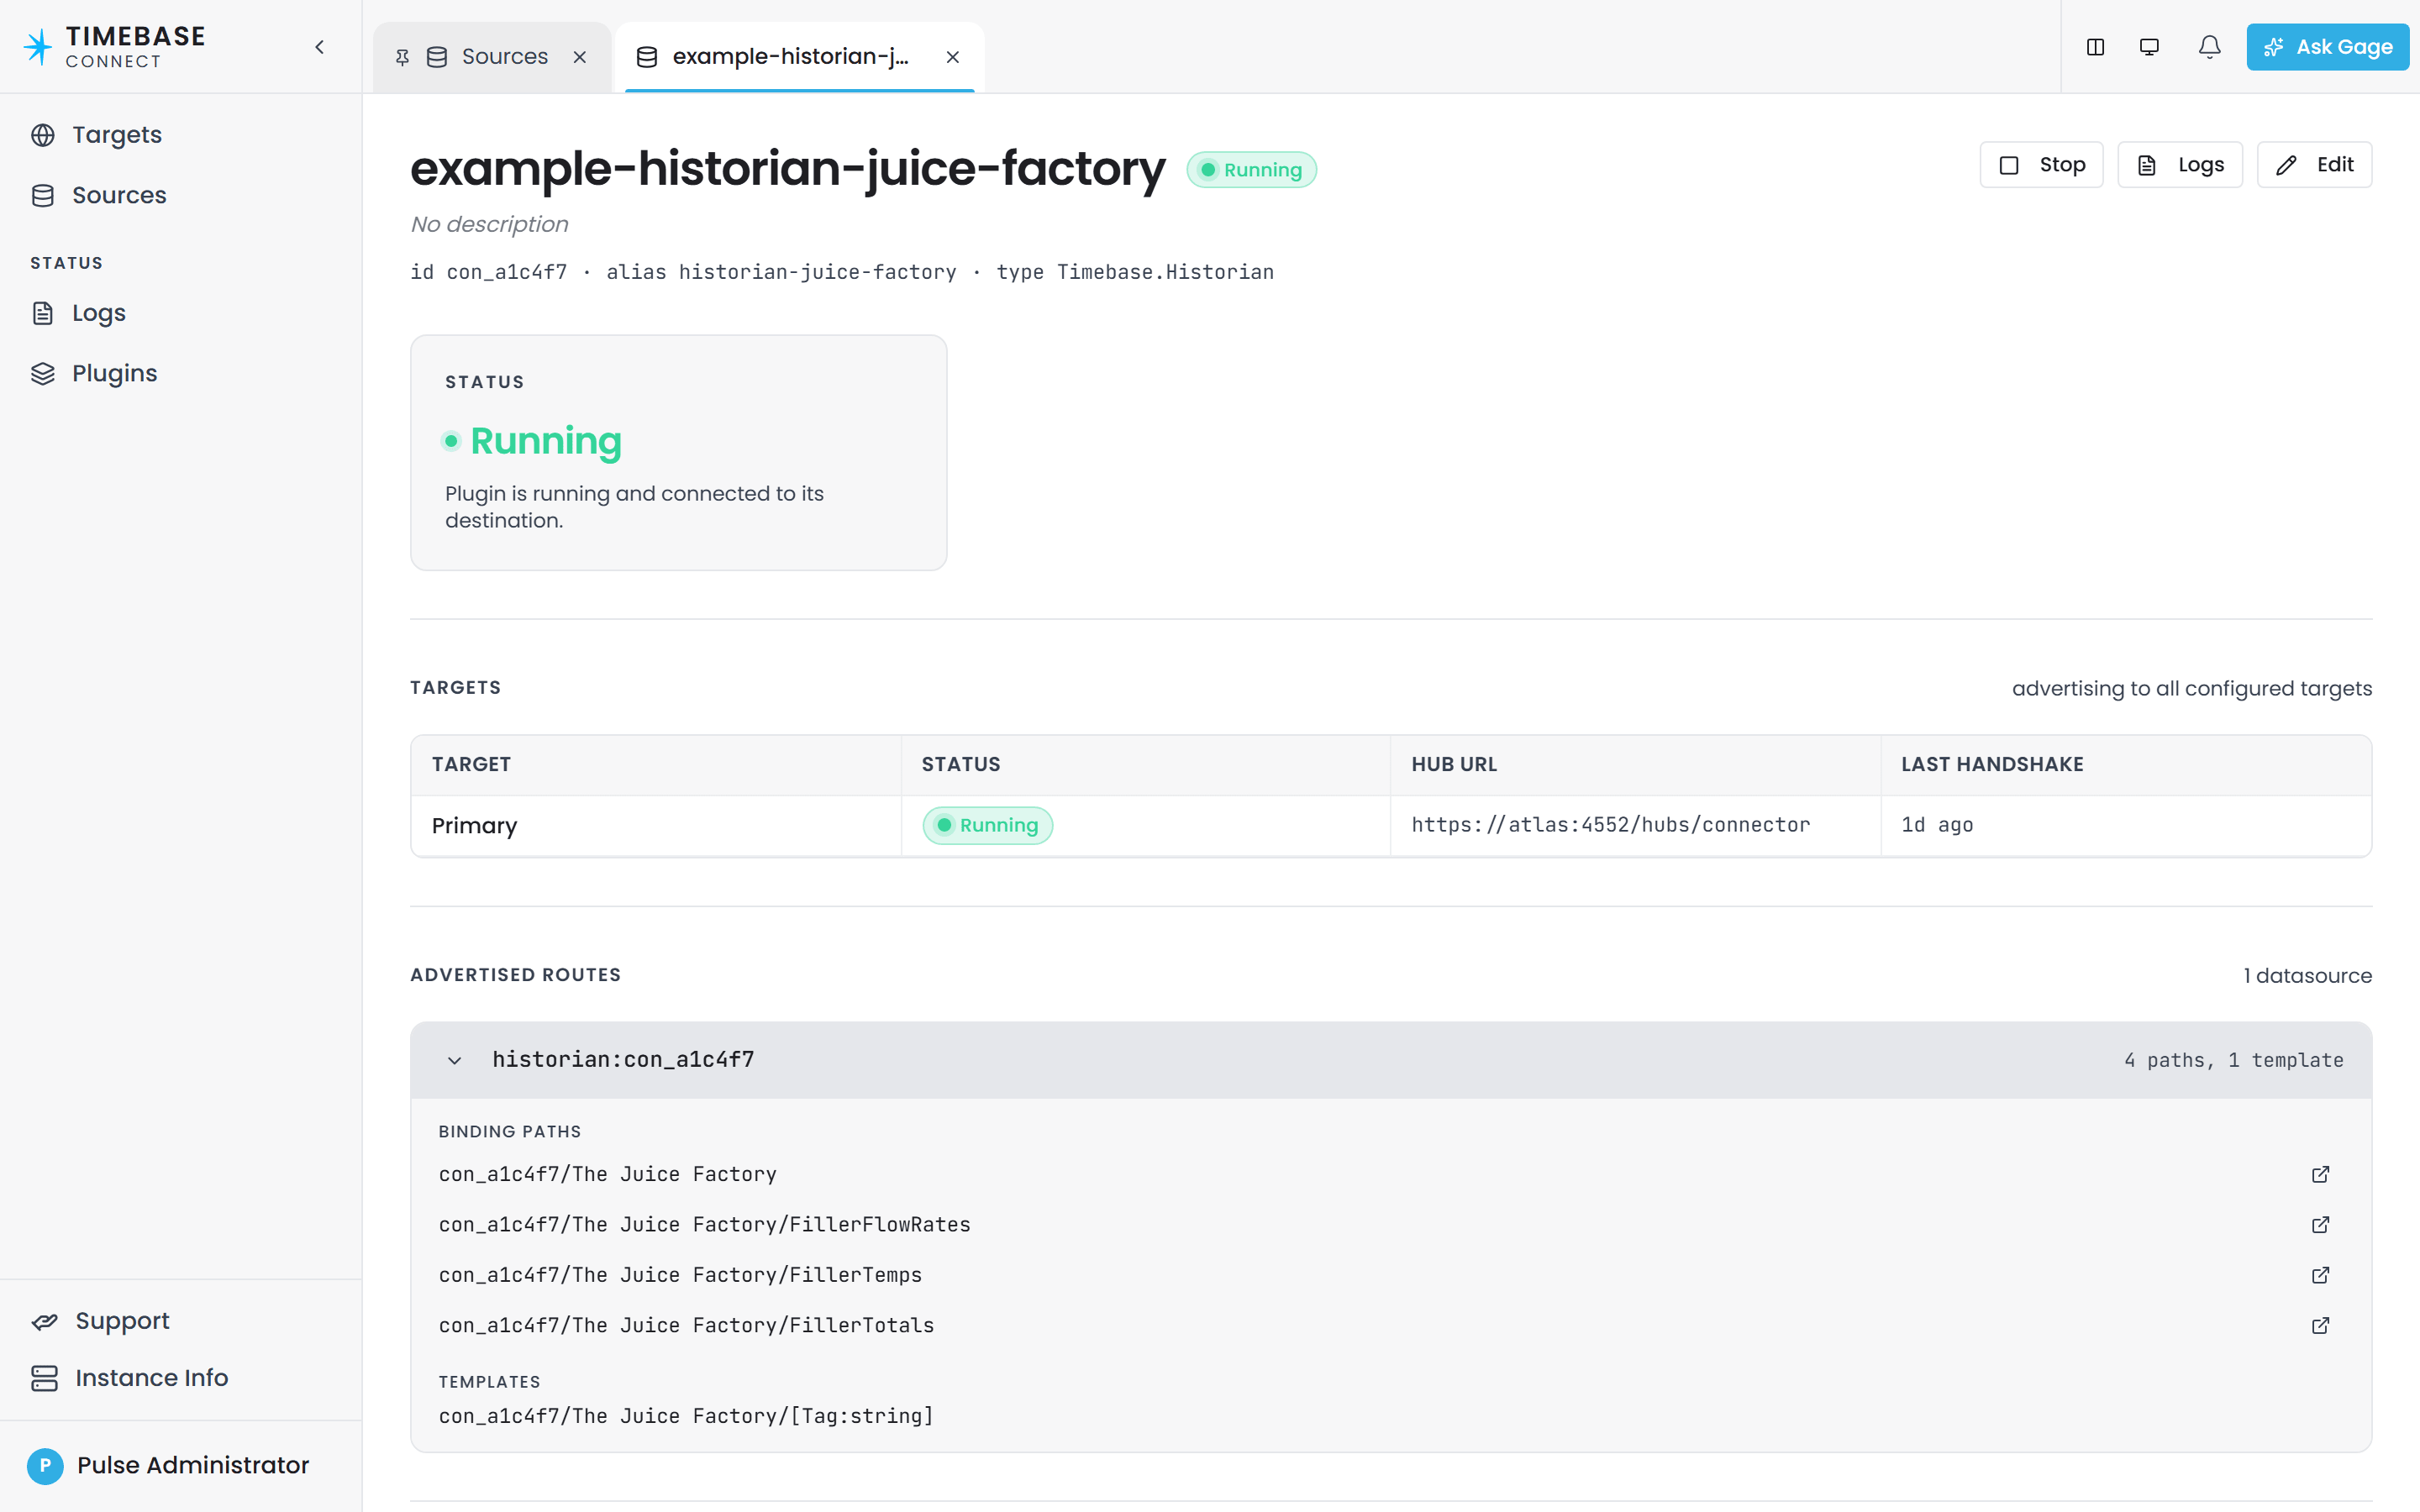
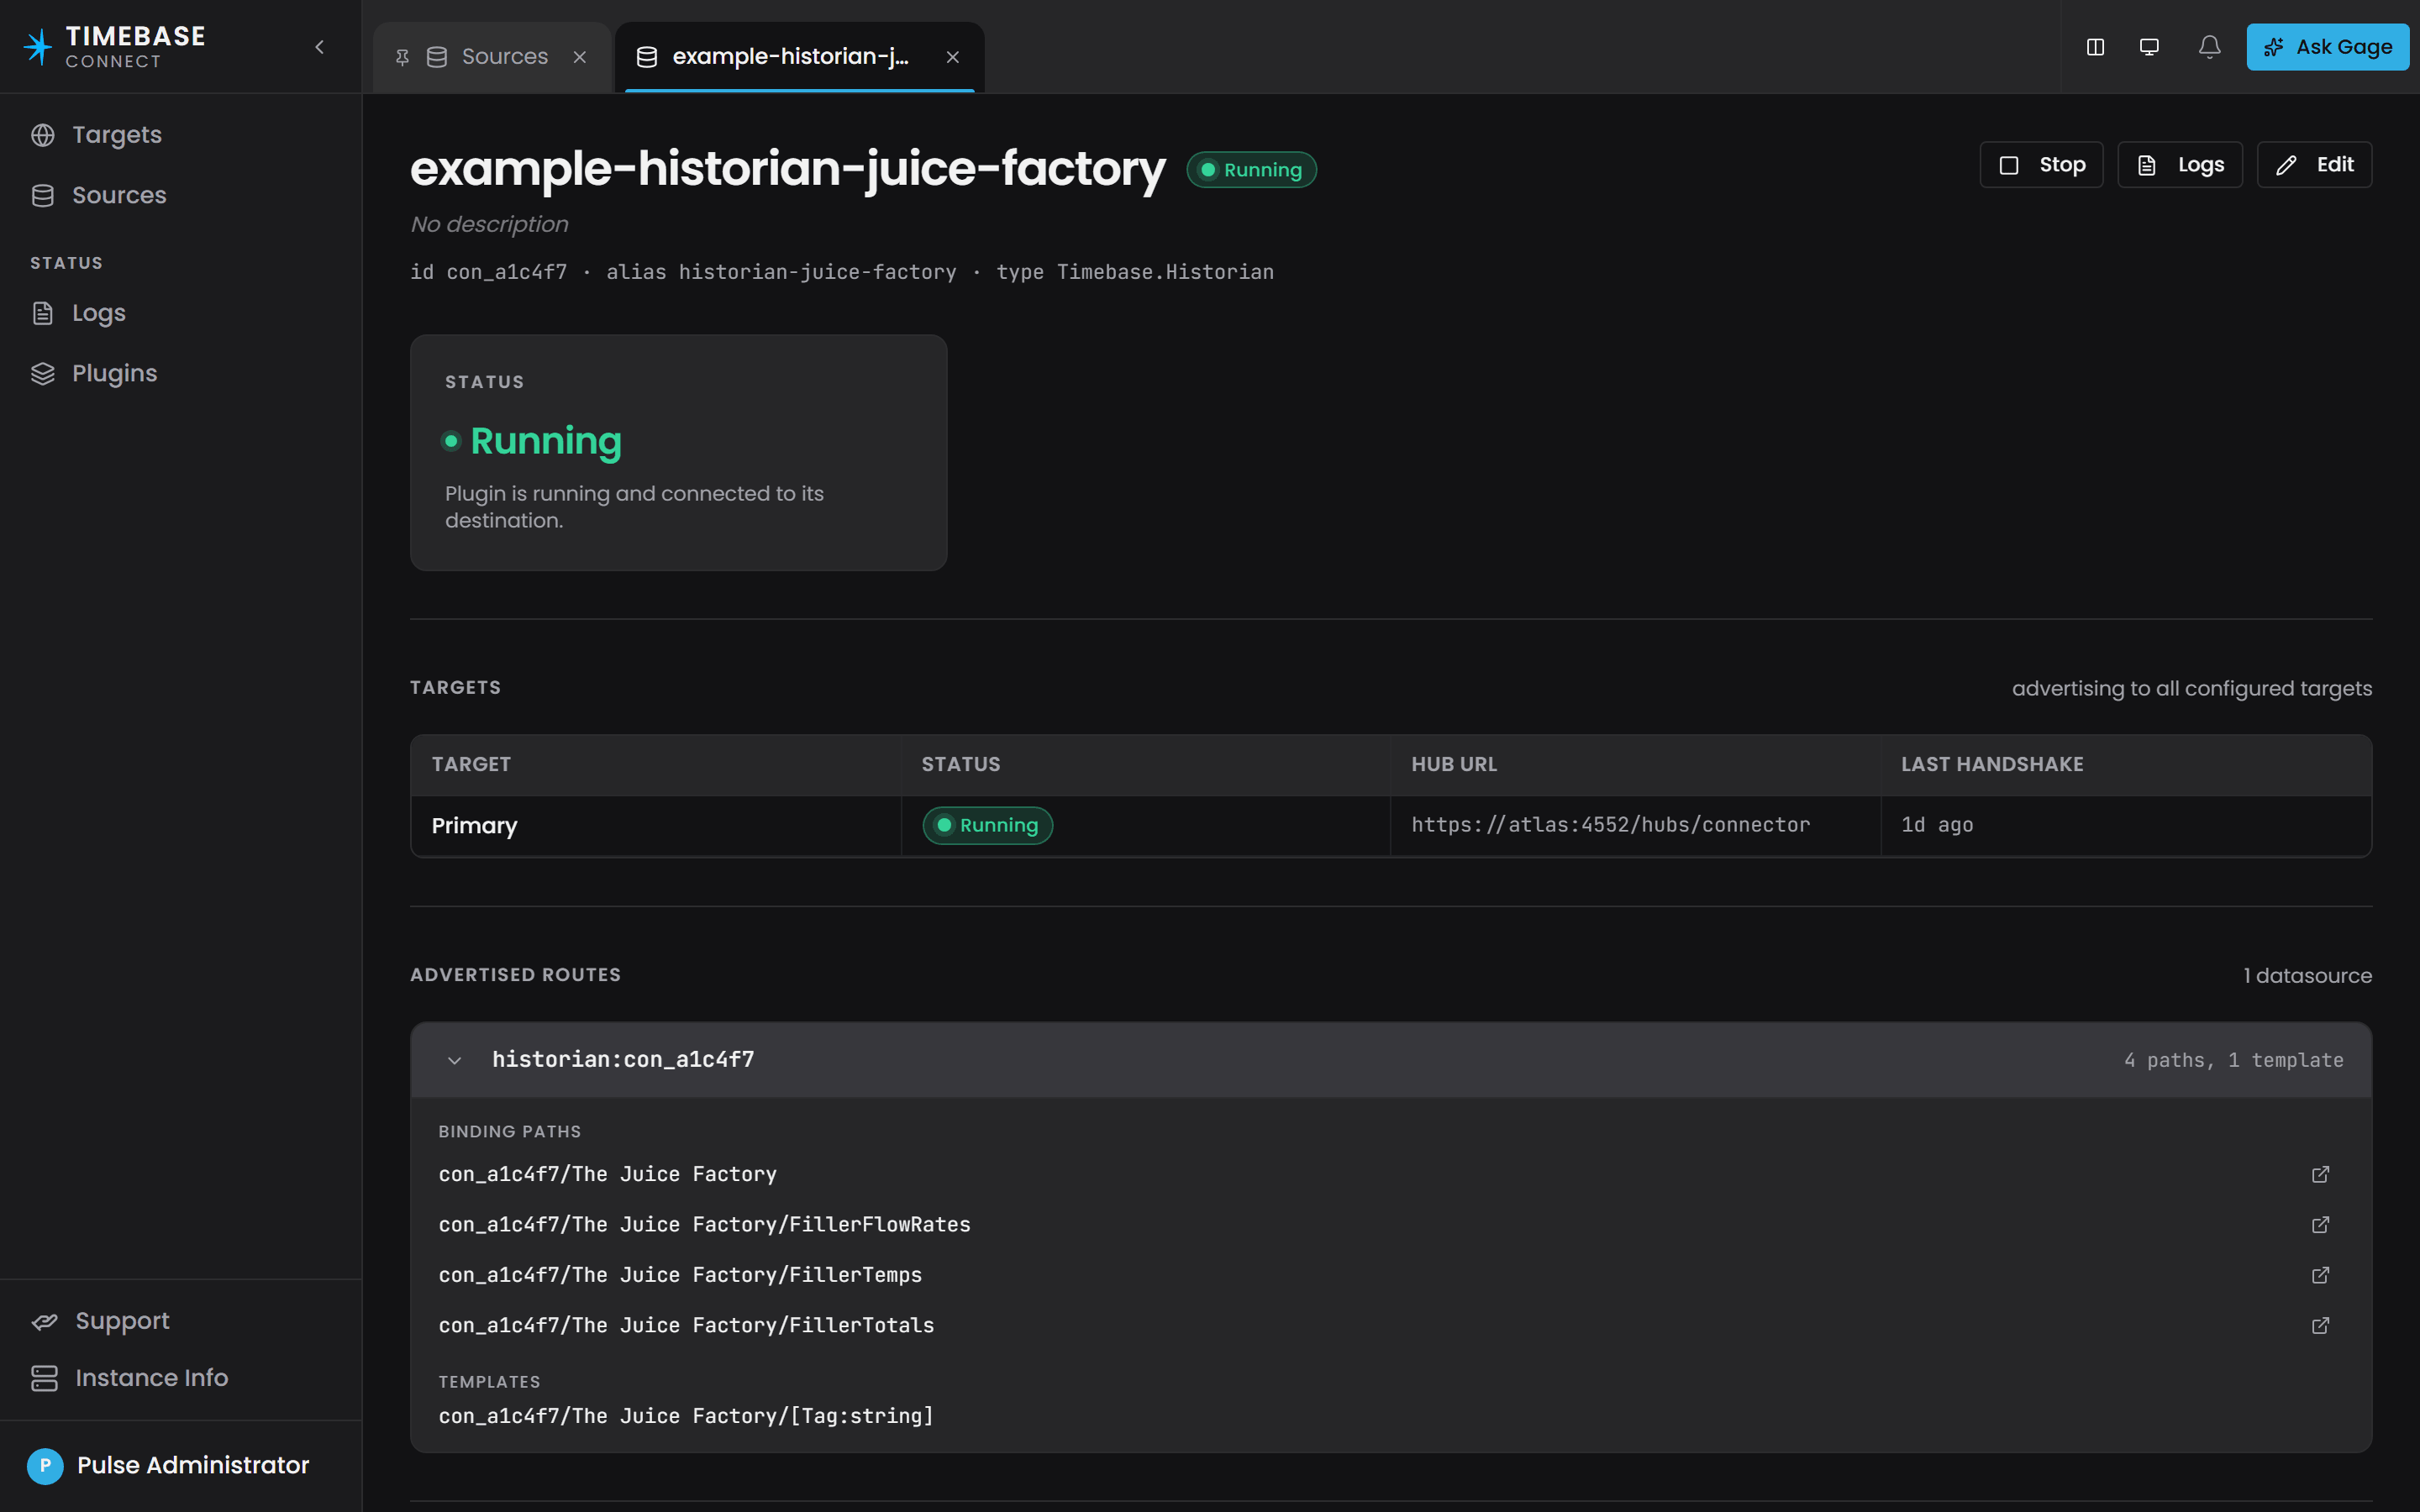
Copy each path character for character. Three rules:
- Slash-delimited segments. The page lists them under the source's minted id,
con_a1c4f7/...; write the source's alias in that first position instead, which Atlas resolves the same way and which stays readable. The shippedjuice-factorydomain bindshistorian-juice-factory/The Juice Factory/...for exactly this reason. - Not a URI. Never write
historian://oropc://. A path written that way is accepted, compiles without complaint, and never produces a value. - Case-sensitive.
historian-main/Plant Data/Tank01.Levelwill not matchhistorian-main/plant data/tank01.level.
Segments may contain spaces and dots, so The Juice Factory and 131-TT-01.PV are each one segment.
For what a binding is rather than how to copy one - how a property, an instance and a data source are joined, and where that join can go wrong - see How Binding Works: Properties, Instances and Data Sources.
Step 7: Map instances and bind them to data#
An instance map turns one type into real things, and says where each property's value comes from. Select Instance Builder, then Create.
Choose Single Instance for a one-off asset such as the pump station itself, or Entity Instance Map (Bulk) for a set such as the pumps inside it.
- On the General tab, fill in Definition ID, Definition name, Type, Instance ID and Instance label. Use
[Name]placeholders in the Instance ID to vary it per instance, for examplePump-[Num, 00]. - On the Variables tab, select + Add variable and give the variable that drives the count its data - a variable named
Numwith the data1-6produces six pumps. - On the Mappings tab, select a property and choose its Sourcing strategy:
| Strategy | Use it for |
|---|---|
| Static | A fixed value you type - a unit of measure, nameplate data, a set-point |
| Bound | A live value from a connector, identified by a Binding path |
| Calculated | A value worked out by a function when something reads it |
That table is the short version. Property Sourcing Strategies - Static, Bound, and Calculated covers what each strategy does at read time, and Instance Maps covers variables, placeholders and maps that create one instance per row a source returns.
- For a Bound property, paste the path you copied in Step 6 into Binding path, using the same placeholders where the map expands - for example
historian-main/The Juice Factory/131-TT-[Num].PV. - Select Create.
the placeholder syntax is [Name], not {i}. A pattern written pump-{i} has no variables at all, so you get exactly one instance literally named pump-{i}, and nothing warns you.
if you have no live data yet, leave the properties Static. The model still compiles and is still queryable, and you can come back and bind them later.
Step 8: Compile the domain#
Compile is the gate between "I authored it" and "I can query it". There is no deploy step and no separate runtime - Atlas stores, compiles and serves the result itself.
Publish and Compile are two different actions, and doing one does not do the other. Compiling and Publishing a Domain opens by naming this as the most common support call in Atlas: publishing moves your changes onto the branch, but whatever was compiled last keeps answering queries until somebody recompiles. Read it before you rely on either.
- In the sidebar, select Overview.
- Read the Outstanding items panel if it is showing. Items split into To fix - errors, which block the compile - and Advisory - warnings, which never block anything. Each line begins with its rule ID:
O-A…andO-B…for ontology items,I-A…andI-B…for instance maps - look each one up in the Validation Rules Reference, which gives every rule's message and what to change to satisfy it. Clear everything under To fix. - Look for a panel headed Unpublished changes. If it is there, your work is in a private draft and the branch has not moved. When its chip reads Ready to publish, select Publish to {branch}.
- In the Instances section, select Compile. Once a world exists the button reads Recompile, with Unload beside it.
- Read the result: cards counting Entities, Relationships and Properties, with the compile time beneath them.
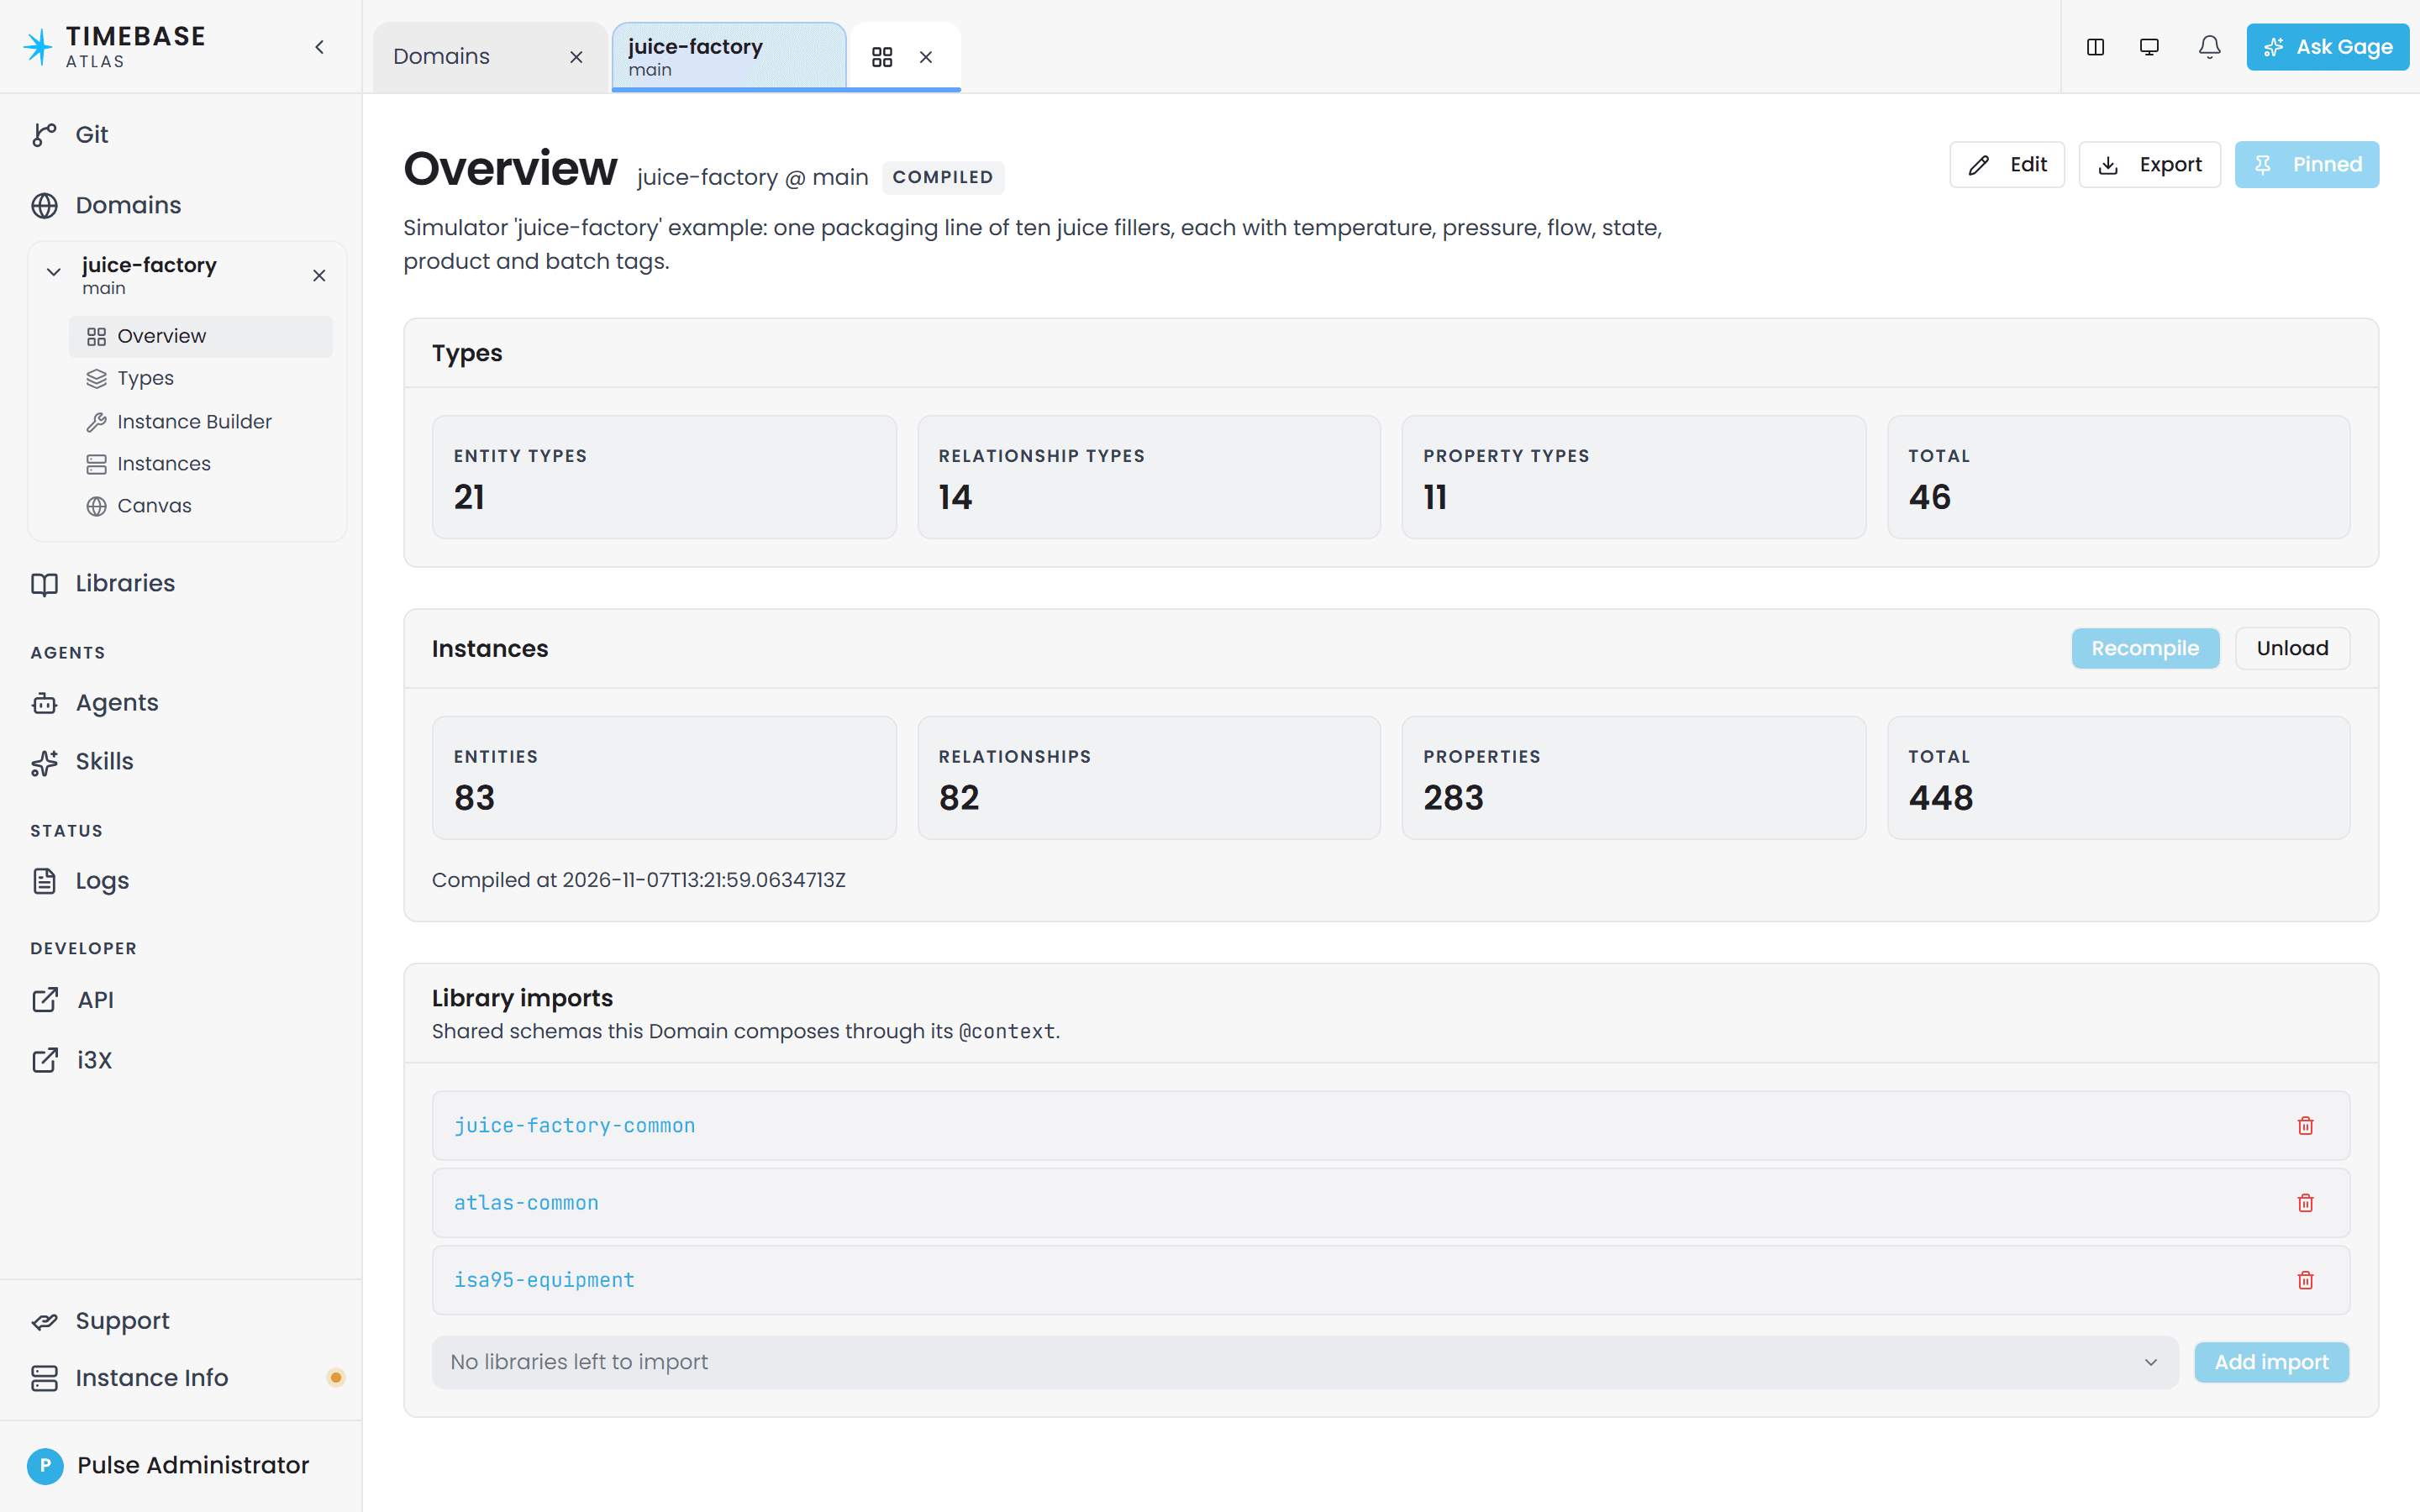
A compile is a full rebuild, so it is safe to repeat as often as you like. Types are not frozen once compiled - edit anything at any time and compile again.
after a restart, Atlas recompiles every domain it has a record of, in the background, without being asked. The one exception is a domain that reads live data from a connector: that one waits until its connector reports in.
Step 9: Confirm data is arriving#
- In the sidebar, select Instances. Your instances appear, nested by containment.
- Select one. The inspector shows its property values.
- Turn on the Live switch in the inspector header. Atlas opens a live subscription, returns current values immediately, and then streams changes as they arrive.
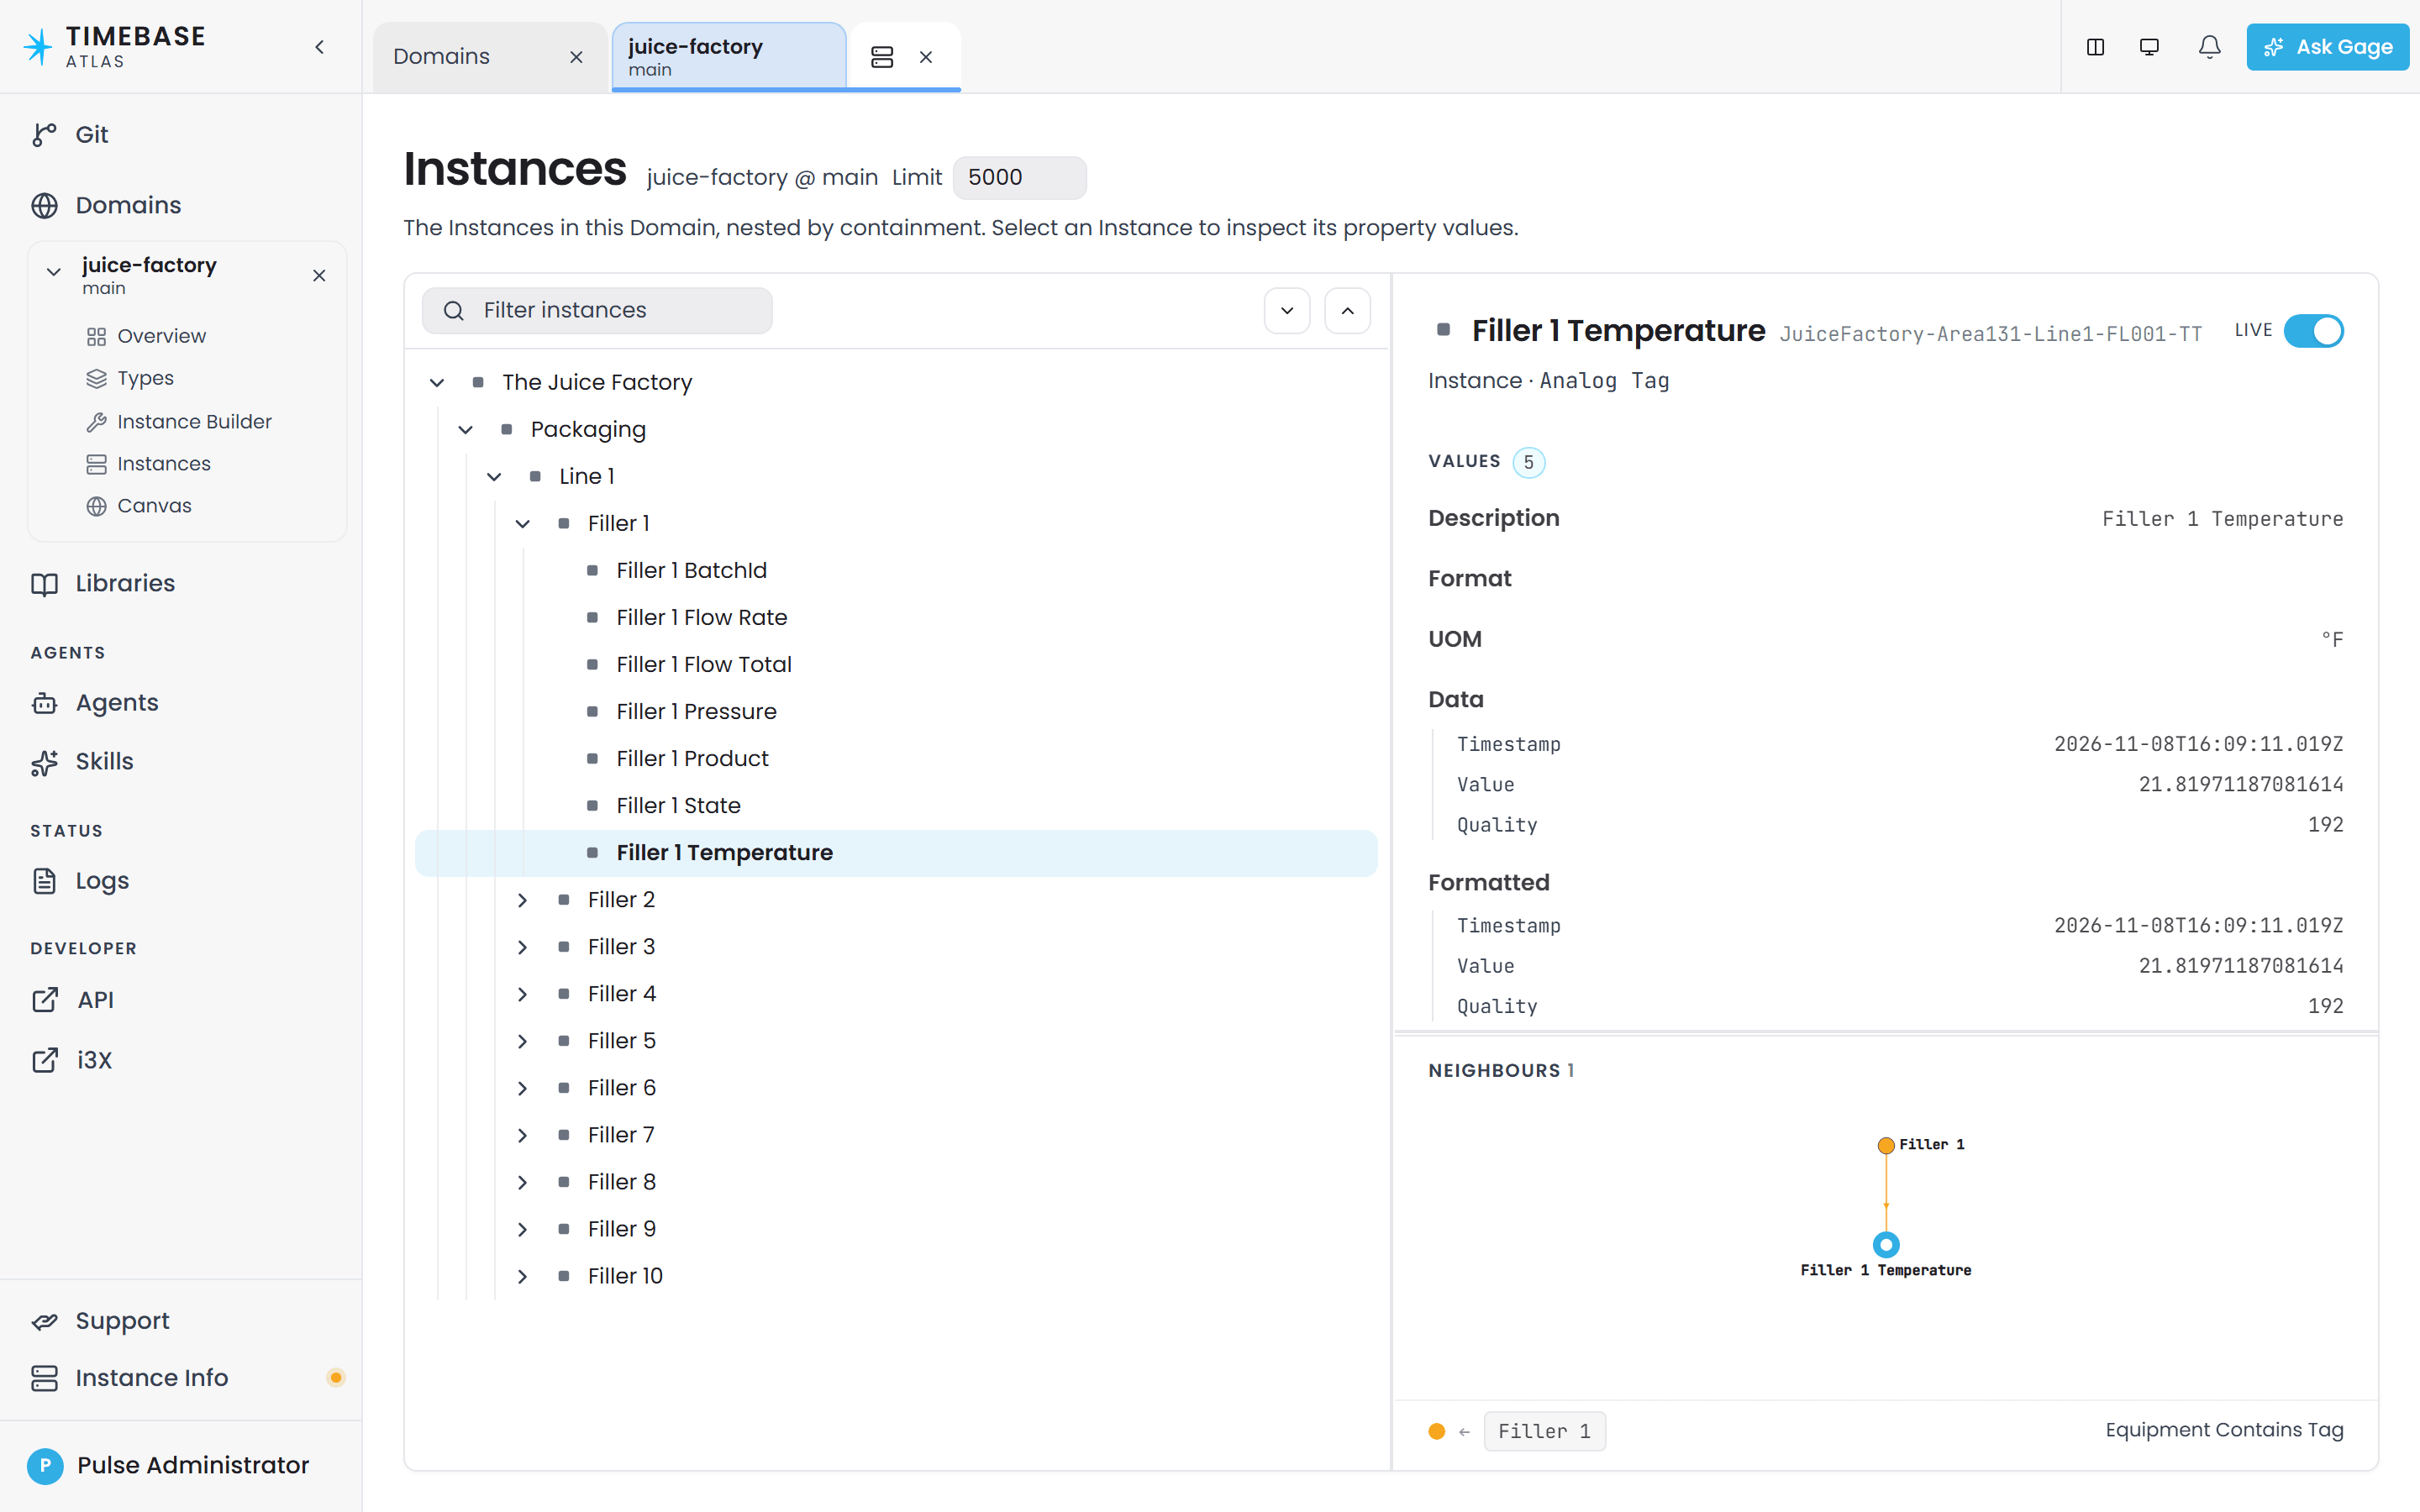
If a bound property shows nothing, or shows a number you did not expect, the cause is almost always one of these:
- The binding path does not match an advertised path - character for character, case included.
- The path was written as a URI with
://. - A compound property is bound to a source whose column names do not match its fields. Atlas matches by name and silently drops what it does not recognise.
- A plain number property is bound to a multi-column result, so the timestamp landed in the value.
Connector Diagnostics - Data Not Flowing is written for exactly this moment and works through each cause in order. How Atlas Aligns and Times Values explains why a live subscription returns complete rows, and how values arriving at different rates are aligned.
Browsing the Instances tree is only one way to read a compiled World. Querying with Cypher shows where to run a query and gives you ready-made ones; from there, Query Troubleshooting, Traversing Large Graphs and the openCypher Query Reference take it as far as you need.
Step 10: Publish results out with Bridge#
Bridge subscribes to the Atlas value hub and streams each property change to a downstream target. It transforms nothing and stores nothing - it is a conduit.
Nine destination types ship: Microsoft.SqlServer, PGDG.PostgreSql, Oracle.MySql, MQTT, SparkplugB, Apache.Kafka, Microsoft.EventHubs, Snowflake.SnowpipeStreaming and IETF.Http. Each has its own article covering its connection fields and the shape of what arrives - follow Exporting Data with Bridge to the one for your target.
Bridge has an interface of its own at https://localhost:4572. Add Target on its Targets page opens a New target drawer for the plugin you choose; Create adds it switched off. Its page then has Add subscription, offering Values or Type description; the Values editor takes the Domain, the Type and, optionally, one Instance and one Property, and derives the mode below from what you filled in. Start the target once a subscription exists. Exporting Data with Bridge walks through every control.
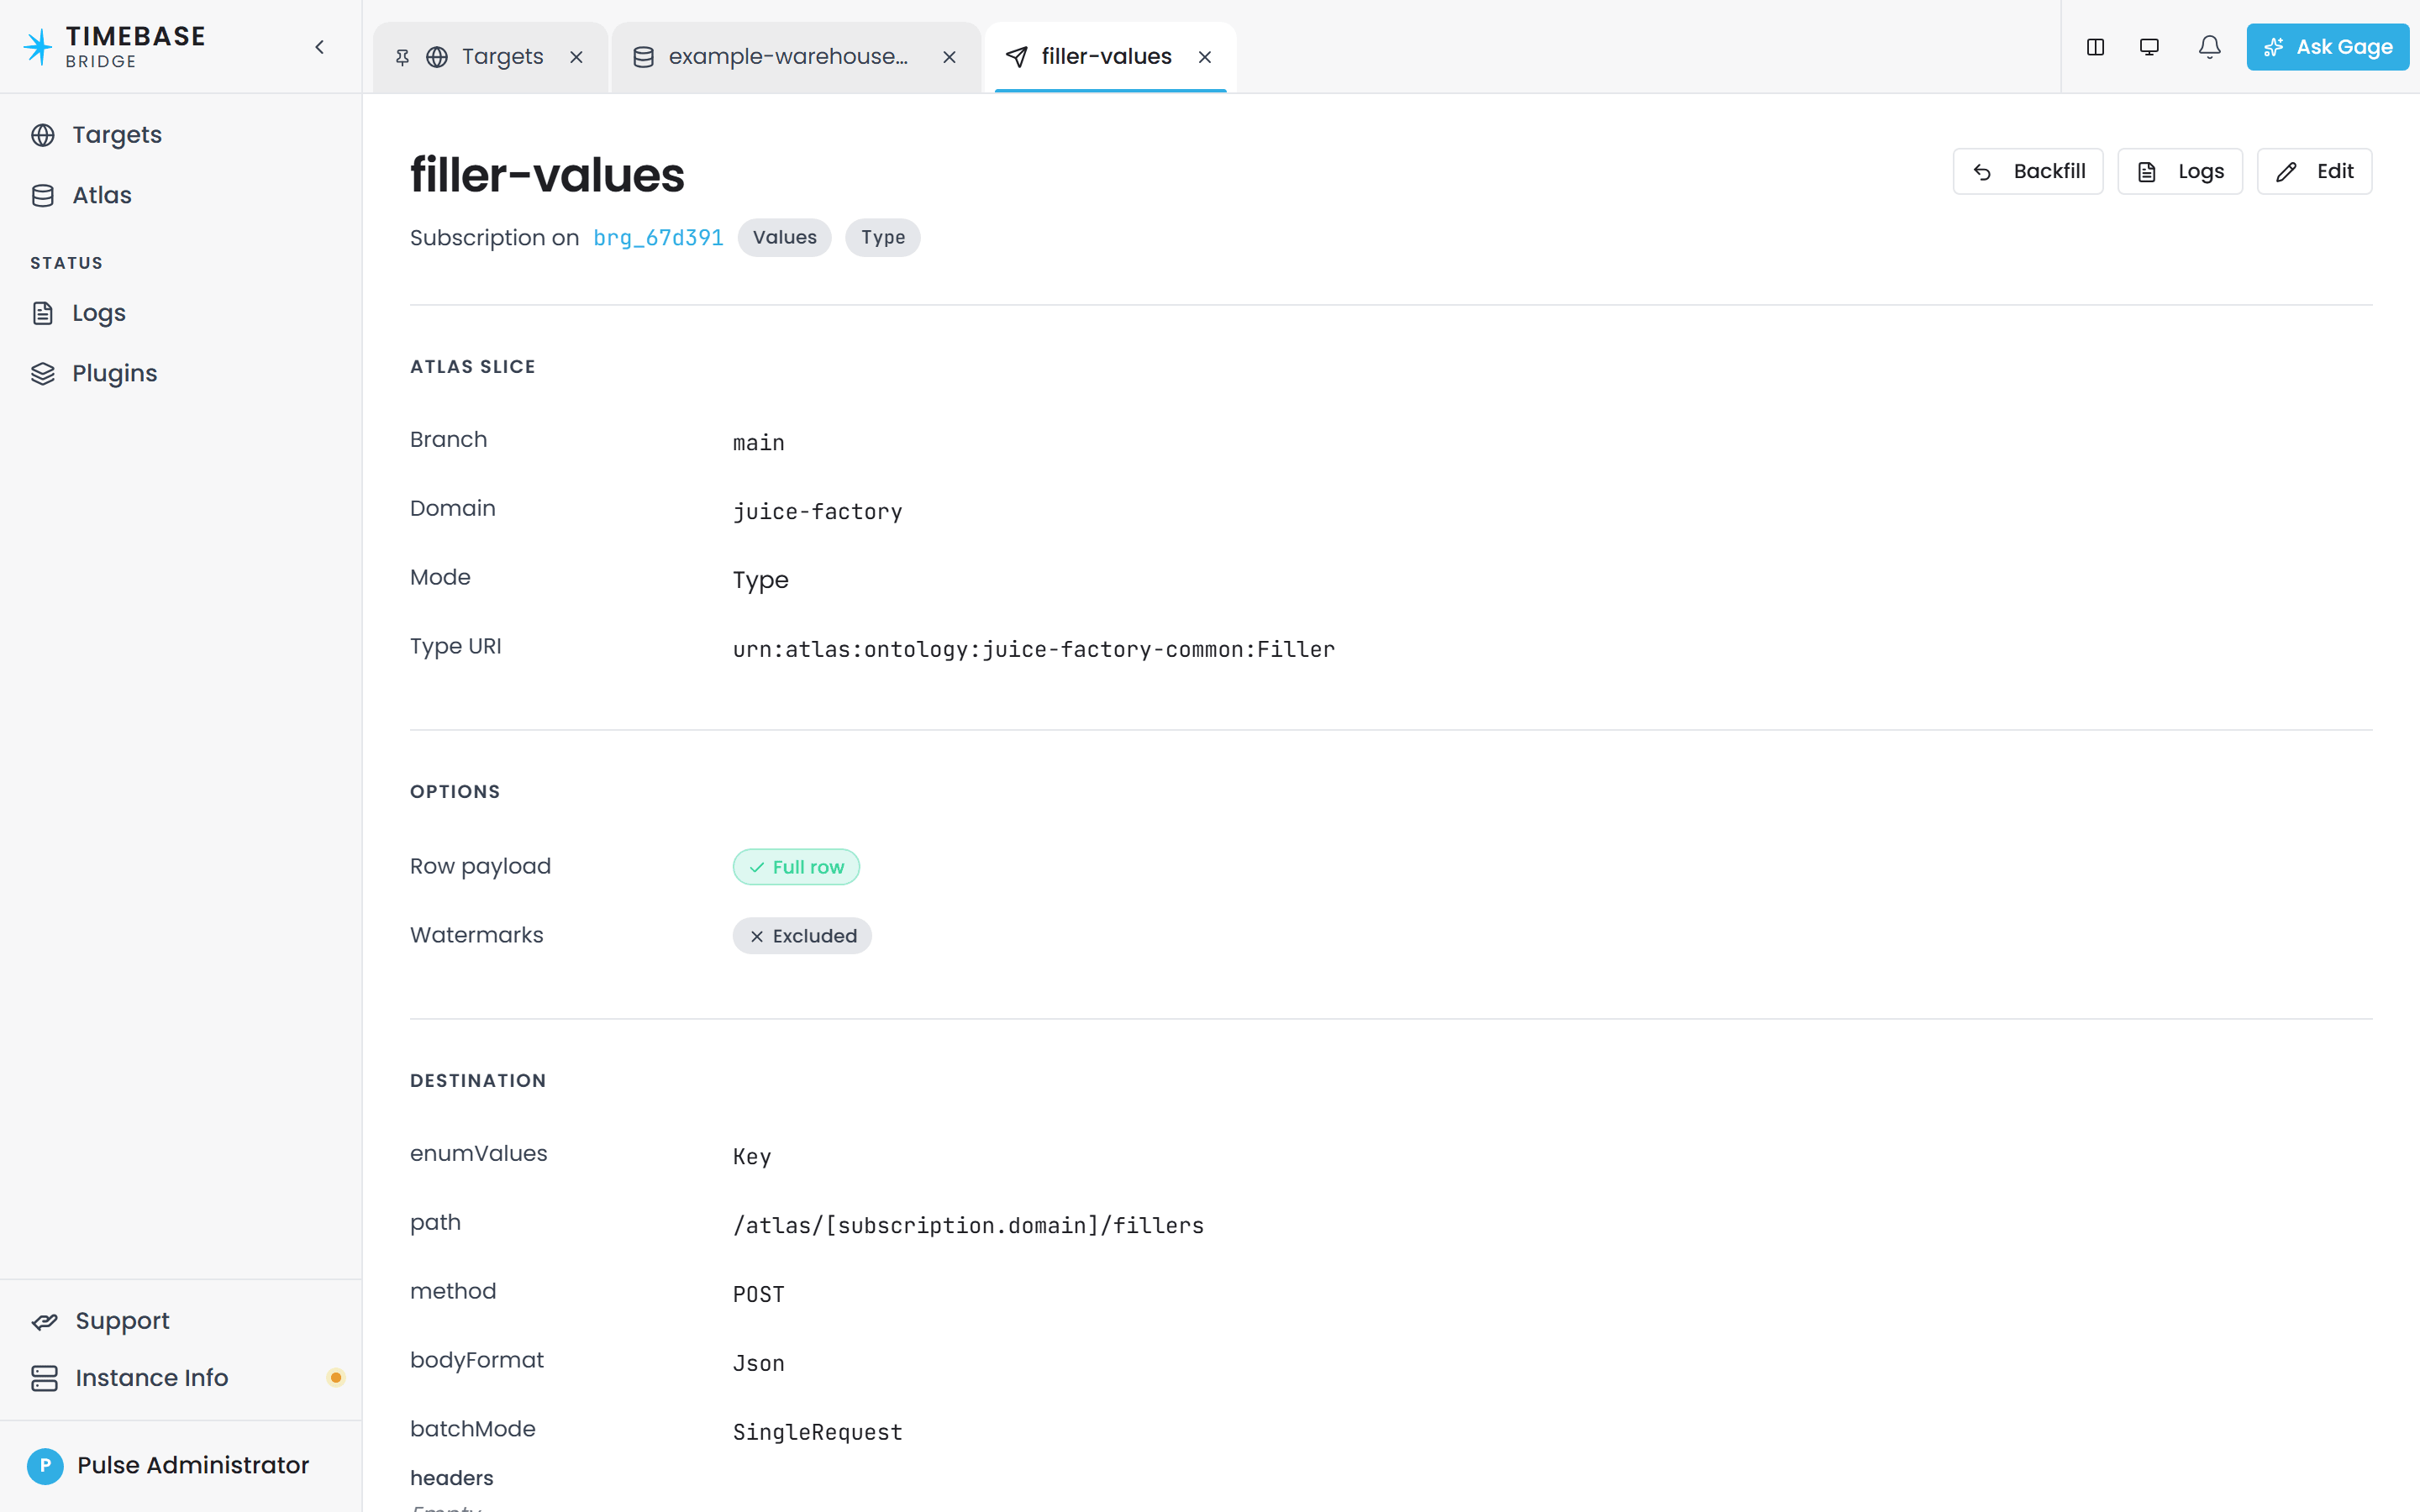
Or edit Bridge's configuration file:
docker compose cp bridge:/bridge/config/bridge.config ./bridge.config
Each record in the bridges map is one destination, and each key under Subscriptions inside its config is one thing to stream to it:
{
  "bridges": {
    "brg_1e6a94": {
      "name": "warehouse-egress",
      "type": "Microsoft.SqlServer",
      "enabled": true,
      "config": {
        "ConnectionString": "Server=<YourSqlServerHere>;Database=Atlas;...",
        "CommandTimeout": "00:00:30",
        "Subscriptions": {
          "all-pumps": {
            "Branch": "main",
            "Domain": "pump-station-north",
            "Mode": "Type",
            "TypeUri": "urn:demo:Pump",
            "EmitFullRow": true
          }
        }
      }
    }
  }
}
Mode decides the scope of a subscription:
| Mode | Scope | URIs it requires |
|---|---|---|
InstanceProperty |
One property of one instance | Instance URI + Property URI |
Instance |
Every property of one instance | Instance URI |
TypeProperty |
One property across every instance of a type | Type URI + Property URI |
Type |
Every property of every instance of a type | Type URI |
TypeDescription |
The compiled description of one type, not its values | Type URI |
The widest scope is one entity type. There is no domain-wide subscription, so properties from several types need several subscriptions.
The first four modes are Values subscriptions. TypeDescription is the other kind, Type description: you pick it from the Add subscription menu when you add the subscription, and it sends a type's shape rather than any values. See Exporting Data with Bridge.
fill in every URI the mode requires. A subscription missing one loads and reports healthy without receiving any data, and only the Bridge log records the validation warning.
Verify: Bridge's log records the token exchange and the hub connection.
docker compose logs bridge | tail -20
For the per-plugin connection fields, replaying history with backfill, delta emits and watermarks, see Exporting Data with Bridge.
What you have now#
A working pipeline, end to end:
- A connector reading an outside system and advertising its data points.
- A compiled Atlas domain where those points are typed properties on named assets you can query and subscribe to.
- A Bridge streaming those values on to a downstream consumer.
That is the DataOps loop. Everything from here is more of it: more sources, richer types, calculated properties, more destinations.
Where to go deeper#
Each step above links the reference it summarises. These are the ones that sit across the whole workflow rather than in one step:
- Introduction to Domain Modeling - the four modelling stages in full, and how to hand the work to the Ask Gage assistant instead of clicking through it yourself.
- Calculations and Functions - the Calculated sourcing strategy from Step 7, and writing the functions behind it.
- Connecting Data Sources - the index to all twelve connector plugins, plus multiple Atlas targets, hot reload and data-quality behaviour.
- Exporting Data with Bridge - the index to all nine Bridge plugins, plus backfill, delta emits and watermarks.
Troubleshooting#
| Symptom | Likely cause | What to do |
|---|---|---|
| Connect or Bridge logs a repeating connection failure against Atlas | Missing audience, not a network fault. Atlas issues 401 and the retry log looks identical to an unreachable host |
Add Atlas to that client's audiences in Pulse, then restart the component. Step 1 |
Connect's log names localhost rather than your Atlas |
atlas.config is missing or its atlases section is empty, so the default address is in use. Inside the container localhost is Connect itself |
Set host to atlas, port to 4552 and useTls to true on the target, then restart Connect |
A bound property is empty, or reads 0.0 |
The binding path does not match an advertised path, or the source is not running | Copy the path from Connect's Advertised routes rather than typing it, and check the source's status on its page. Steps 3 and 6 |
| A bound property reads a very large number | A plain number property is bound to a multi-column result, so the timestamp landed in the value | Model the property with the compound TVQ type from atlas-common. Step 5 |
| A compound property stays empty although the source returns data | Atlas matches source columns to property fields by name and drops what it does not recognise | Align the source's column names with the property's field names |
| Your instance map produced exactly one instance with a literal placeholder in its name | The placeholder was written {i} instead of [Name] |
Use [Num], and add the matching variable on the Variables tab. Step 7 |
| A domain you just created is not in the list | It was created on a branch you are not browsing | Switch the Branch select on the Domains page to the branch you created it on |
| Work you saved is not visible to colleagues | It is held in your own draft session because the branch has not moved | Publish it from the Unpublished changes panel on the domain's Overview. Step 8 |
| Compile is greyed out or refuses | Error-severity violations are outstanding | Clear everything under To fix in Outstanding items. Advisory items never block. Step 8 |
| A domain that reads live data never finishes compiling | It waits for its connector to report in | Confirm Connect is running, registered with Atlas, and advertising the paths the domain binds |
| A Bridge subscription reports healthy but nothing arrives | A URI the Mode requires is missing |
Check the Bridge log for the validation warning, and supply every URI that mode needs. Step 10 |
Your edits to atlas-core disappear after a restart |
That library is owned by Atlas and overwritten from the image on every start | Never edit it. Put your own types in your own library or in the domain. Imported libraries such as atlas-common are yours and are not overwritten |
A change you made in settings.config had no effect |
An environment variable in the environment: section of docker-compose.yml, or a command-line argument, sets the same key and outranks the file |
Change or remove the environment entry, then restart. The path entries - Settings, Config, Logs, Certificates and Data - are read before the file is even located and say where it lives |