Start Here for Docker: How to Deploy and Secure Timebase 2.0
Stand up the full Timebase 2.0 platform on Docker and secure it with Pulse - token issuer, certificates, component credentials, users and the AI gateway - from an empty host to a system ready to use.
This is the starting point for a fresh Timebase 2.0 deployment on Docker. It assumes nothing except a machine you can install Docker on, and it goes in the order the platform actually needs: check what you are running it on, understand what you are about to install, then bring it up.
Deploying with an AI agent? Every step below can be carried out for you by a coding agent such as Claude Code. Hand it the Timebase 2.0 Docker Agent Runbook - the same sequence as this article, written for execution rather than reading, with explicit stopping points where it has to come back to you.
Getting help#
Tell us when something does not work, and equally when something works but was harder to find than it should have been. Both are bugs to us.
Struggling with a step, or think you have found a defect? Submit a ticket and we will respond by email.
What the agent runbook does and does not do#
If you took the agentic route above, the agent starts by asking you two plain questions - whether Timebase will be used only on this computer or by other computers on your network too, and whether you want the AI assistant ready now - and a few points in the deployment still need you, because they involve credentials an agent must not handle or rights it does not have:
- Changing the default administrator password.
- Retrieving each component's client secret from the Pulse interface and pasting it into that component's own setup form, so that no secret passes through the agent.
- If other computers will use Timebase, registering their sign-in addresses in Pulse.
- Entering the key for your AI provider, if you want the assistant.
- Installing the root CA and, if you need one, adding a hosts entry - both need administrator rights.
The runbook marks each of these and waits for you rather than guessing. Your user accounts and the AI usage limits are not on the list: they are not needed for the platform to run, so the agent offers them as next steps at the end.
Read this article either way. The runbook tells an agent what to do; the sections below explain why each step matters, which is what you will want when something does not behave as expected.
Step 1: Check the machine you are deploying to#
Before pulling anything, confirm the host can carry what you are about to put on it. This quick start runs multiple containers on a single machine, which is the simplest way to evaluate the platform and keeps the per-component figures less critical than a distributed deployment would.
Read both of these first:
- Hardware Requirements Guide - minimum CPU, memory and disk for each component, whether you run them on one machine or spread them across several.
- Software Requirements Guide - supported operating systems, prerequisites and browser support.
If you do not have Docker yet, install it now from the Docker installation guide. Docker Desktop on Windows or macOS, or Docker Engine on Linux, are all fine. You need Docker Compose v2 or newer, which any current Docker Desktop or Docker Engine includes. Step 6 also uses Python 3, for one command that tidies the JSON it prints. On Windows it is usually python, not python3.
Decide how people will reach it#
Decide this now, because the answer is written into Pulse's public address and into every certificate. There are two answers, and the first is the default:
- Only this computer. You open every Timebase page on the machine that runs Docker, as
localhost. Nothing more to decide. - Other computers on your network too. People open Timebase from their own machines, at a name or address you choose, such as
timebase.yourcompany.comor10.4.2.17. Decide it now and use the same one everywhere below, written in lower case. A name has to resolve on every machine that will use it. An IP address needs no lookup.
this guide does not cover reaching Timebase through a proxy or load balancer. Each component builds its sign-in address from the address the browser used, and a proxy changes it.
The answer is a single setting, TIMEBASE_HOST, which Step 4 puts in a .env file. It defaults to localhost, so if you chose the first answer you set nothing.
Decide about the AI assistant#
Timebase's AI assistant, Gage, answers questions by calling an AI model that you supply. Pulse holds the credentials and every component asks Pulse, so you set it up once, in Pulse. Decide now, because Step 9 has you do it while you are already in Pulse. There are three answers:
- Anthropic's Claude. Pulse already has a provider prepared for it. You need an Anthropic API key, and nothing else.
- Another provider. OpenAI, Google Gemini, or a model you run yourself, such as one served by Ollama. You need its address, an API key if it uses one, and the name of the model.
- Later. Skip it for now. Nothing breaks: the assistant answers nothing until a provider has a key, and Next: Turn on Gage, the AI assistant, after Step 9, is where you come back to it.
Have the key ready before Step 9, in a place you can copy it from.
Step 2: Meet the components#
Every Timebase image is published on Docker Hub under the timebase organization. You do not need to pull them by hand - Steps 4 and 9 do that for you - but it is worth knowing what each one is before you run all seven of them.
Pulse comes first, because everything else depends on it. After that the table follows the data: it is collected from the field, stored, given meaning, then read or forwarded on.
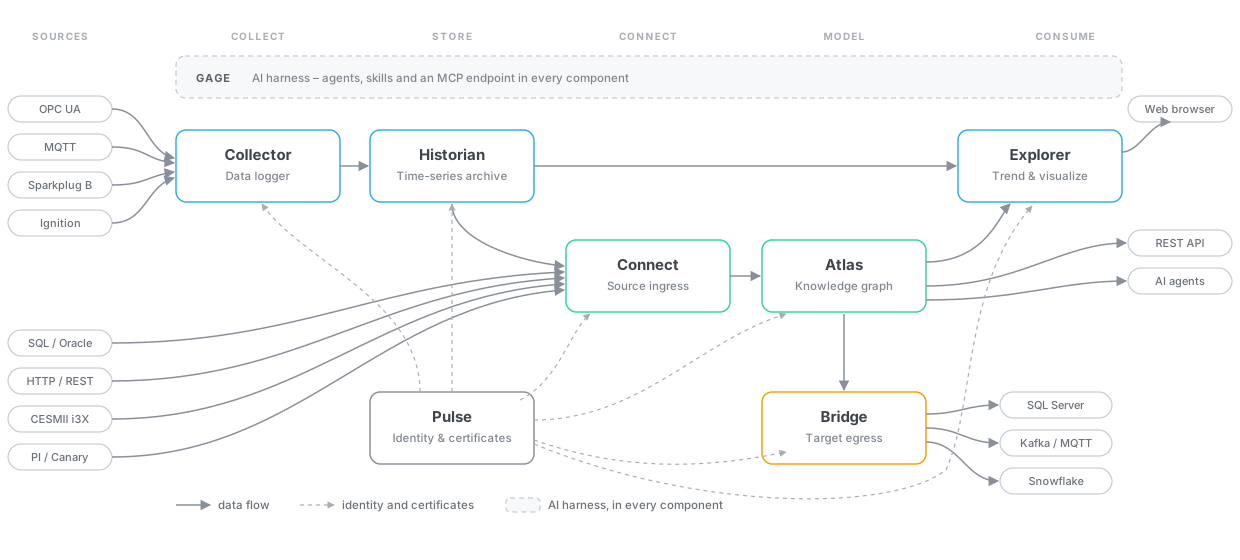
| Component | Image | What it does |
|---|---|---|
| Pulse | timebase/pulse |
Identity, certificates and licensing for everything else, and the single gateway to the LLMs that Gage uses. Every other component depends on it. |
| Collector | timebase/collector |
Logs your real-time data sources into the Historian - MQTT, SparkplugB, OPC UA, Telegraf and more. One Collector connects to one data source, so add another Collector container for each additional source. |
| Historian | timebase/historian |
The time series historian - high performance ingestion and lossless retrieval. This is where your data lives. |
| Explorer | timebase/explorer |
Trending and visualization - how you see and understand what has been stored. |
| Connect | timebase/connect |
Sits between Atlas and your other systems - historians, SQL databases, OPC UA, HTTP - so a property on an Atlas model can be bound to live data that lives outside Timebase. |
| Atlas | timebase/atlas |
Models your plant as a knowledge graph, so that data in other systems becomes a typed property of a named asset - something you can ask questions about, instead of a value you have to go and find. |
| Bridge | timebase/bridge |
Publishes your Atlas models out to other targeted databases and systems, such as SQL Server, Snowflake, Kafka or MQTT. |
One more spans the platform rather than sitting in it:
Gage is the AI harness, and it ships inside every component rather than as a container of its own. Each component carries its own agents and skills and serves an authenticated MCP endpoint at /mcp on its own address. No component holds a model API key of its own - they all reach their language model through Pulse.
Pulse is not optional and it is not a later step. Every component in the Compose file ships with authentication switched on, which means each one sends you to Pulse to sign in. That is why Pulse comes up first and alone, and the other six start in Step 9, once Pulse is configured. Plan on configuring Pulse before you expect to reach any other component's interface.
The ports each component uses#
Every component exposes a plain HTTP port and an HTTPS port, in a consistent pattern:
| Component | HTTP | HTTPS |
|---|---|---|
| Historian | 4511 |
4512 |
| Collector | 4521 |
4522 |
| Explorer | 4531 |
4532 |
| Pulse | 4541 |
4542 |
| Atlas | 4551 |
4552 |
| Connect | 4561 |
4562 |
| Bridge | 4571 |
4572 |
Step 3: Create the Compose file#
Create a file named docker-compose.yml on the host, in a directory of your choice, with the contents below. It defines the whole platform and a named volume for each service, so that data, logs, settings and configuration survive a container being replaced. You start Pulse from it first and the other six later, in Steps 4 and 9.
# Upgrading an existing stack? Keep YOUR existing project name on the next line: Compose
# names volumes under it, and changing it mounts a fresh, empty set instead of your data.
name: timebase

services:
  # Runs once, as root, before anything else, and exits. From 2.0 the images run as
  # an unprivileged user (uid 1654), so a volume created by an earlier release, which
  # ran as root, has to be handed over first. A volume that is already right costs
  # one stat. `$$` is how Compose writes a literal `$`.
  # Keep it on a fresh installation too: it also hands over a volume first mounted at a
  # path its mounting image does not pre-create; a correct volume costs only that stat.
  volume-init:
    image: timebase/pulse:${TIMEBASE_TAG:-latest}
    user: "0"
    restart: "no"
    network_mode: none
    entrypoint: ["sh", "-c"]
    command:
      - |
        for d in /pulse /historian /explorer /atlas /connect /bridge /collector; do
          if [ "$$(stat -c %u "$$d")" != "1654" ]; then
            echo "volume-init: $$d is owned by uid $$(stat -c %u "$$d"); handing it to uid 1654"
            chown -R 1654:1654 "$$d"
          fi
        done
    volumes:
      - pulse:/pulse
      - historian:/historian
      - explorer:/explorer
      - atlas:/atlas
      - connect:/connect
      - bridge:/bridge
      - collector:/collector

  pulse:
    image: timebase/pulse:${TIMEBASE_TAG:-latest}
    deploy:
      resources:
        limits:
          cpus: "1"
          memory: 2048m
    hostname: pulse
    ports:
      - "4541:4541"
      - "4542:4542"
    restart: unless-stopped
    depends_on:
      volume-init:
        condition: service_completed_successfully
    volumes:
      - pulse:/pulse
    environment:
      - Certificates=/pulse/certificates
      - Settings=/pulse/settings
      - Config=/pulse/config
      - Data=/pulse/data
      - Logs=/pulse/logs
      # The names this host's certificate must carry, beyond localhost. Every
      # other container dials Pulse as `pulse`, and a certificate is only good
      # for the names inside it. TIMEBASE_HOST comes from .env and defaults to
      # localhost. See Step 3.
      - Cert__Names=pulse,${TIMEBASE_HOST:-localhost}
      # Where a BROWSER reaches Pulse. Without it the sign-in redirect sends
      # your browser to https://pulse:4542, which resolves only inside this
      # network. It also names Pulse in every token. See Step 6.
      - Auth__PublicAddress=https://${TIMEBASE_HOST:-localhost}:4542
      # Where Pulse's own assistant reaches Pulse: always itself, so it never
      # depends on reaching its own public name from inside the container.
      - Gage__SelfAddress=https://localhost:4542

  historian:
    image: timebase/historian:${TIMEBASE_TAG:-latest}
    deploy:
      resources:
        limits:
          cpus: "1"
          memory: 4096m
    hostname: historian
    ports:
      - "4511:4511"
      - "4512:4512"
    restart: unless-stopped
    depends_on:
      volume-init:
        condition: service_completed_successfully
    stop_grace_period: 60s
    volumes:
      - historian:/historian
    environment:
      - Certificates=/historian/certificates
      - Settings=/historian/settings
      - Pulse__Cert__Names=historian,${TIMEBASE_HOST:-localhost}
      - Data=/historian/data
      - Logs=/historian/logs

  explorer:
    image: timebase/explorer:${TIMEBASE_TAG:-latest}
    deploy:
      resources:
        limits:
          cpus: "1"
          memory: 2048m
    hostname: explorer
    ports:
      - "4531:4531"
      - "4532:4532"
    restart: unless-stopped
    depends_on:
      volume-init:
        condition: service_completed_successfully
    volumes:
      - explorer:/explorer
    environment:
      - Certificates=/explorer/certificates
      - Settings=/explorer/settings
      - Pulse__Cert__Names=explorer,${TIMEBASE_HOST:-localhost}
      - Config=/explorer/config
      - Data=/explorer/data
      - Logs=/explorer/logs

  atlas:
    image: timebase/atlas:${TIMEBASE_TAG:-latest}
    deploy:
      resources:
        limits:
          cpus: "1"
          memory: 4096m
    hostname: atlas
    ports:
      - "4551:4551"
      - "4552:4552"
    restart: unless-stopped
    depends_on:
      volume-init:
        condition: service_completed_successfully
    volumes:
      - atlas:/atlas
    environment:
      - Certificates=/atlas/certificates
      - Settings=/atlas/settings
      - Pulse__Cert__Names=atlas,${TIMEBASE_HOST:-localhost}
      - Config=/atlas/config
      - Logs=/atlas/logs
      - Data=/atlas/data

  connect:
    image: timebase/connect:${TIMEBASE_TAG:-latest}
    deploy:
      resources:
        limits:
          cpus: "1"
          memory: 2048m
    hostname: connect
    ports:
      - "4561:4561"
      - "4562:4562"
    restart: unless-stopped
    depends_on:
      volume-init:
        condition: service_completed_successfully
    volumes:
      - connect:/connect
    environment:
      - Certificates=/connect/certificates
      - Settings=/connect/settings
      - Pulse__Cert__Names=connect,${TIMEBASE_HOST:-localhost}
      - Config=/connect/config
      - Logs=/connect/logs
      - Data=/connect/data

  bridge:
    image: timebase/bridge:${TIMEBASE_TAG:-latest}
    deploy:
      resources:
        limits:
          cpus: "1"
          memory: 2048m
    hostname: bridge
    ports:
      - "4571:4571"
      - "4572:4572"
    restart: unless-stopped
    depends_on:
      volume-init:
        condition: service_completed_successfully
    volumes:
      - bridge:/bridge
    environment:
      - Certificates=/bridge/certificates
      - Settings=/bridge/settings
      - Pulse__Cert__Names=bridge,${TIMEBASE_HOST:-localhost}
      - Config=/bridge/config
      - Logs=/bridge/logs
      - Data=/bridge/data

  collector:
    image: timebase/collector:${TIMEBASE_TAG:-latest}
    deploy:
      resources:
        limits:
          cpus: "1"
          memory: 4096m
    hostname: collector
    ports:
      - "4521:4521"
      - "4522:4522"
    restart: unless-stopped
    depends_on:
      volume-init:
        condition: service_completed_successfully
    volumes:
      - collector:/collector
    environment:
      - Active=false
      - Certificates=/collector/certificates
      - Settings=/collector/settings
      - Pulse__Cert__Names=collector,${TIMEBASE_HOST:-localhost}
      - Config=/collector/config
      - Data=/collector/data
      - Logs=/collector/logs

volumes:
  pulse:
  historian:
  explorer:
  atlas:
  connect:
  bridge:
  collector:
Three things about this file are worth understanding before you run it.
The services carry no container_name. A container name is global in Docker rather than scoped to a project, so a hard-coded pulse would collide with any other container called pulse on the host. Compose generates timebase-pulse-1 instead, from the project name timebase and the service name, and the hostname entries are what the components still use to find each other. Volumes and networks carry the same timebase prefix.
Address services through Compose, not by container name. Because the names are generated, use docker compose cp, docker compose exec, docker compose restart and docker compose logs, all of which take the short service name - pulse, atlas - and run them from the directory holding your docker-compose.yml.
Every service gets a named volume. The volumes: block at the bottom declares all seven, and each service mounts its own. This is what lets you replace a container - to take a newer image, for example - without losing its settings, configuration and data. Learn more about Docker volumes.
volume-init runs first and has finished by the time you look. From 2.0 every image runs as an unprivileged user, app (uid 1654), rather than as root. A named volume that Compose creates for this file is owned by that user from the start, so on a fresh installation the step finds nothing to do. Its job is the upgrade: a volume written by an earlier release, which ran as root, is not writable by app, and the component would exit with a message naming the directory. volume-init runs as root before any other service, hands such a volume over, and exits; every other service waits for it. It is absent from docker compose ps, which lists running containers only, and docker compose ps -a shows it as Exited (0). If you deploy without this file - your own Compose file, a bind mount, a Kubernetes manifest - see Timebase 2.0 Release Notes for the one-off fix you have to run yourself.
Every image takes its tag from one variable. TIMEBASE_TAG defaults to latest, which always points at the newest 2.0 release, so a fresh installation needs no entry for it. To stay on a particular release, set it in .env, for example TIMEBASE_TAG=2.0.0. Either way the whole stack moves together - you cannot end up with one component on a different release than the rest.
Most environment variables set paths, not behavior. Certificates, Settings, Config, Data and Logs tell each component where inside its volume to keep each kind of file. Leave them as they are unless you have a reason to change the layout.
A few carry your address, and they all read TIMEBASE_HOST. Auth__PublicAddress is where a browser reaches Pulse. Cert__Names on Pulse and Pulse__Cert__Names on each other component list the names that component's certificate must carry beyond localhost: its own service name, because every container dials its peers by it, and your address, so that a browser opening it finds its name. A name becomes a DNS entry in the certificate and an IP address becomes an IP entry. Gage__SelfAddress pins where Pulse's own assistant calls Pulse, to Pulse itself, so that it never depends on reaching its own public name from inside the container. The variable defaults to localhost, which is why a local run sets nothing.
The Collector starts with Active=false. It runs, but collects nothing until you configure it. That is deliberate: it lets you bring the whole platform up first and choose your data source afterwards, rather than having a Collector search for a broker that does not exist yet.
service names in this file - pulse, historian, atlas and the rest - are also the hostnames components use to find each other on the Docker network. When you configure a component later, use the service name rather than localhost, because inside a container localhost is that container itself. See Docker Network Settings.
Step 4: Pull the images and start Pulse#
Pulse starts first, and alone, so that everything it needs can be settled before any other component exists. You start the rest in Step 9.
The images use the latest tag, the newest 2.0 release, and every start below pulls with --pull always, so a host that already holds an older image is brought up to date. To stay on a particular release instead, pin it in a .env file beside your docker-compose.yml, and every service picks it up:
echo "TIMEBASE_TAG=2.0.0" > .env
Note that the Connect image is timebase/connect; there is no timebase/connector repository.
If you chose in Step 1 to let other computers reach Timebase, add the address too, written as you will type it in a browser: lower case, with no https://, no port and no trailing slash. Skip this if you chose only this computer.
echo "TIMEBASE_HOST=timebase.yourcompany.com" >> .env
Confirm what Compose resolved before you bring anything up:
docker compose config | grep -E "image:|Auth__PublicAddress|Cert__Names"
All eight image: lines should show the same tag - one per component, plus volume-init, which reuses the
Pulse image. Pulse's Auth__PublicAddress should read https:// and your address with :4542, its Cert__Names should end with your address, and so should each component's Pulse__Cert__Names. With nothing set, the address reads localhost.
Now start Pulse:
docker compose -f docker-compose.yml up --detach --pull always pulse
That pulls the Pulse image, creates the seven named volumes, and starts Pulse in the background. Naming a service starts only that service and what it depends on, so the other six stay down for now. The first run takes a minute or two while the image downloads.
Step 5: Confirm Pulse is running#
Check what came up. Run this from the directory holding your docker-compose.yml, so Compose knows which stack you mean:
docker compose ps
Only Pulse should be listed, with its STATUS column reading Up and a duration - Up About a minute. volume-init ran before it and exited: docker compose ps -a shows it as Exited (0), and anything other than 0 there means a volume could not be repaired, so read docker compose logs volume-init. The SERVICE column carries the short name you use in every other command. All seven are below, although only Pulse is running yet:
| Service | What it is |
|---|---|
pulse |
Identity provider and certificate authority |
historian |
Time Series Historian |
explorer |
Explorer |
atlas |
Atlas |
connect |
Connect - brings outside data sources into Atlas |
bridge |
Bridge - writes Atlas values out to downstream targets |
collector |
Data Collector - logs a data source into the Historian |
volume-init |
One-off volume ownership fix; runs before the rest and exits, so it is not in this list |
If Pulse is missing or restarting, read its logs before changing anything. Name the service, not the container id:
docker compose logs pulse
⚠️ Deleting these containers without their volumes destroys your data. If you tear the platform down with docker compose down -v, the -v removes the volumes and everything in them. Back up first.
One container running is not yet a working platform. The other six do not exist yet, and every component here has authentication switched on, so none of them can sign anyone in until it holds its client secret. That is what the next steps set up: first Pulse, then a secret for each component.
Step 6: Check the token issuer#
Pulse is the identity provider, the certificate authority and the LLM gateway for the whole platform, so it is the first thing to configure and the only one that unlocks the rest.
The token issuer is how Pulse names itself: the iss claim it mints into every token, and the issuer its discovery document advertises. You do not set it. Pulse derives it from its public address, Auth:PublicAddress, plus /auth - and the Compose file sets that address from TIMEBASE_HOST: https://localhost:4542 unless you chose another address in Step 1. It is where your browser reaches Pulse.
It has to be a real address. Standard OpenID Connect and MCP clients load Pulse's discovery document from the issuer and refuse one whose issuer does not match where they loaded it from. Deriving it from the one address you already state is what keeps the two from drifting apart.
Confirm what your instance is publishing:
curl -sk https://localhost:4542/auth/.well-known/openid-configuration | python3 -m json.tool | grep -E '"(issuer|token_endpoint)"'
You should see the issuer on your Pulse address, which is localhost unless you chose another in Step 1. Pulse writes it in lower case. The token_endpoint follows the address you called, so from the Docker host it reads localhost whatever you chose:
"issuer": "https://localhost:4542/auth",
"token_endpoint": "https://localhost:4542/auth/token",
When you chose another address#
If other computers will use this deployment, the Compose file has already carried your address into Pulse's public address and into every certificate, so there is nothing to set. What is left is whether the address works from those computers. You are on the Docker host, where localhost works whatever you chose, so your own curl proves nothing here.
An IP address needs no lookup. A name does: check that it resolves on this machine, then open https://<address>:4542 from one of the other computers. You should see Pulse's sign-in, with a certificate warning until Step 8.
On Linux and macOS:
ping -c 1 <address>
On Windows, in PowerShell:
[System.Net.Dns]::GetHostAddresses('<address>') | Select-Object -ExpandProperty IPAddressToString
Either check always succeeds for this machine's own hostname, so it proves nothing about the other computers: each of them must resolve the name to the Docker host's LAN address.
If the page does not load from another computer, the usual cause is the Docker host's firewall: the HTTPS ports 4512, 4522, 4532, 4542, 4552, 4562 and 4572 must be reachable from them. If the name does not resolve, give it a DNS record. For a single machine you can map it in that machine's hosts file instead, using the Docker host's IP address, or 127.0.0.1 on the Docker host itself: If sign-in redirects you to a page that will not load has the commands.
the issuer follows the public address, so settle it before you connect components in Step 9 rather than afterwards. Changing it later invalidates every token already issued. To change it, edit TIMEBASE_HOST in .env and run docker compose up -d, which recreates what changed, then register the matching sign-in addresses again in Step 9.
Pulse's own assistant needs no entry anywhere: Gage__SelfAddress has it call Pulse on localhost, so it never has to resolve your address from inside the container.
Step 7: Sign in to Pulse and secure the administrator account#
With the issuer checked, sign in to Pulse and deal with the default credentials before anybody else can reach the instance.
Open Pulse in a browser:
https://<PulseAddress>:4542
Use the HTTPS port. Pulse also listens on 4541 for plain HTTP, which is useful for a first look but is not where you should be managing credentials.
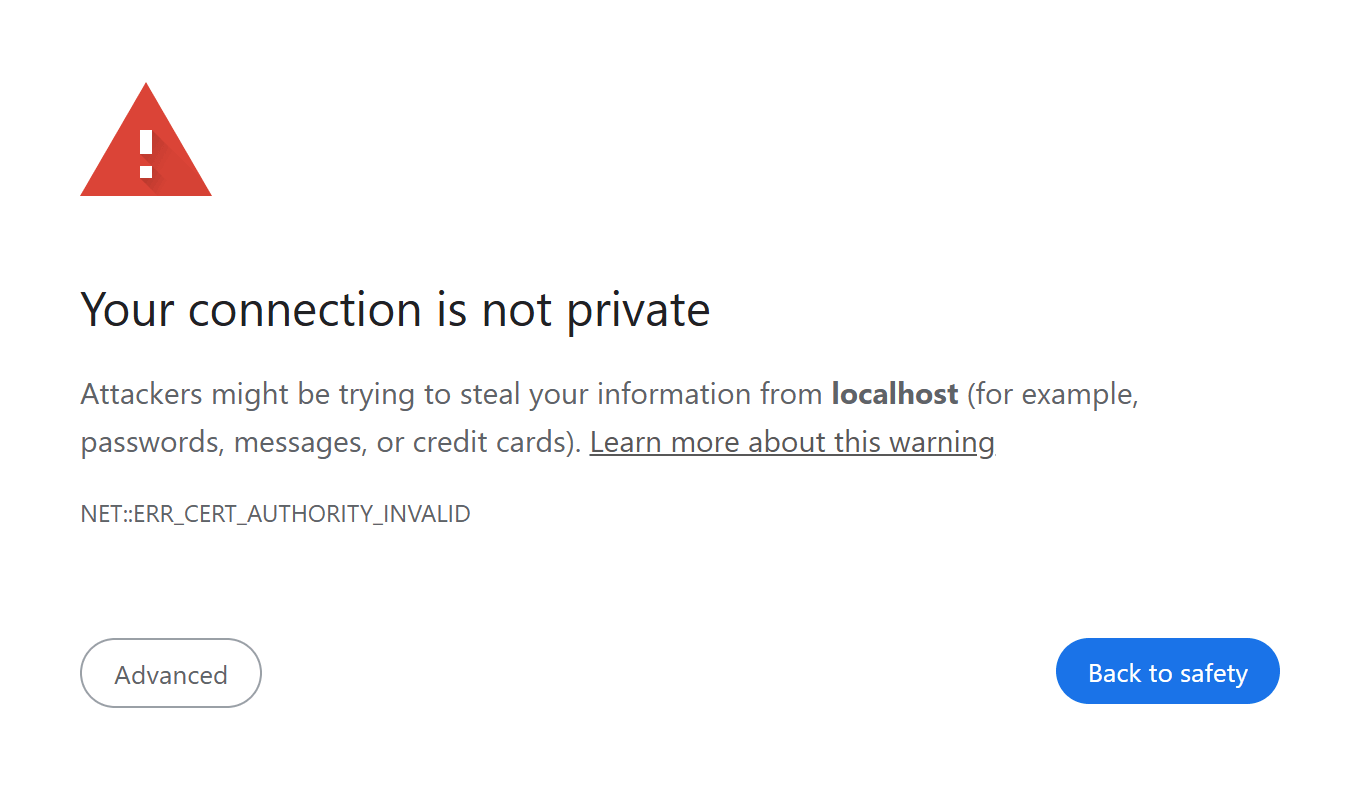
your browser will warn that the certificate is not trusted. That is expected on a fresh install - Pulse has generated its own certificate and nothing on your machine trusts it yet. Proceed through the warning for now, with Advanced and then the link to continue; Step 8 removes the warning properly.
Sign in with the first-run administrator#
On its very first startup, Pulse creates a single administrator account:
| Field | Value |
|---|---|
| Username | Administrator |
| Password | timebase |
The username is case-sensitive - it is Administrator, not administrator.
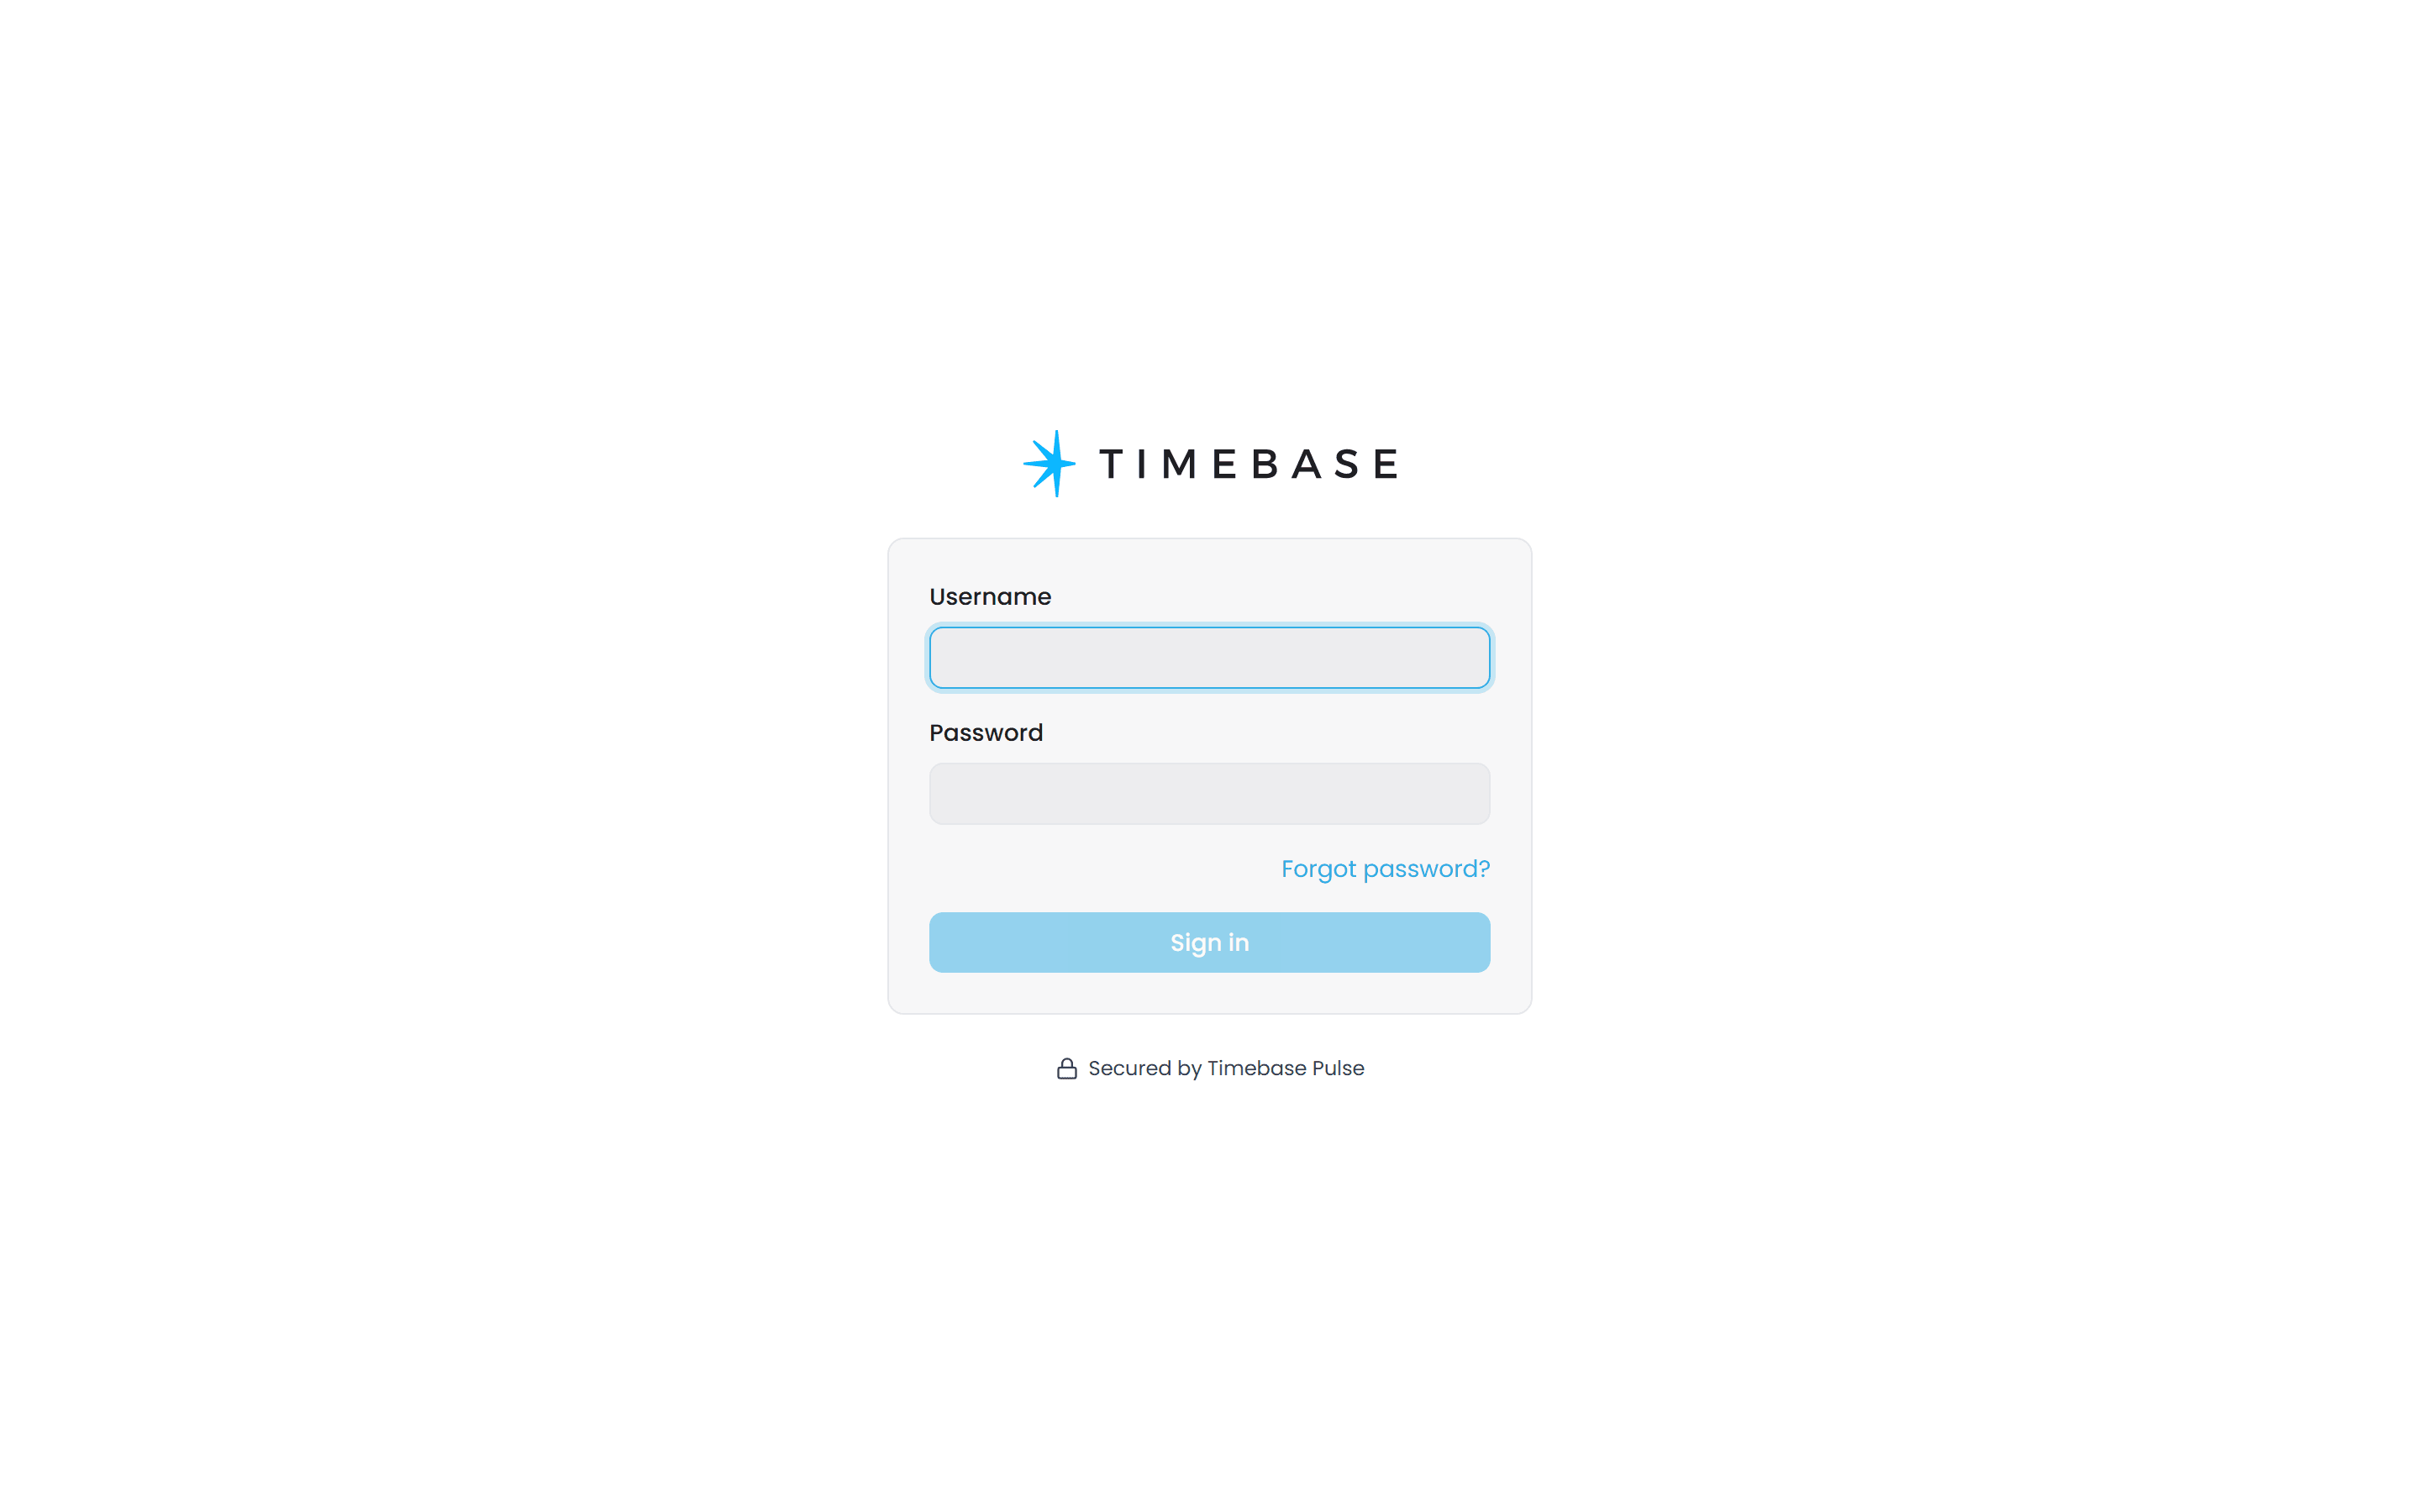
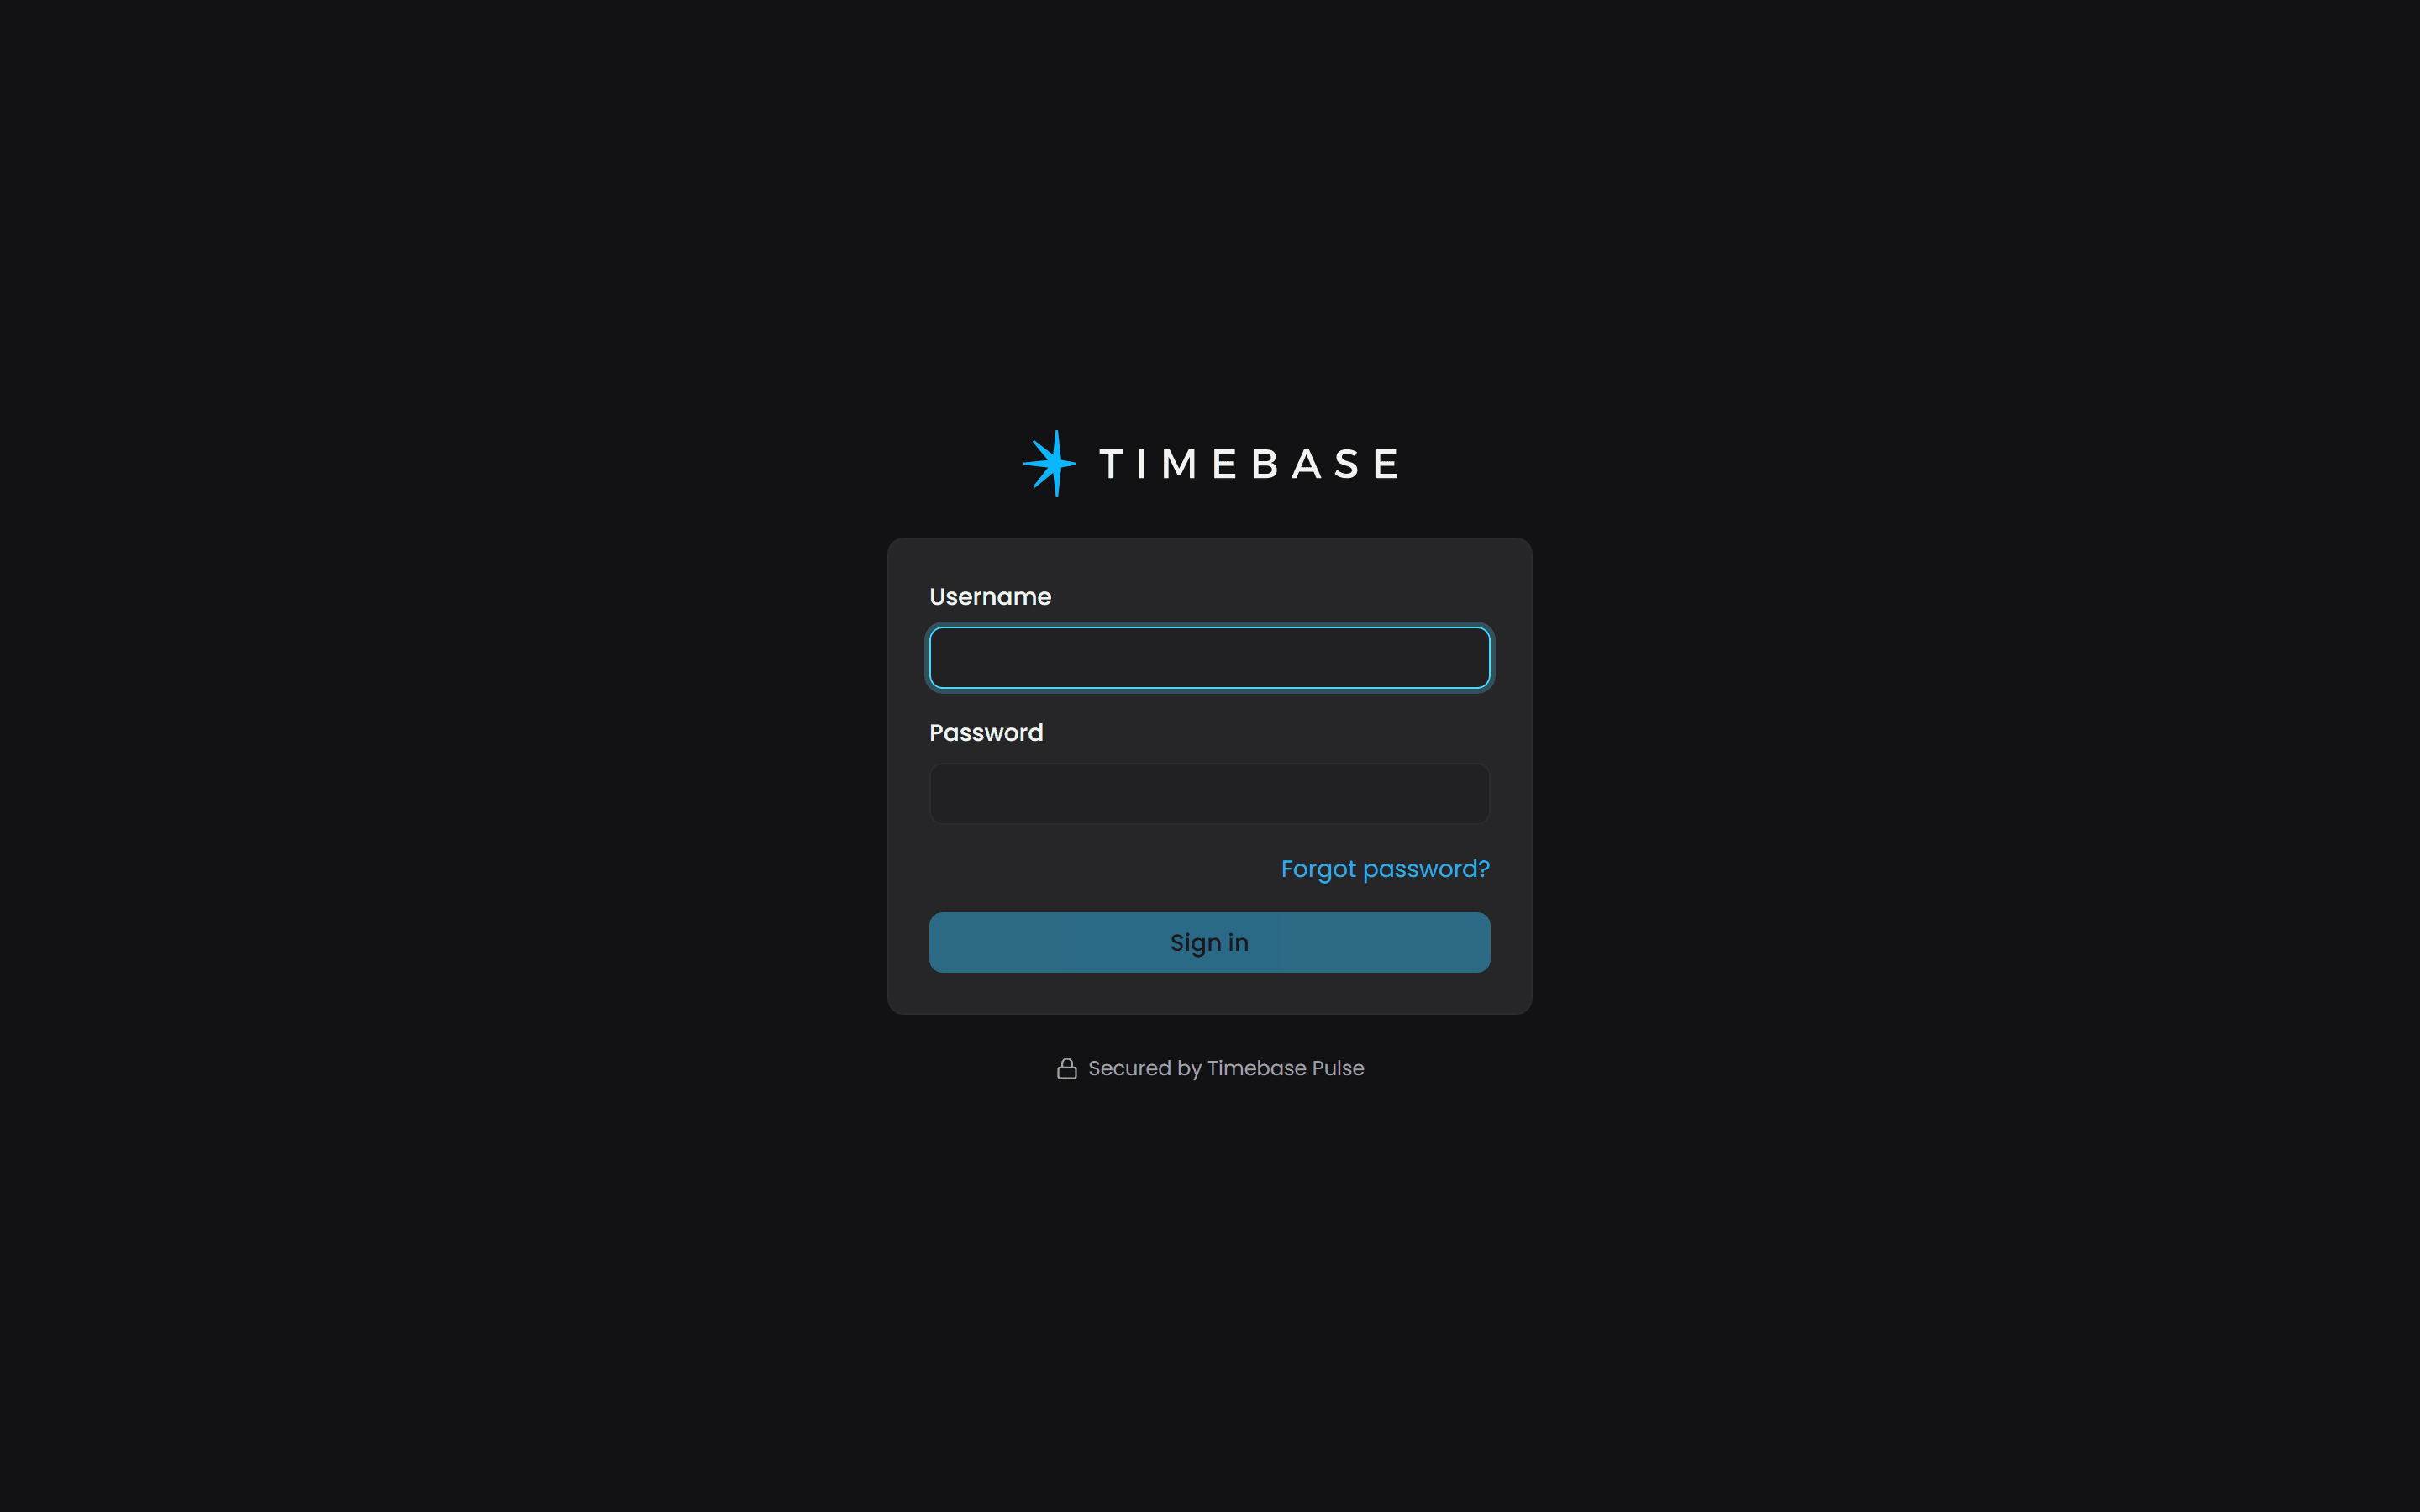
change this password before the instance is reachable by anyone else. Administrator / timebase is the documented default and is identical on every new installation, and this account controls the identity provider, the certificate authority and the LLM gateway for your entire stack. Treat changing it as part of installing Pulse, not as a follow-up task.
Change it from your own profile as soon as you are signed in: open the account menu at the bottom of the sidebar, select View profile, and use Reset password in the Security section. Pulse setup shows the page.
the first-run account is created only when the user store is empty. If you delete the user store and restart, Pulse creates Administrator / timebase again - which makes it a first-run convenience, not a recovery mechanism, and means deleting the user store reopens the default credential.
Step 8: Trust the Pulse certificate authority#
Pulse runs a root certificate authority, and it issues a certificate to every component automatically. Only one part of this is yours to do.
What Pulse handles for you#
Nothing on this list needs your attention - it is here so you can recognize it in a log and know it is working.
On startup, each component generates its own private key, sends Pulse a certificate signing request, and receives a signed certificate back. It then keeps that certificate current: components subscribe to Pulse for certificate notifications and reload a replacement without restarting. You never create, copy, or bind certificates for historian, atlas, explorer or any of the others.
if Pulse is briefly unreachable, a component keeps running on its own self-signed certificate and retries with a backoff. It stays fully functional - browsers will simply warn about its certificate until the sync succeeds.
Download the root CA certificate#
Installing Pulse's root CA on the machine you browse from clears the certificate warning from Step 7 for every component at once. It is the only certificate work you do by hand.
-
Change to the directory you want the certificate saved in:
cd /path/of/your/choosing -
Download the certificate:
curl -k https://<PulseAddress>:4542/api/ca -o pulse-ca.cerThe
-kflag skips validation for this one request, which is necessary because the certificate you are fetching is the thing that would validate it. -
Note the full path, which the install command may need:
pwdOn Windows, the install command needs the
C:\...form of that path, not Git Bash's/c/.... PowerShell'spwdalready prints it. In Git Bash, runpwd -Winstead, which printsC:/..., and write it with backslashes.
Install it in your machine's trust store#
run the install command from the directory you downloaded to. It needs elevated rights, and an elevated shell does not inherit your current directory - a new Administrator PowerShell session starts in C:\Windows\System32, and sudo -i puts you in root's home. After elevating, cd back to that directory, or replace pulse-ca.cer with the full path from pwd.
Run the one command for your operating system.
On Windows, in an Administrator PowerShell session:
Import-Certificate -FilePath pulse-ca.cer -CertStoreLocation Cert:\LocalMachine\Root
On macOS:
sudo security add-trusted-cert -d -r trustRoot -k /Library/Keychains/System.keychain pulse-ca.cer
On Debian or Ubuntu:
sudo cp pulse-ca.cer /usr/local/share/ca-certificates/ && sudo update-ca-certificates
On RHEL or CentOS:
sudo cp pulse-ca.cer /etc/pki/ca-trust/source/anchors/ && sudo update-ca-trust
Then reload the Pulse UI. A green padlock and no warning means the root CA is trusted, and every other component's interface will be trusted too.
The other computers#
If you chose in Step 1 to let other computers use Timebase, each of them needs the same root CA, or its browser warns on every page. They download it from https://<address>:4542/api/ca and install it with the command for their own operating system above. Nothing waits on this: Timebase works without it, and it only quiets the warnings.
If the browser still says "Not secure"#
If it is a component other than Pulse, finish Step 9 first. The other six start there, and a component only requests its Pulse-signed certificate once it holds its client secret. Until then it serves a self-signed certificate of its own, so it keeps warning however well the root CA is installed. The warning clears on its own a few seconds after the secret is applied.
Quit the browser completely and reopen it. Browsers read the operating system's trust store when they start, and they cache the result of validating a certificate - so a root CA you installed a moment ago is not picked up by a browser that was already running. Reloading the page is not enough, and neither is closing the tab.
Quit the whole application, not just the window: on macOS use Cmd+Q rather than closing the last window. On Windows, closing every window is still not enough, because Edge and Chrome keep running in the background and so keep the trust they read when they started. Type edge://restart in Edge's address bar (chrome://restart in Chrome), which restarts the browser and reopens your tabs.
If it persists after a full restart, the certificate did not land in the right store. Re-run the install command for your operating system, checking that it reported success, and confirm you pointed it at the file you actually downloaded rather than a stale copy from an earlier attempt.
Why two Pulse endpoints allow anonymous callers#
If you audit Pulse's routes you will find two that accept unauthenticated callers. Both are safe, and both are why the automatic issuance above can work at all - a component has to fetch trust material before it holds any credential.
GET /api/ca returns the root CA's public certificate. It carries no private key, cannot sign anything, and is public information by definition.
POST /api/ca/sign accepts a certificate signing request, which contains only a public key and metadata. No secret is exchanged, and the certificate it returns is useless without the private key that only the requester holds.
Step 9: Give each component its client secret#
Every component needs a client secret before it can authenticate to Pulse, and you have to put it there by hand. Nothing about this happens on its own, and until it is done you cannot sign in to that component at all.
Pulse seeded one OAuth client per component when it first started, so the client each Timebase component needs already exists. What is missing is the secret. Pulse generates a random secret per installation and never prints it, while every component ships with an empty one - and an empty string never matches a generated secret. The token exchange fails, and keeps failing, until you copy the secret across.
Only Pulse is running, so the order here is: finish everything Pulse needs first - the sign-in addresses and the AI provider below - then start the other six, then give each its secret.
do not create these clients by hand. They already exist. Adding your own either collides with the seeded client, or leaves behind a second registration that nothing ever uses.
The seeded clients#
| Component | Client Id | Seeded redirect URI |
|---|---|---|
| Historian | Historian |
https://localhost:4512/callback |
| Collector | Collector |
https://localhost:4522/callback |
| Explorer | Explorer |
https://localhost:4532/callback |
| Pulse's own assistant | Pulse |
none - client_credentials only |
| Atlas | Atlas |
https://localhost:4552/callback |
| Connect | Connect |
https://localhost:4562/callback |
| Bridge | Bridge |
https://localhost:4572/callback |
the Pulse client is the one you never touch. Pulse's own assistant uses it over loopback and reads its secret straight from its own client store, so nothing needs copying and Pulse's settings file carries no Gage connection settings at all.
If other computers will use it: register their sign-in addresses#
Skip this if you chose only this computer in Step 1.
Pulse accepts a sign-in only for an address registered on the client, and the clients ship with the localhost ones above. No setting adds more, so for each of the six components you add the address people will use:
- In Pulse, open Clients and choose the client.
- Choose Edit, and in Redirect URIs add one line from the table below.
- Save. Keep the
https://localhost:...line that is already there.
| Client | Add this to Redirect URIs |
|---|---|
Historian |
https://<address>:4512/callback |
Collector |
https://<address>:4522/callback |
Explorer |
https://<address>:4532/callback |
Atlas |
https://<address>:4552/callback |
Connect |
https://<address>:4562/callback |
Bridge |
https://<address>:4572/callback |
Use the same address, in the same case, as the one in your .env. Leave the Pulse client alone.
miss one, and signing in to that component fails after the Pulse sign-in, on a page reading Client 'Explorer' does not support the specified redirect Uri. The fix is always the same: add the line to that client.
While you are in Pulse: the AI provider#
Skip this if you chose to leave the assistant for later in Step 1. Doing it now, while Pulse is the only thing running, means the components pick up the finished catalogue the first time they start.
Anthropic. Pulse already has an Anthropic provider waiting for a key. Open Gage, then Providers, select it, and under API key choose Set new key, paste your key, and choose Set key. Entering a key never changes whether a provider is enabled.
Another provider. Open Gage, then Providers, and choose Add provider. In the New provider drawer, fill in:
| Field | What to enter |
|---|---|
| Provider Id | A short lower-case name of your own, such as openai. It becomes the first half of the model's handle and cannot be changed later |
| Display Name | A label for people, such as OpenAI |
| Wire | OpenAI for OpenAI, for Google Gemini's OpenAI-compatible address and for servers such as Ollama: the wire is the shape of the requests, not the company. Anthropic only for Anthropic's own API |
| Endpoint | The provider's base address, such as https://api.openai.com |
| Upstream Path | Blank, unless the provider serves requests at a non-standard path: Configuring Gage LLM providers and models has worked examples |
| API Key | The provider's key, or blank for a server that needs none |
| Logical Id | Under Logical models: a short lower-case name for the model, such as smart. The handle is the Provider Id and this, joined by a slash: openai/smart |
| Real Model Id | The model name the provider expects, such as gpt-4o |
| Default Model | Turn this on. See below |
Turn on Default Model, or the assistant keeps using the seeded model. Until a default is marked, Pulse uses the alphabetically first handle in the catalogue. anthropic/claude sorts ahead of almost anything and has no key, so every question would fail against it. Marking your model moves the default for every assistant in the installation.
a model on the Docker host itself. Pulse runs in a container, where localhost is the container and not your machine. Use an address the container can reach: http://host.docker.internal:<port> on Docker Desktop (Windows and macOS), or the host's own IP address on Linux. The server must also listen on more than its own loopback address: for Ollama, set OLLAMA_HOST=0.0.0.0. A provider in the cloud needs only outbound internet access from the Docker host.
Confirm it works before you leave Pulse. Choose Ask Gage in Pulse's header (administrators only) and ask it anything. An answer means the key works. An authentication error means it does not.
Start the other six#
With Pulse configured, start the rest. Pulse is already running and is left alone:
docker compose -f docker-compose.yml up --detach --pull always
That pulls the six remaining images, which takes a few minutes, and starts them. Run docker compose ps: all seven services should read Up. Each of the six now shows a Pulse setup form in place of its sign-in, waiting for its secret, which the next two sections supply.
on Windows, pulling several images at once can fail with error getting credentials ... The paging file is too small for this operation to complete from Docker Desktop's credential helper. It is transient. Pull one image at a time (docker compose pull historian, then the next) and run the up again without --pull always.
Copy the secret out of Pulse#
- In Pulse, open Clients and select the client named after your component.
- The secret is masked in the Security section at the bottom of the page. Reveal shows it, Copy puts it on the clipboard.
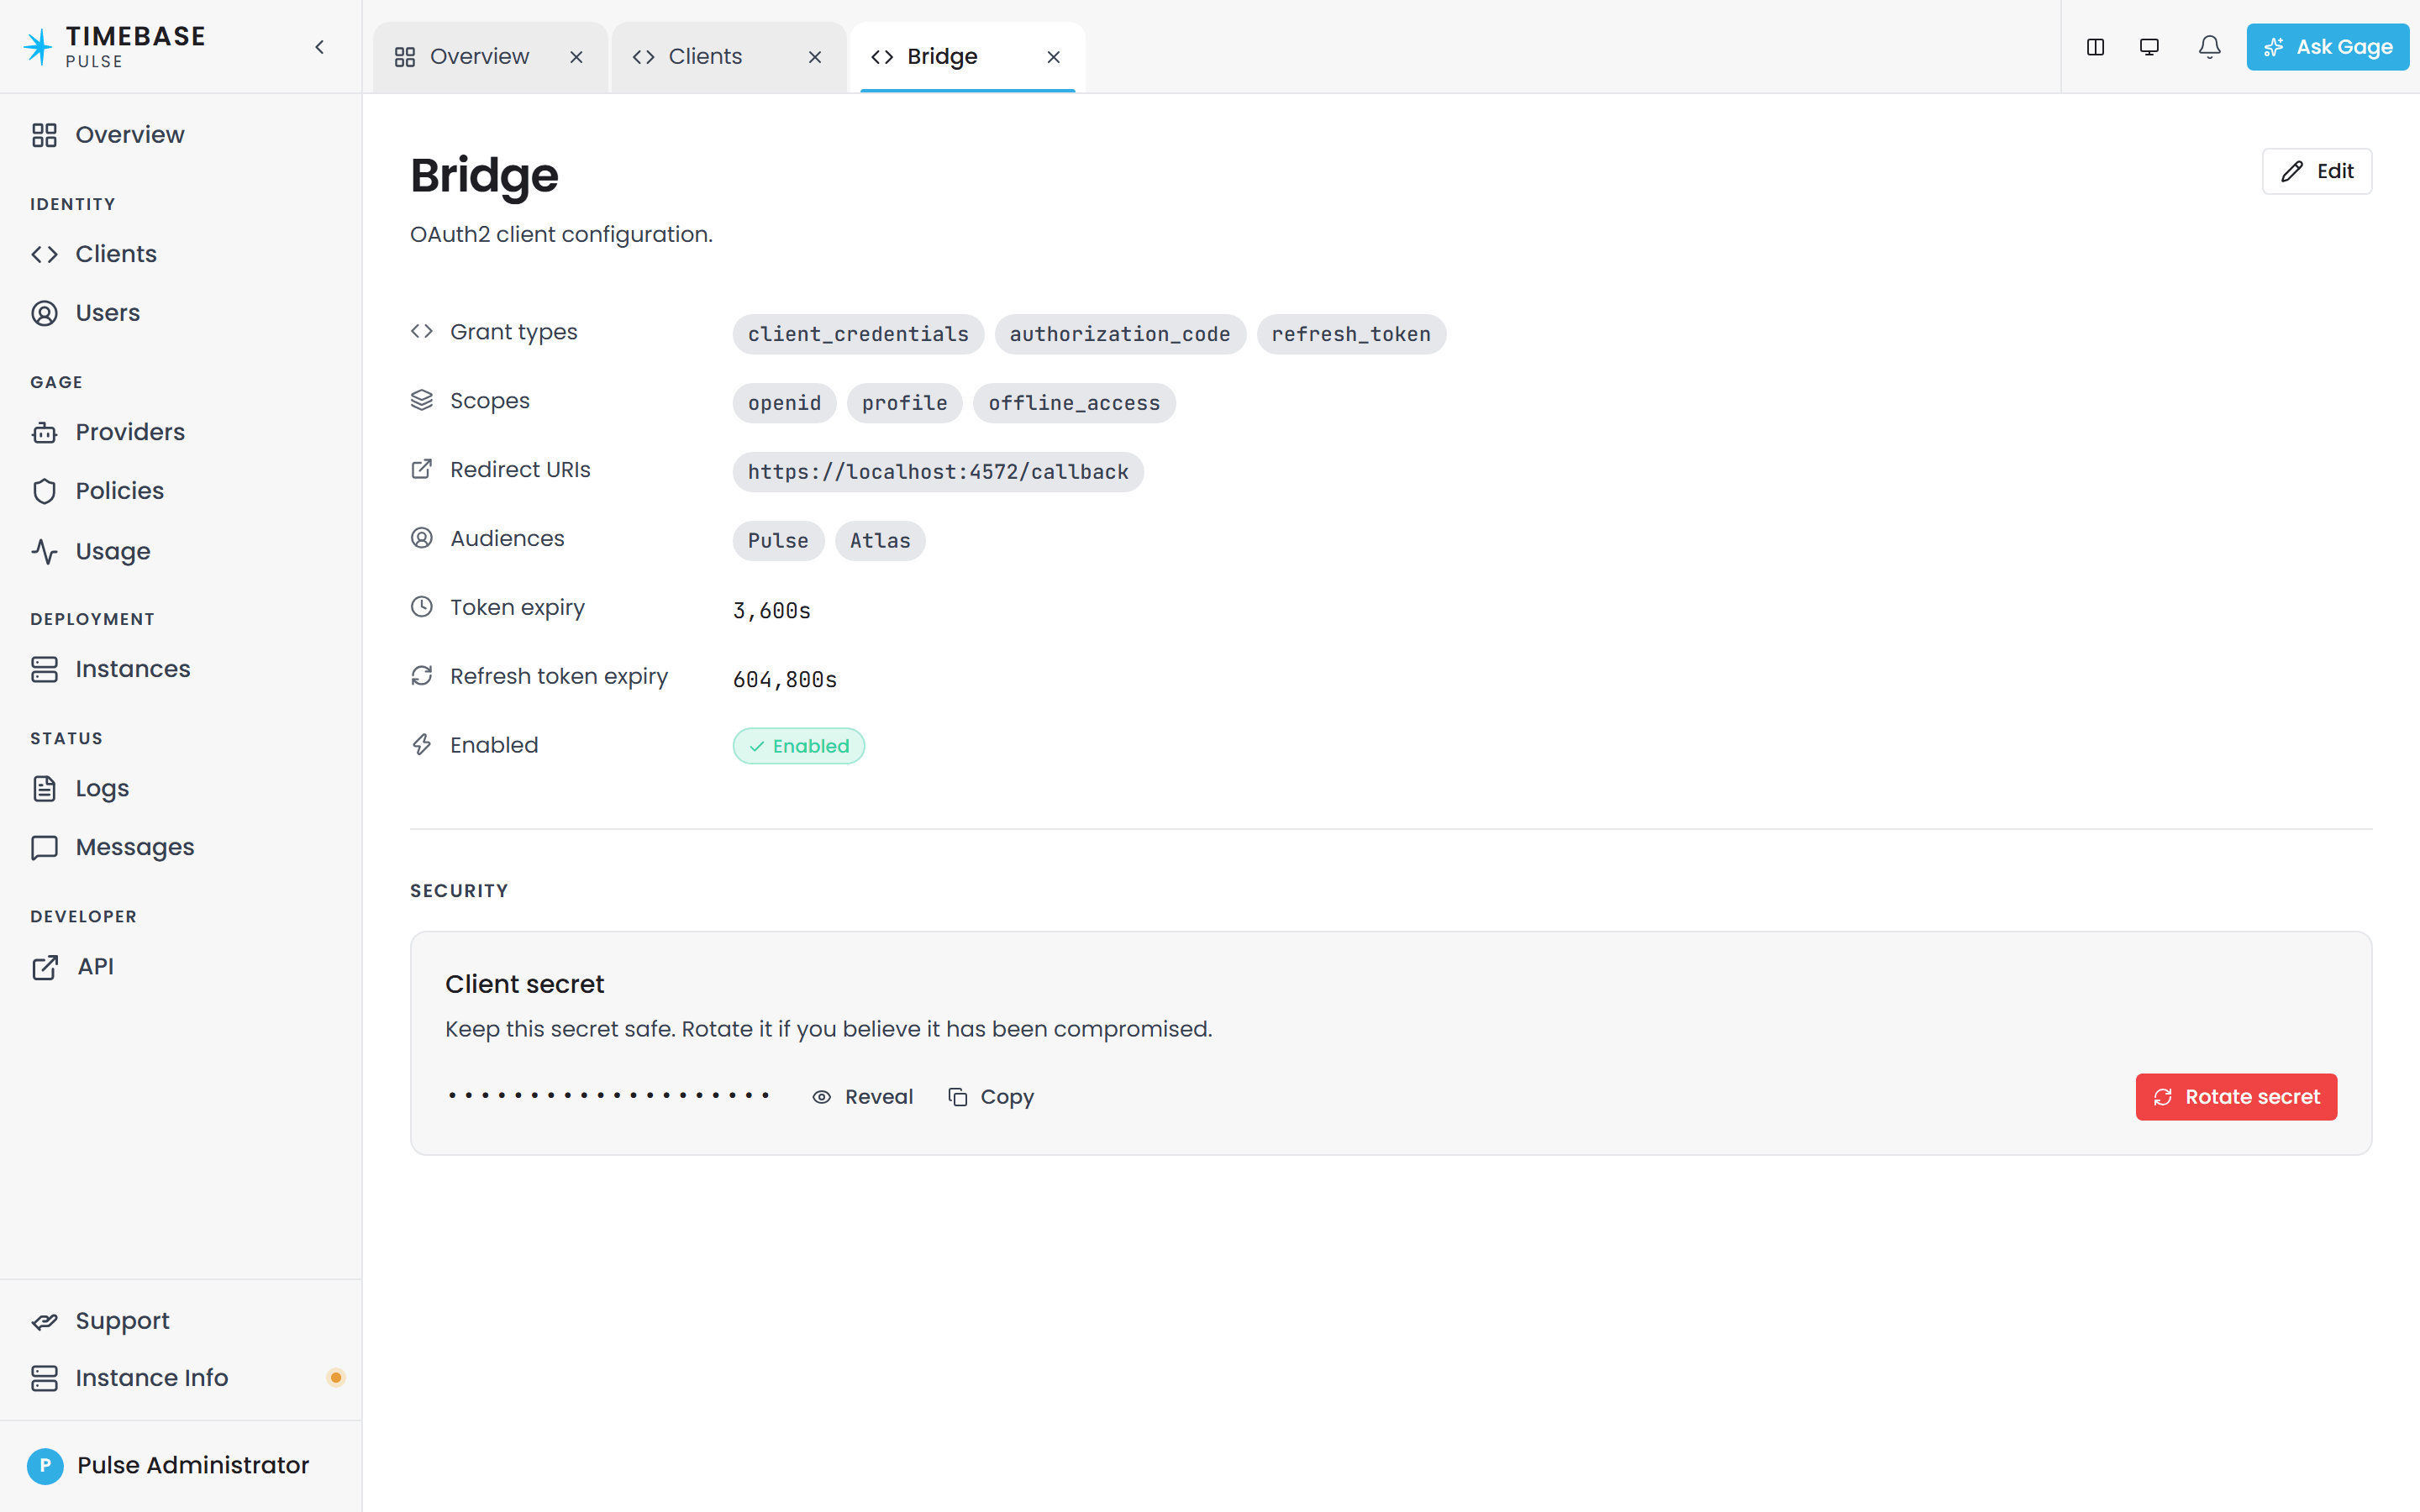
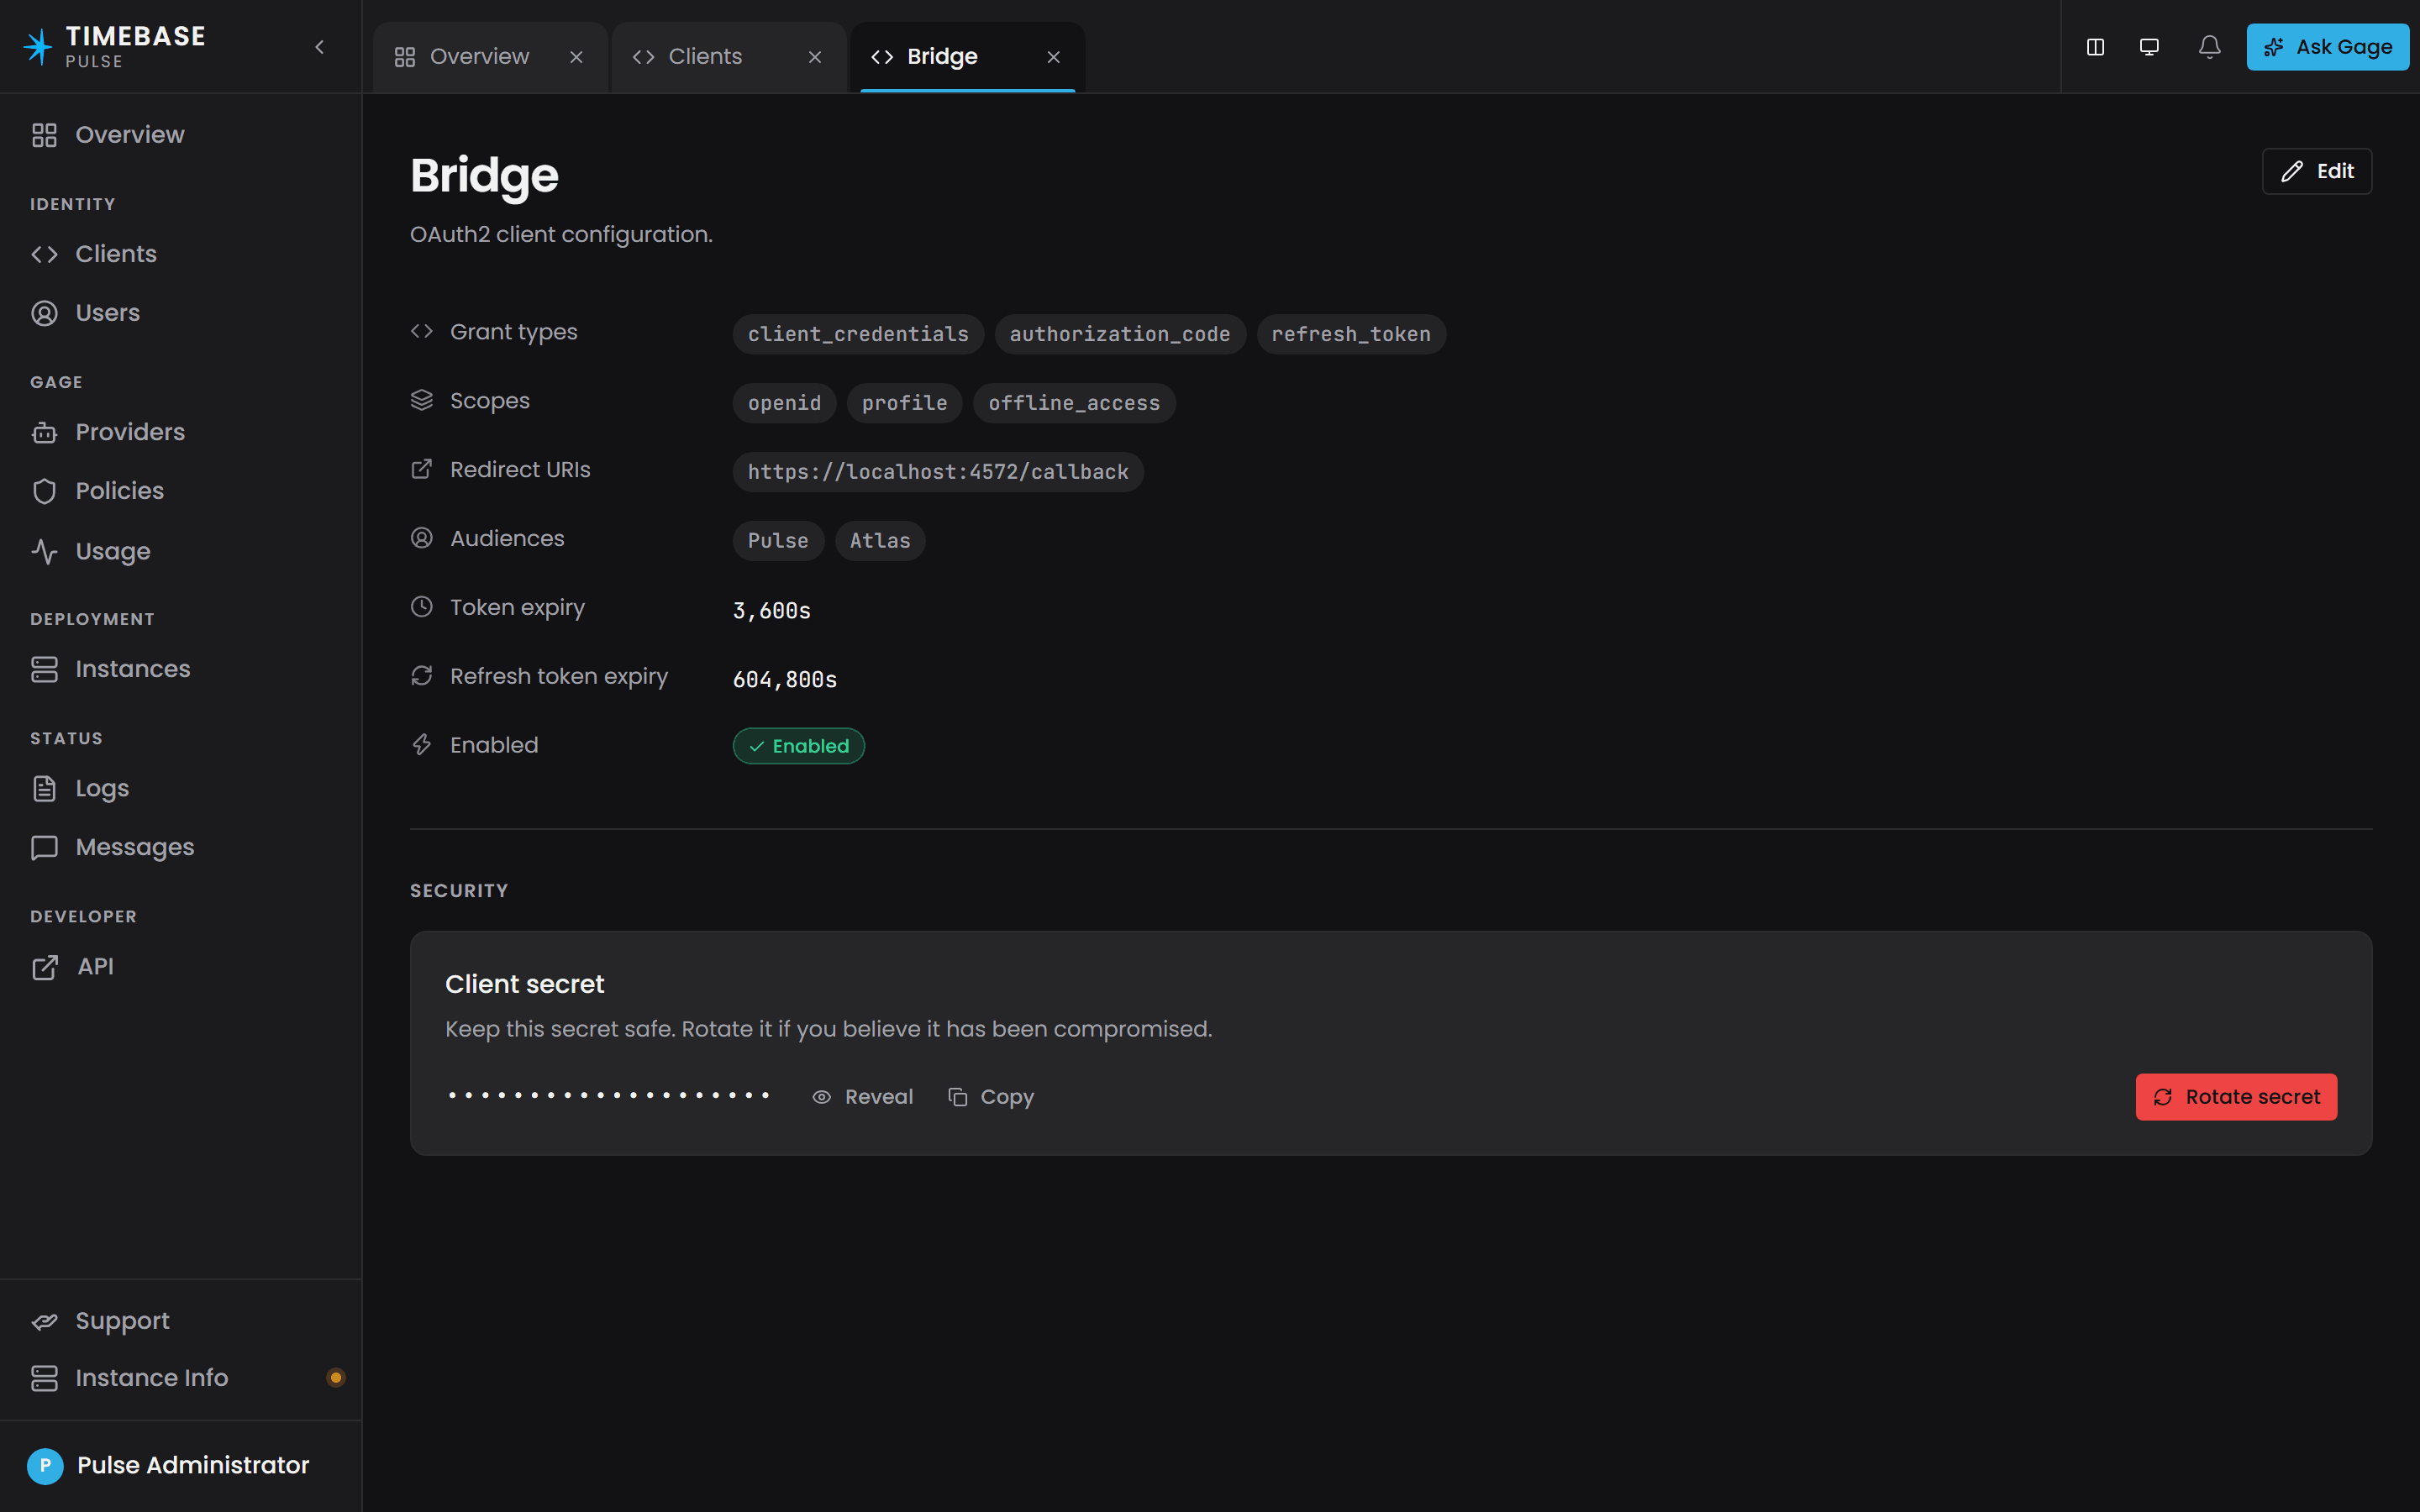
do not rotate the secrets. Pulse generated every one when it first started, so they are all new and there is nothing to replace.
Paste the secret into the component's setup form#
While Pulse rejects a component's client, that component's own interface shows a Pulse setup form instead of sending you to sign in. Open the component - https://localhost:4552 for Atlas, or your own address if you chose one in Step 1, and so on down the port table - paste the secret you copied from Pulse into Client secret, and select Save and sign in. The component checks the secret against Pulse, writes it into its settings.config, and switches to the normal sign-in without a restart. Repeat for each of the six.
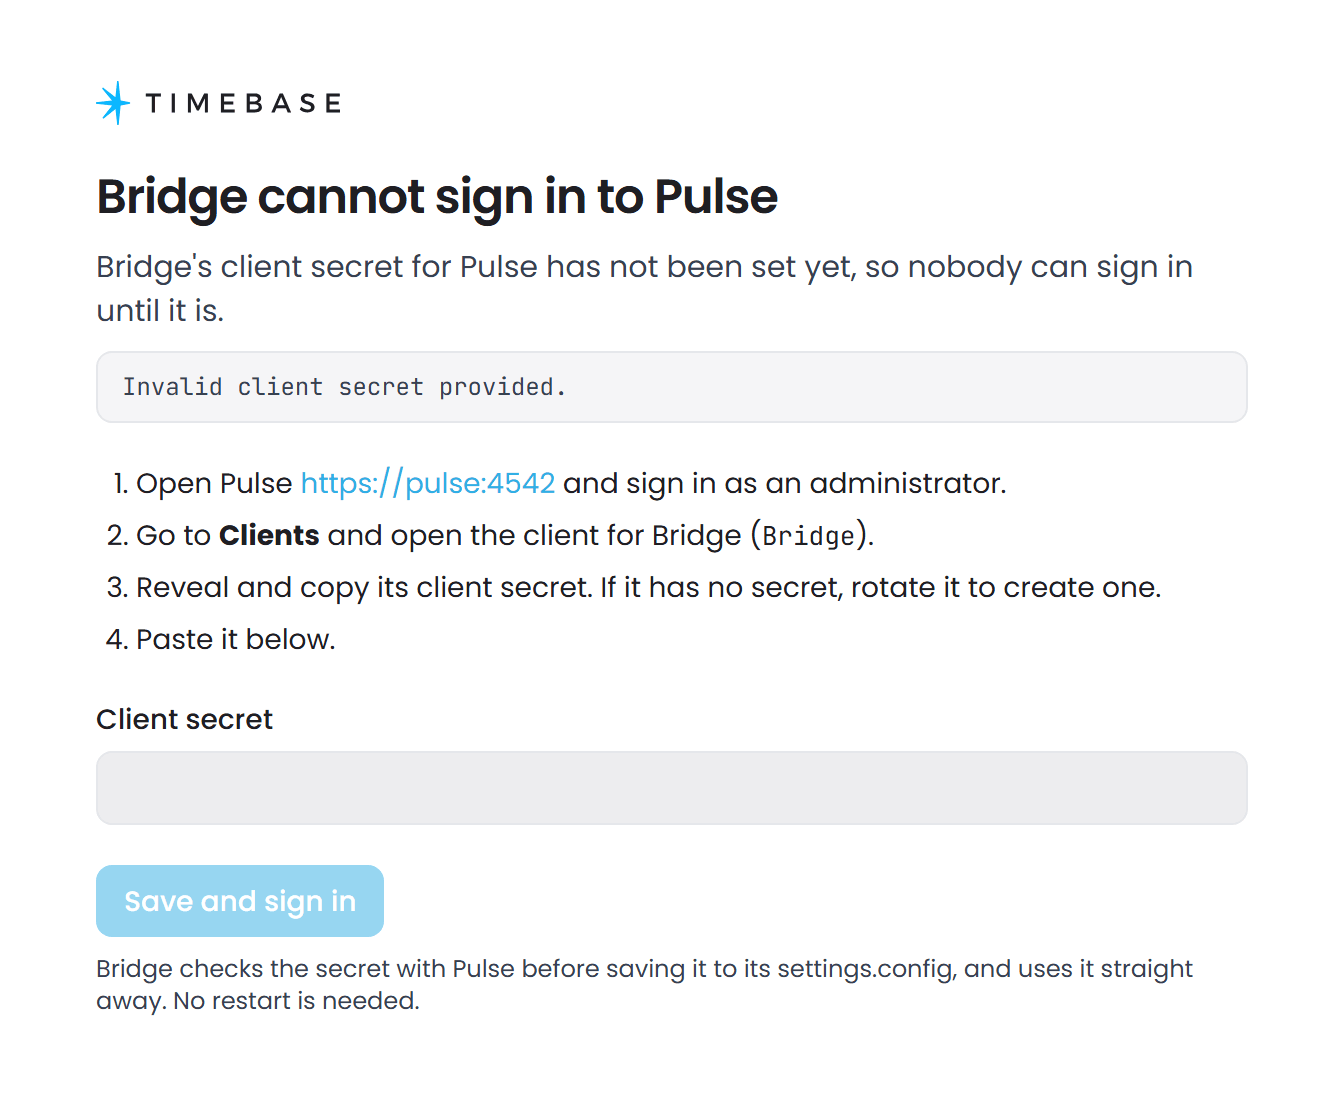
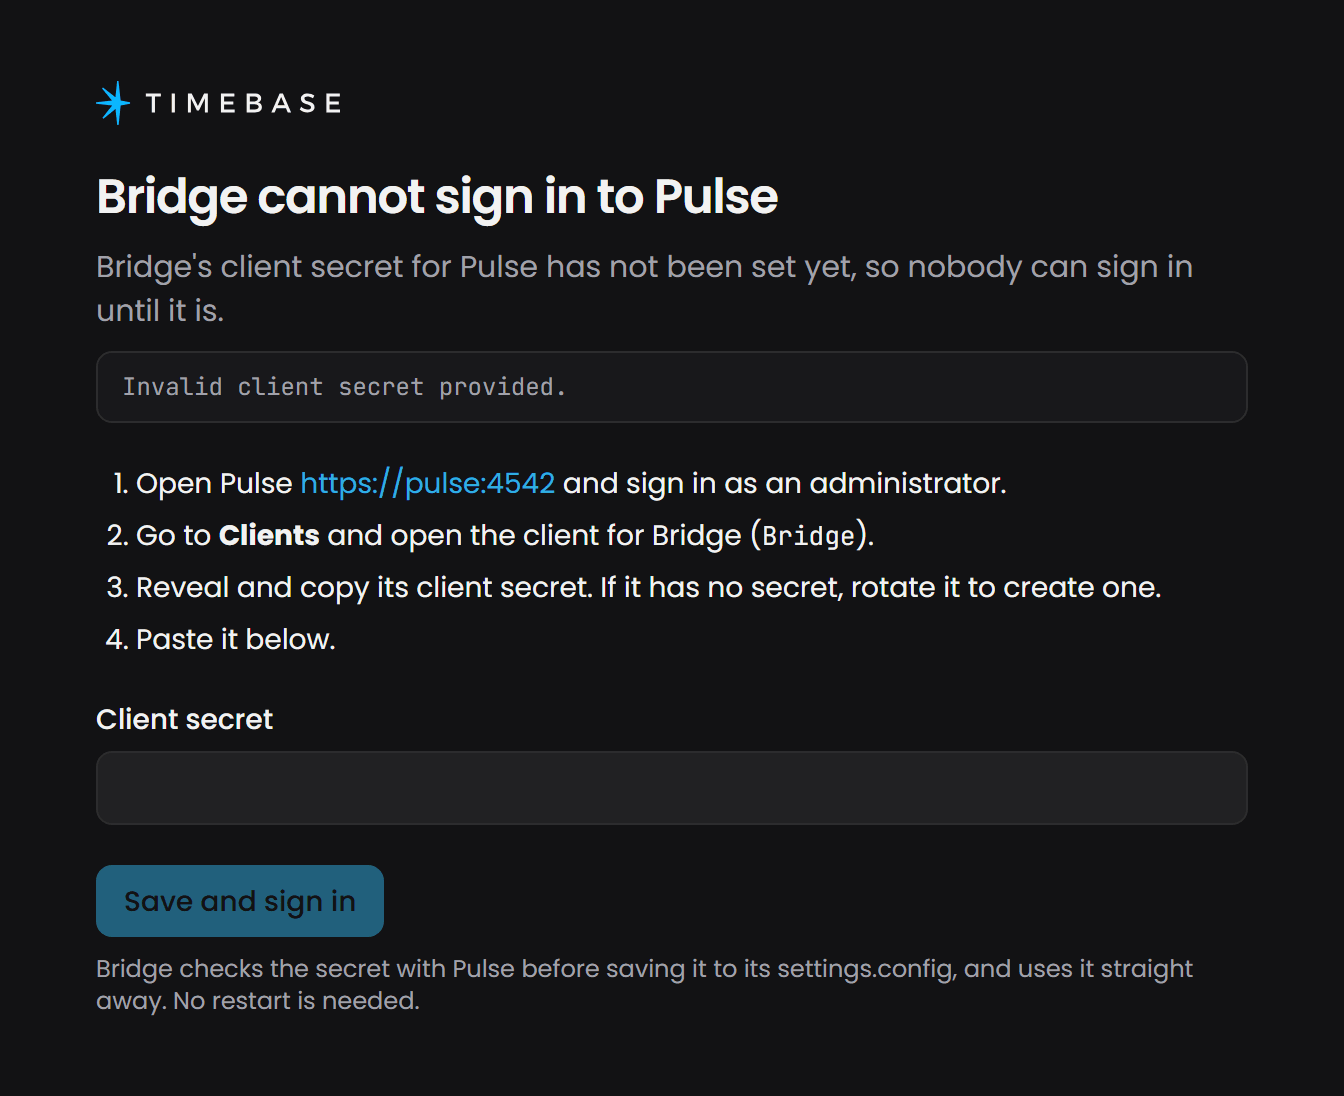
You can confirm where each component stands without signing in:
curl -sk https://localhost:4552/app/setup/pulse
"state":"rejected" means the secret is still missing; "state":"ok" means it is applied. Once all six report ok, each one also requests its Pulse-signed certificate, and the certificate warnings from Step 8 disappear.
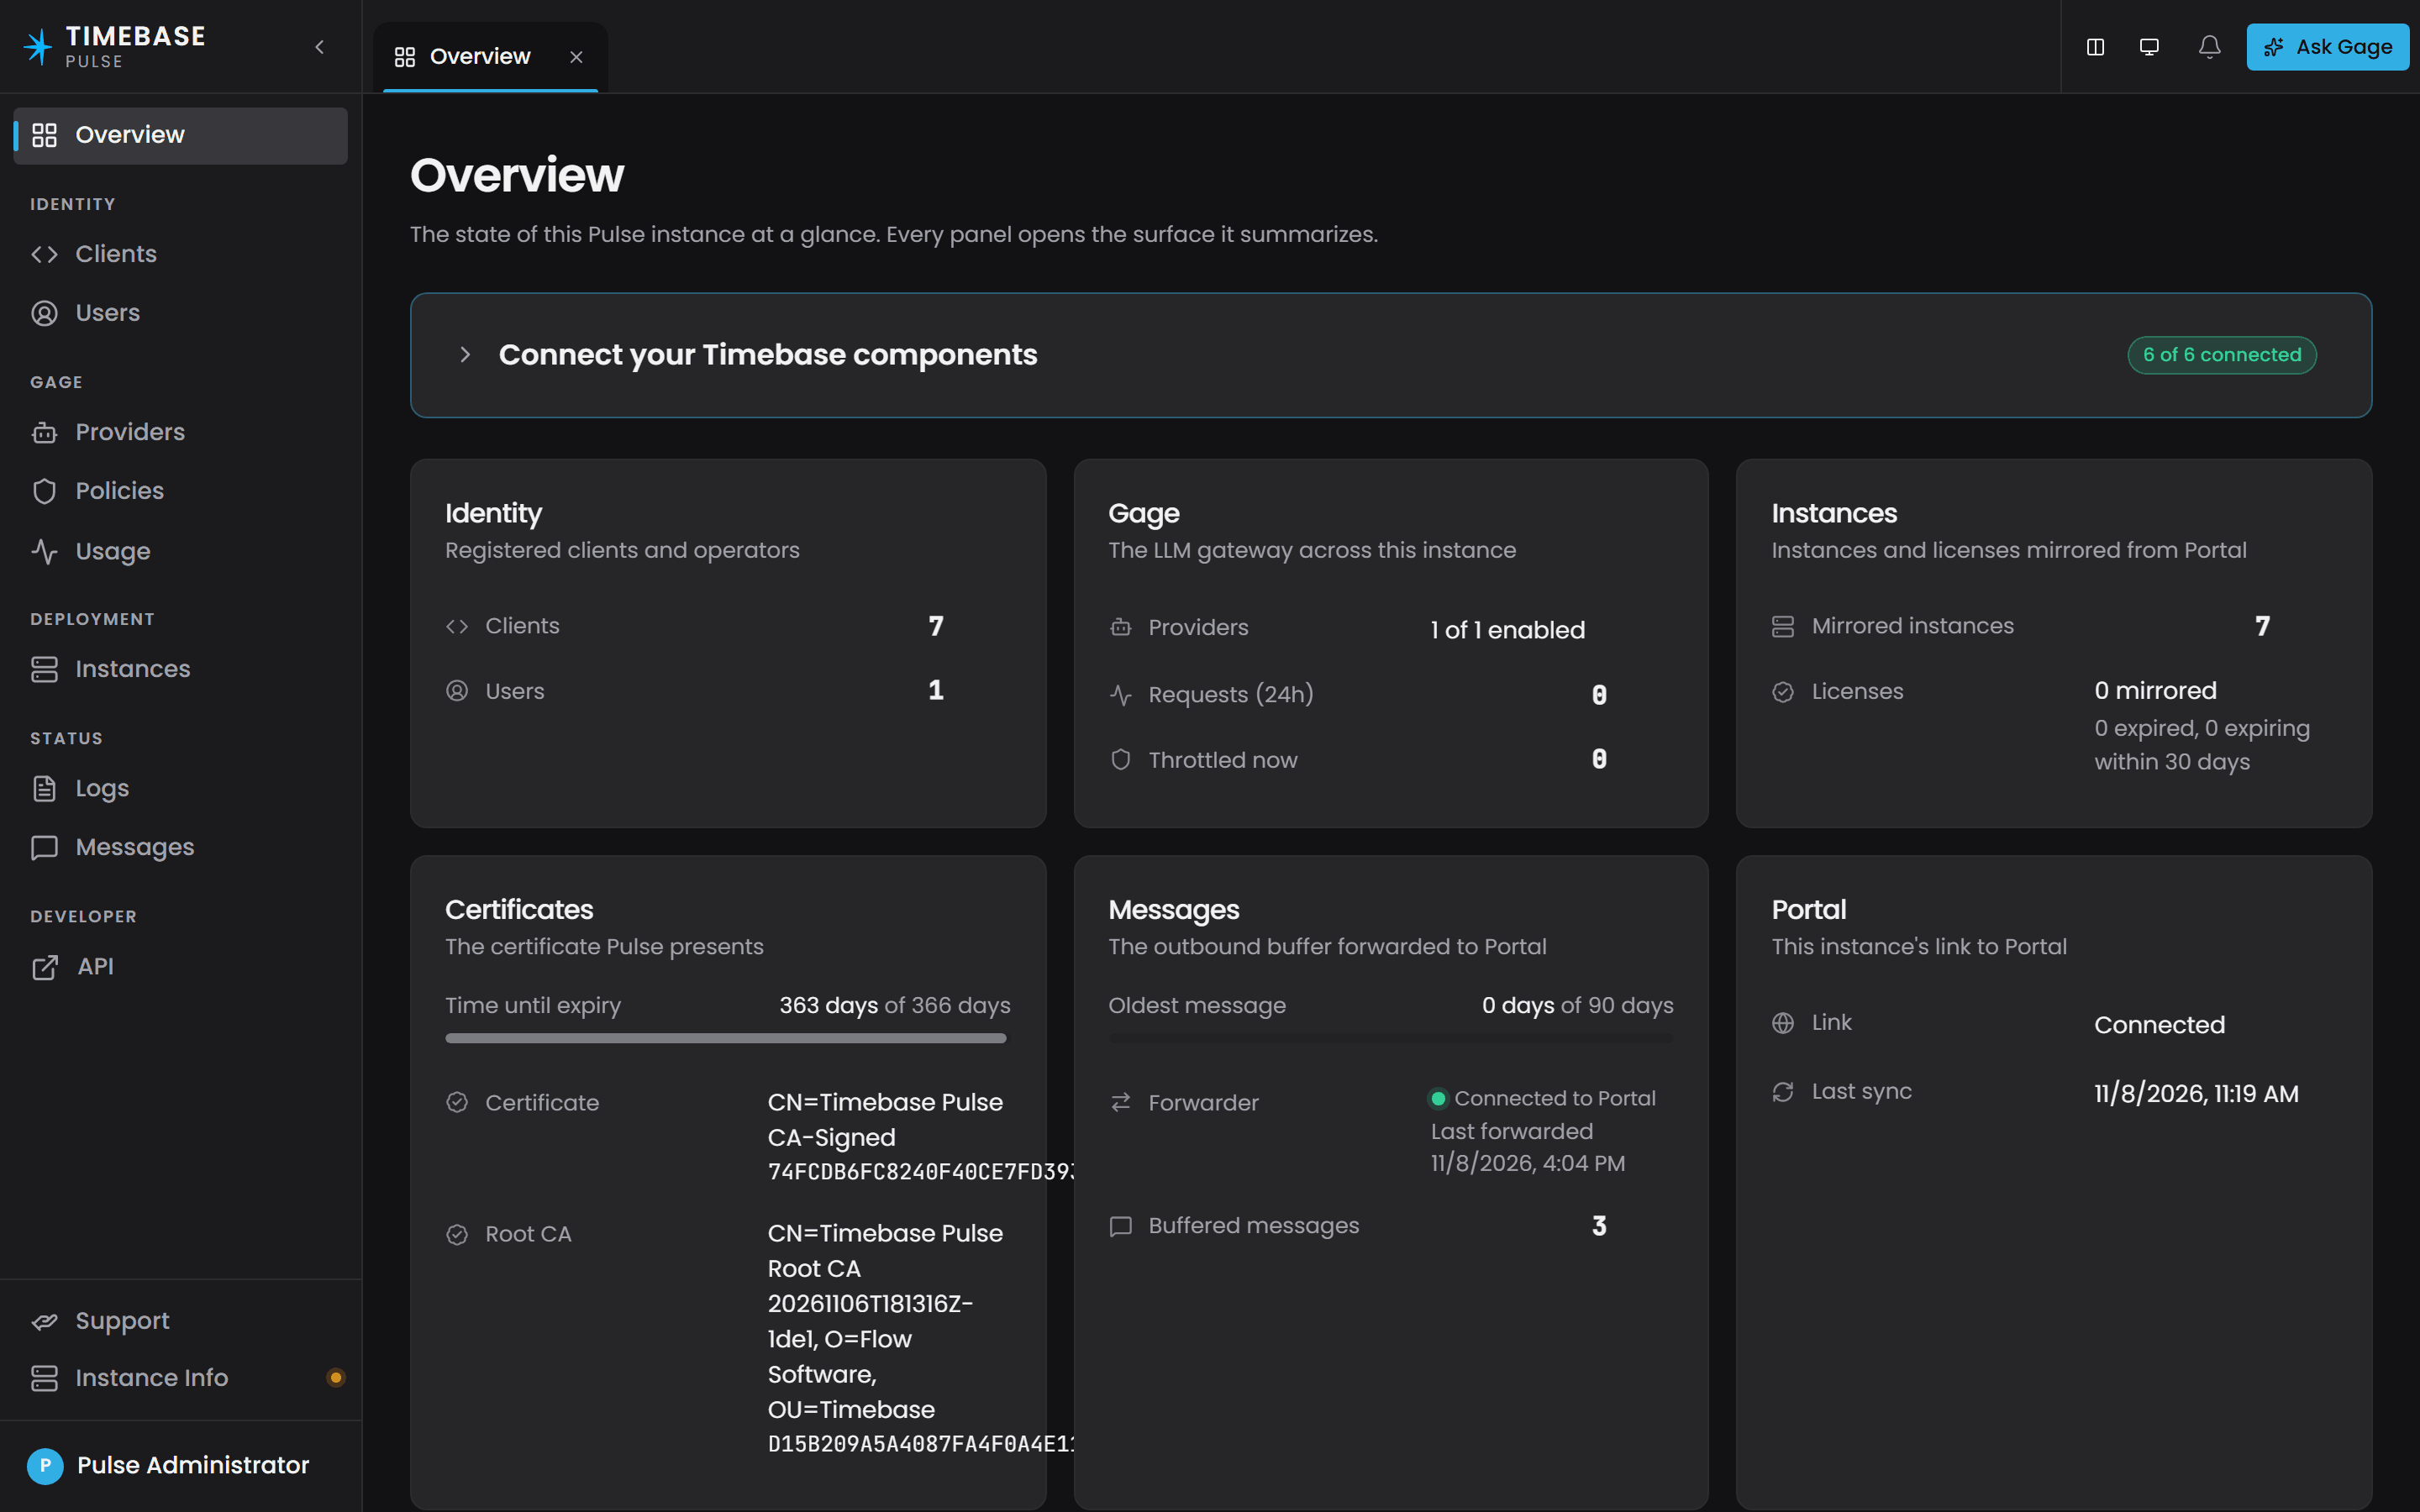
Pulse's Overview page says the same thing in one line: the Connect your Timebase components card reads 6 of 6 connected.
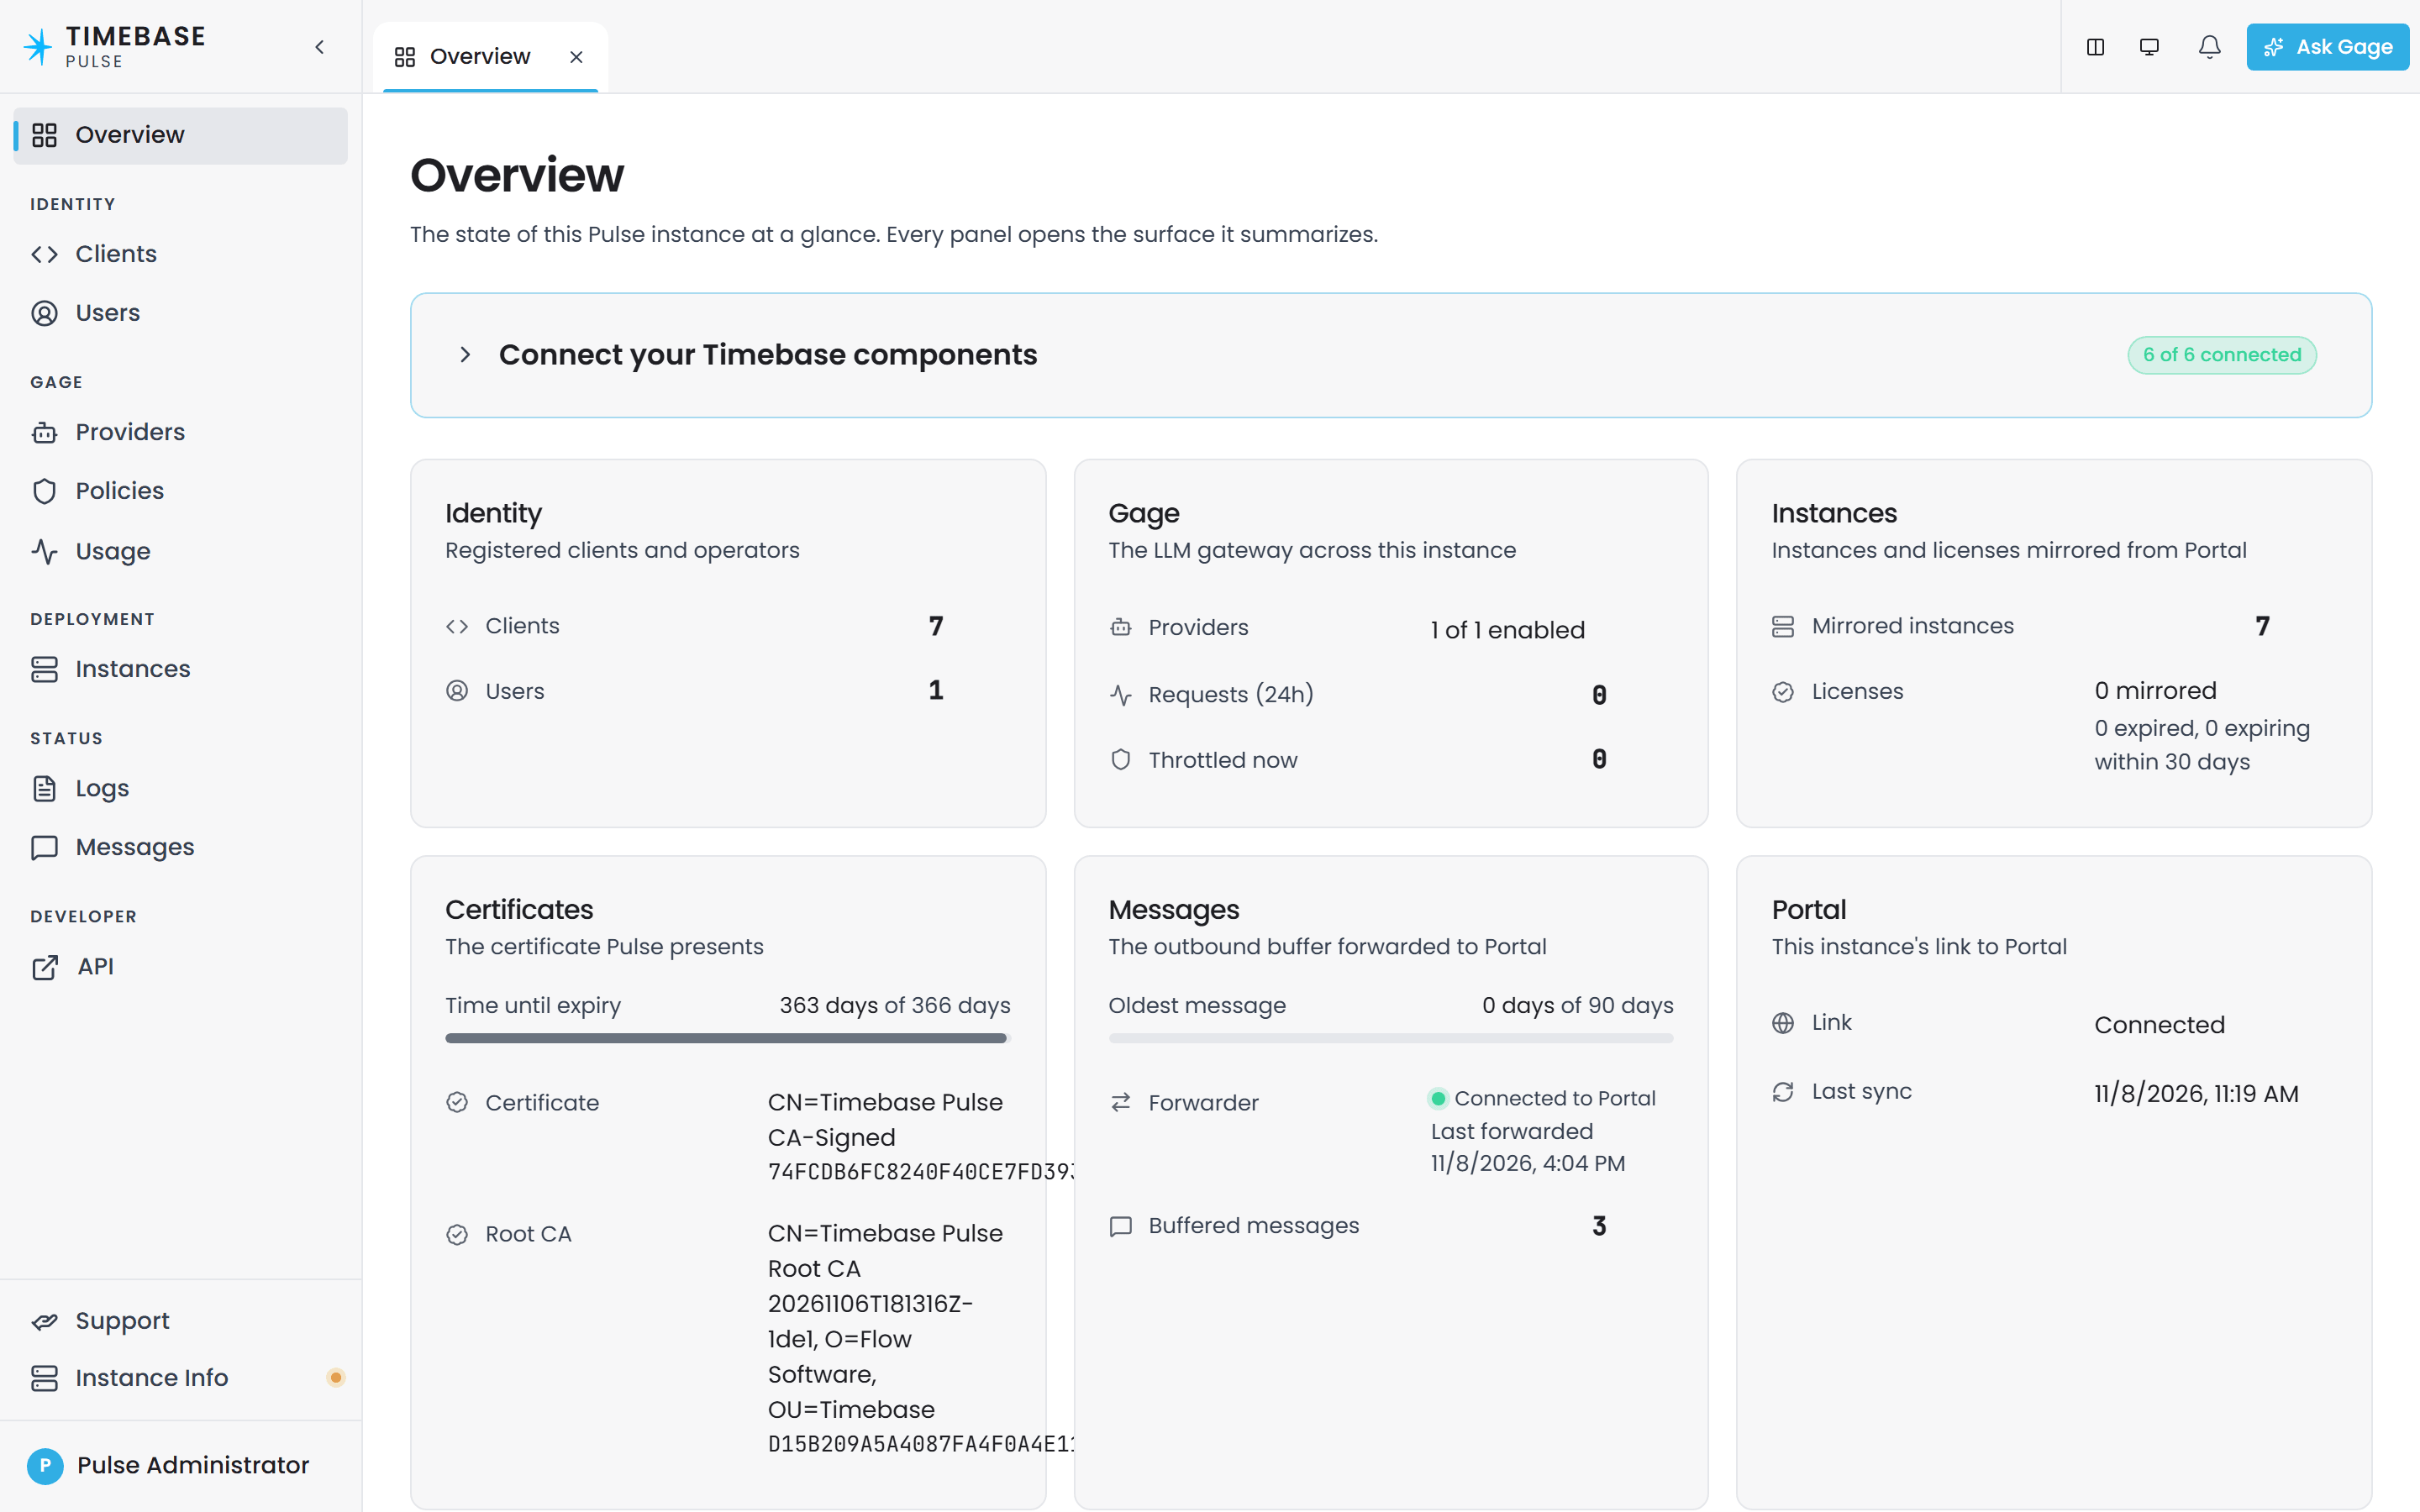
until a component holds its secret it logs failed sign-ins to Pulse, and in the first seconds after a start it can log The SSL connection could not be established while it fetches Pulse's certificate authority. Atlas and Bridge each log one Gage model discovery ... no bearer token warning that they recover from within a second. None of it persists once the secret is in, so judge a component by the checks above rather than by those lines.
a running platform is an empty one. Every example collector and connector ships switched off, so nothing is stored until you turn one on. Their names all begin example-; switching on example-simulator in the Collector gives you data to look at within a minute.
Or write the secret into the file#
The form is the easy route. If you would rather script it, each component keeps its settings inside its own Docker volume, at /<component>/settings/settings.config, and the client secret goes in that file. It is the only settings file in the volume: the Docker-specific values - where Pulse answers, as Pulse:Host, Pulse:Port and Pulse:UseTls - were composed into it the first time the container started, from an overlay embedded in the image, and that overlay is never read again. An environment variable in the Compose file for the same key outranks the file.
Copy the main settings file out of the container, using the Historian as the example:
docker compose cp historian:/historian/settings/settings.config ./historian-settings.json
Set Pulse:Auth:ClientSecret to the secret you copied from Pulse, and check that ClientId matches the client id for this component:
{
  "Pulse": {
    "Auth": {
      "Enabled": true,
      "ClientId": "Historian",
      "ClientSecret": "<the secret you copied from Pulse>"
    }
  }
}
Then copy it back and restart the component so it picks the new secret up:
docker compose cp ./historian-settings.json historian:/historian/settings/settings.config && docker compose restart historian
Repeat for every component you intend to use. The Auth block is read at startup, so each one needs that restart.
if your Pulse runs somewhere other than the pulse service in this Compose file, change Pulse:Host in the overlay, not in the main file. Editing Pulse:Host in settings.config has no effect in a container, because the overlay is loaded afterwards and wins. And never set it to localhost - inside a container that is the container itself, so the component looks for an identity provider in its own process and never finds one. See Docker Network Settings.
to keep the secret out of a plaintext file, reference an environment variable instead of the literal value. On Linux and macOS the placeholder is ${MySecretEnvVar}; on Windows it is %MySecretEnvVar%.
The data connections authenticate as their host#
The secret you just supplied is also what the component's data connections use. The Collector's Historian link (/collector/config/historians.config) and Explorer's Historian and Atlas sources (/explorer/config/sources.config) each carry an Auth block. A connection with no client of its own authenticates as the host: the Collector pushes as Collector, Explorer reads as Explorer, each with the Pulse address from its own Pulse section. Both seeded clients already carry the Historian audience (Explorer's carries Atlas too), so there is nothing further to switch on once the component itself has its secret.
Check that it does. If a connection ships naming its client, Collector or Explorer, with authentication switched off, it counts as having its own credentials, and they are switched off, so it presents nothing. The Historian then logs 401 Unauthorized with Authorization header ABSENT about every twenty seconds, and Explorer's source reports that it cannot connect. Check rather than assume: two minutes after the start, read a clean window of the Historian's log.
docker compose logs historian --since 1m | grep -c "Authorization header ABSENT"
0 means there is nothing to do. Anything higher means each connection needs its own credentials, which you enter in the component's own interface. Both apply on save and need no restart. You need that component's secret again: in Pulse, open Clients, choose the client, reveal the secret and copy it. Make the same six settings in each place:
| Setting | Value |
|---|---|
| Auth Enabled in the Collector, Enabled in Explorer | on |
| Client ID | Collector, or Explorer |
| Client Secret | that component's secret |
| Identity Provider > Host | pulse |
| Identity Provider > Port | 4542 |
| Identity Provider > Use TLS | on |
- Collector: in the sidebar open Historians, choose Edit on the Historian row (it shows when the pointer is over the row), open its Authentication tab, make the settings and save.
- Explorer: in the sidebar open Config > Sources, choose Edit on the Historian source, open its Authentication tab and then the Authentication row, switch Enabled on (the other settings appear once it is on), make the settings and save. Do the same for any other source you use.
Both screens need an administrator. If Edit is greyed out, or a save is refused, the account you are signed in with is not one.
You only need to touch a data connection's Auth block otherwise when that connection should present a different client from its host, for example a Historian that trusts another Pulse. A connection that names a client always uses it, switched on or off, and never falls back to the host.
if you edit the files instead, the two spell the same settings differently - auth/enabled/clientId in the Collector's, Auth/Enabled/ClientId in Explorer's. Copy the casing from the file you are editing rather than from this page.
Verify against a clean time window, not a line count. Wait a minute after you save, then:
docker compose logs historian --since 1m | grep -c "Authorization header ABSENT" || echo "0 - no unauthenticated pushes"
when you are checking whether something is now fixed, use --since <duration> rather than --tail <n>. A tail can quietly include lines from before your change and make a working fix look broken.
If a component still returns 401#
Two different faults produce a 401, and the Historian's log tells you which one you have. Check that first, because the fixes are unrelated:
| What the log says | What it means | Fix |
|---|---|---|
Authorization header ABSENT |
No token was ever sent. The component has no secret yet (its setup form has not been filled in), or the data connection names a client of its own that is switched off | Finish the step above for that component; or, for a connection with its own client, switch it on and give it its credentials in the component's interface |
| A token was presented and rejected | A token was sent and refused. This is an audience problem | The rest of this section |
A component that authenticates to Pulse successfully but is then rejected by another component, with a token present, is almost always an audience problem rather than a credentials problem.
A token carries an aud claim listing which components it is valid for, and the receiving component checks that its own id appears in that list. The rule is: to let X call Y, add Y to X's audiences. A client's own id is always included automatically, so you never need to list it.
The common case is Explorer or a Collector reaching the Historian - both need Historian in their audiences. Edit the client in Pulse, then restart the component so it requests a fresh token.
If sign-in redirects you to a page that will not load#
You open a component, it sends you to Pulse to sign in, and the browser hangs or reports that it cannot find the server.
Look at the hostname in the address bar. A component sends you to the address Pulse publishes for browsers, its Auth:PublicAddress, so this is a name-resolution problem on your own machine rather than a Timebase one.
If the address says pulse, Pulse has no public address: Auth__PublicAddress is missing from its environment in the Compose file. Add it as Step 3 shows, and recreate Pulse.
If the address says localhost, that is the public address this Compose file sets. Confirm the port is 4542 and that the pulse container is running.
If the address says a name, it is the address you chose in Step 1, and your workstation cannot resolve it. Either give it a DNS record - the right answer when other people will reach this deployment - or, for a single machine, map it to the Docker host in that machine's hosts file. Use the Docker host's own IP address in the entry, or 127.0.0.1 when you are on the Docker host itself:
echo "<ip of the Docker host> <your-hostname>" | sudo tee -a /etc/hosts
On Windows, in an Administrator PowerShell session:
Add-Content -Path $env:SystemRoot\System32\drivers\etc\hosts -Value "`n<ip of the Docker host> <your-hostname>"
Confirm it resolves, then retry the component. On Linux and macOS:
ping -c 1 <your-hostname>
On Windows, in PowerShell:
[System.Net.Dns]::GetHostAddresses('<your-hostname>') | Select-Object -ExpandProperty IPAddressToString
a hosts entry fixes the one workstation you run it on. If colleagues will reach this deployment from their own machines, give the hostname a DNS record they can all resolve rather than asking everyone to edit their hosts file.
If instead you reach Pulse and sign in, and then land on a page reading Client '...' does not support the specified redirect Uri, the name resolves fine: that component's client is missing the address you opened it at. Add it under Redirect URIs, as in If other computers will use it above.
Congratulations - the hard part is behind you#
Take a moment, because this was the lion's share of the work.
You have stood up an entire industrial data platform and, far more than that, you have secured it. Pulse is issuing identity for every component, running a certificate authority that keeps them trusting each other over TLS, and brokering every AI request the platform makes. Your administrator account is no longer the one every installation ships with. Your components hold real credentials and exchange them for real tokens. Your browser trusts your own certificate authority.
That is the part most people find hardest, and it is the part that everything else quietly depends on. From here, nothing you build has to be retrofitted for security later - it is already there, underneath all of it.
Your Timebase platform is running, secured, and ready to use. Well done.
Two things are worth doing next, in whichever order suits you, and neither is needed for the platform to run: giving the people who will use it their own accounts, and finishing the AI assistant - turning it on if you left it for later, and setting its usage limits. The next two sections cover them.
Next: Create your user accounts#
Until you do, only the Administrator account can sign in. With Pulse reachable and components authenticating, add the people who will use the platform. User accounts are managed from the Users tab in Pulse, and they grant access to the other Timebase components as well as to Pulse itself.
To add a user, choose Add User and supply:
- Id - a unique identifier, such as the person's email address.
- First name.
- Last name.
- Password.
There are two base user definitions, Admin and Standard. Select Is Administrator to grant administrative privileges.
Administrator rights in Pulse gate the things that change the platform's security posture: managing users and OAuth clients, configuring Gage providers and policies, downloading the server certificate's private key, and regenerating certificates.
a client_credentials token never carries the administrator role, even when the client was created by an administrator. An automated process cannot acquire admin privilege by holding a client secret.
Next: Turn on Gage, the AI assistant#
Gage reaches its language model through Pulse - no component holds a model API key of its own - so this is configured once here rather than in every component. If you chose a provider in Step 1, its key went in during Step 9, and what is left here is to confirm the catalogue and set the usage limits. If you left the assistant for later, this is where you turn it on.
A fresh Pulse ships an Anthropic provider already defined and enabled, waiting only for your key:
| Field | Seeded value |
|---|---|
| Provider Id | anthropic |
| Wire | Anthropic |
| Endpoint | https://api.anthropic.com |
| Logical Id | claude |
| Real Model Id | claude-sonnet-4-6 |
| Enabled | Yes, but no key set |
Its model handle is therefore anthropic/claude, which is what every component's shipped configuration already expects.
Add your key#
If you chose a provider in Step 1, you did this in Step 9, and can go on to Confirm the catalogue below. Otherwise, in Pulse, open Gage, then Providers:
- Select the anthropic provider.
- Under API key, choose Set new key, paste your Anthropic API key, and choose Set key.
For a provider other than Anthropic, follow While you are in Pulse: the AI provider in Step 9, which works at any time.
the assistant cannot answer until the key is set. The provider is enabled from the start, so its model is already in the catalogue and each component's setup card counts a model as configured, but every question fails against your provider until you add the key.
Confirm the catalogue#
The catalogue lists every enabled model of every enabled provider with its handle, and it is the list each component reads. It is served only to authenticated callers - a component's own token, not a browser session - so a bare request to /api/gage/models returns 401. There are two ways to see it. In Pulse, Gage then Providers lists each provider's models. And each component logs what it received, once Pulse has pushed it, which is after that component's client secret is saved and not when it starts:
docker compose logs atlas | grep "Gage model catalog pinned" | tail -1
It can take up to about two minutes after the component's secret is saved, because the component retries on a growing back-off. If nothing is printed, wait and run it again.
The line ends N model(s), default '<handle>': with the seeded provider alone it reads 1 model(s), default 'anthropic/claude'. The seeded model is listed from the first run, before any key is set, so this confirms the catalogue and the default model rather than the key. The first question the assistant answers confirms the key.
the provider is seeded only on a genuine first run. If you delete it, restarting Pulse does not bring it back.
Set the token usage limits#
Gage meters usage through policies, and there are two kinds. Knowing which one applies to which caller is the thing most often gotten wrong:
| Policy kind | Keyed by | Applies to |
|---|---|---|
| Client policy | An OAuth client id, such as Historian |
A component calling on its own behalf, with a client_credentials token - no person involved |
| User policy | A Pulse user's identifier | A signed-in person using an assistant in a component's interface |
Each kind has a reserved [default] record that applies to every caller in its scope when no policy of its own exists. The [default] record cannot be deleted, which makes it the right place to set the limits everyone starts with.
To set the limits that apply to every signed-in person:
-
In Pulse, open Policy and select User.
-
Edit the [default] policy.
-
Open the Rate & budget limits tab.
-
Set the token limit for Current session and for the weekly limit. Both apply - a caller has to stay under each one:
- Current session caps a single working session, which stops one runaway conversation consuming the week's budget.
- Weekly caps the rolling total.
Enter
-1in either field for unlimited. Any negative value switches that limit off, which is how you grant unmetered access without deleting the policy. -
Choose an Enforcement setting, which decides what happens when a limit is reached.
Repeat the same steps under Client to set the limits that apply to components calling on their own behalf.
The three Enforcement settings#
Each setting allows a little headroom before it acts, so a limit does not bite at exactly the number you typed:
| Setting | What happens when the limit is reached | Headroom first |
|---|---|---|
| Soft | Nothing is refused. The overage is recorded and the call goes through. Use it to measure real consumption before you commit to a number. | 25% |
| Throttle | The call is refused with HTTP 429 and a Retry-After header, telling the caller to back off and try later. The assistant reports a rate limit rather than failing outright. |
10% |
| Block | The call is rejected. No retry is offered. | 5% |
Start with Soft. On a new deployment you do not yet know what normal usage looks like, and Soft records it without anybody being cut off mid-question. Move to Throttle or Block once you have numbers worth enforcing.
on a fresh installation every model in the catalogue is usable by everyone, but token limits are imposed by default and should be adjusted immediately.
an empty model allow-list allows every model - it is not a deny-all. So when a caller is unexpectedly blocked from a model, the fix is often to clear the list rather than add to it. Note also that a list on a specific id replaces the [default] list rather than adding to it.
Where to go deeper#
The seeded provider and the [default] policies are enough to get the assistant answering. These three articles cover everything past that:
- Quick Start: Turn On the AI Assistant - the component side of Gage in more depth. Go here to pin the assistant to a specific model, which matters once more than one is enabled: with nothing pinned, Pulse uses the alphabetically first handle in the catalogue, so enabling a second provider can move it. It also names every error message the assistant can show you, and what each one means.
- Configuring Gage LLM providers and models - the full Pulse-side reference. Go here to add a second provider, use OpenAI or a local Ollama server, reach a backend on a non-standard path, set up fallback between providers, rotate an API key, or read the usage log.
- Atlas AI Agents - the agents themselves. Go here to see the six that ship with Atlas, and to write your own with its own instructions and tools.
Before anyone else relies on it#
Three steps are worth taking before colleagues start using this deployment. None of them is needed to try Timebase on your own machine.
- Use certificates from your own CA - the recommended practice beyond a trial. Pulse's certificate authority keeps everything working, but every machine that opens an interface has to trust its root, as yours does since Step 8. Certificates from your organization's own CA are trusted already, and their renewal stays with whoever runs that CA. Bring your own certificate walks through it, with a Compose override for this stack.
- Let other computers use it. If you chose this computer only in Step 1,
localhostreaches the stack only from the Docker host. For anyone else, Pulse needs a name or address their machines can reach: setTIMEBASE_HOSTin.envto it, rundocker compose up -d, and register the new sign-in addresses as Step 9 describes. See also Where a browser reaches Pulse. If you chose other computers in Step 1, each of them also needs to install Pulse's root CA, as Step 8 describes. - Back up the volumes. Every setting, credential and dataset lives in this stack's named volumes. Disaster Recovery covers what to keep.
Choose where to go next#
Two directions open up from here, and neither is wrong. Pick the one that matches what you came to Timebase to do - and come back for the other whenever you are ready.
Get data flowing: Collector and Historian#
Choose this if your first question is "can Timebase store and trend my process data?" You will point a Collector at a data source, log it into the Historian, and see it on a trend.
- Introduction to the Collector and Logging Sessions - what a logging session is and how data reaches the Historian. Start here.
- General Configuration of the Data Collector - the Collector still has
Active=false. This is where you switch it on and point it at MQTT, SparkplugB, OPC UA or Telegraf. - Creating Data Simulations - no data source to hand yet? Generate realistic process data and carry on without waiting for one.
- Managing and Deleting Tags - once data is arriving, how to see and manage what the Historian is holding.
- Explorer Trending and Visualizations - put your data on a chart and confirm the whole path works end to end.
Give data meaning: Atlas and Bridge#
Choose this if your first question is "can Timebase make sense of data I already have?" You will model your plant as a knowledge graph, bind its properties to live sources, and publish the result to the systems that consume it.
- Getting Started with DataOps and Knowledge Modeling (Docker) - the direct sequel to this article. Connect, Atlas and Bridge working together, from a data source to a compiled model to a downstream target.
- Introduction to Domain Modeling - how to describe your plant as types, instances and properties rather than as tag names.
- Connecting Data Sources - use Connect to bind model properties to live values in your existing historians, databases and OPC UA servers.
- Exporting Data with Bridge - publish your model outward to SQL Server, Snowflake, Kafka or MQTT.
you do not have to choose permanently. Both paths run on the platform you just secured, and plenty of deployments end up doing both - historizing their own process data while modeling what is already stored elsewhere.
Prefer to work from an AI coding assistant? Atlas publishes an MCP server, and a coding assistant such as Claude Code can connect to it. With a component token the assistant can read your model; once you sign in through it with your Administrator account, it can also build and compile models for you, with every change attributed to you. Atlas MCP Server covers the client to register in Pulse and the assistant's configuration.